
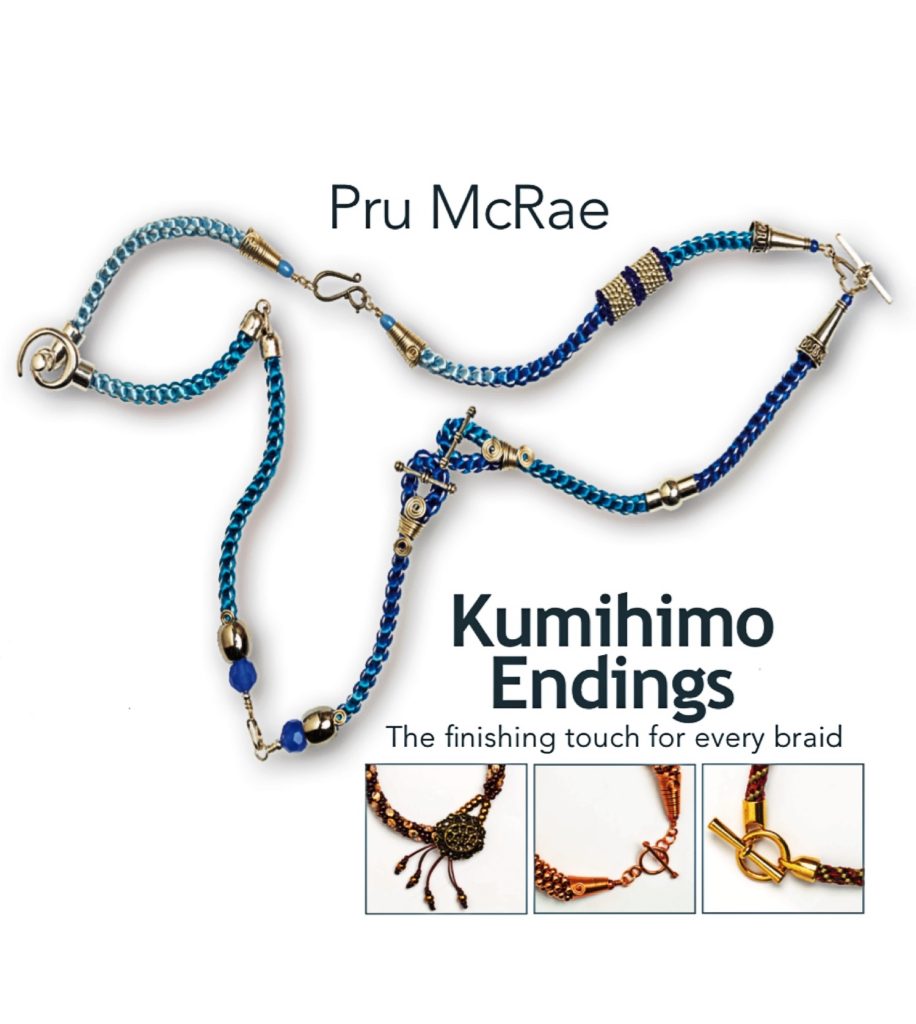
Kumihimo Endings – the finishing touch for every braid
The most important part of turning a kumihimo braid into a piece of jewellery is the ending, but this is also the least favourite part of the process for most people. Over the years I have tried many, many different types of ending, so I decided to write a book to share my methods with others. My aim was not only to help new braiders to finish their work successfully, but I also wanted to encourage more experienced braiders to try new ideas to bring originality and creativity to their work. I have put together a collection of secure and attractive endings and fastenings, which will enhance any braid. The endings are divided into six categories, Glued Endings, Wired Endings, Button Fastenings, Crimp Endings, Loop Fastenings and Tassels and within each category there is a variety of methods and effects, so that you can find what suits you.
The Kumihimo Endings book is the same compact size and concise contents as my first book, The Prumihimo Disk – A fresh approach to kumihimo. It is designed to be barely bigger than a kumihimo disk so that it can fit into a craft bag or handbag and be always there when you need it. In order to keep it concise I needed to find a way to avoid repetition. Certain key techniques are used throughout the book and while they may be familiar to some braiders, they are new to others. These techniques are grouped together in one chapter, which has blue edged pages. In the following chapters when these techniques are mentioned they are highlighted in blue, so that the reader knows where to find full instructions. It is a bit like reading something on Wikipedia!
The book is all about endings, but the endings need to be attached to a braid to make sense, so you will see lots of lovely illustrations of different designs in the book. I do not give instructions for making the braids, but I am giving advice here, page by page, on where to find tutorials or videos for the more complex designs and quick instructions or guidance for the simpler ones. The aim of these pages is to act as a companion to the book.
Designs from the book and how to make them
This information is about the braids, not the endings, because they are covered very thoroughly in the book. When using these instructions please remember that every braid is different, depending on the materials used, the condition of the disk and your own personal tension. For this reason, always keep checking the length as you braid and be ready to make adjustments if necessary. Unless otherwise stated, the usual cord allowance is 3 times the finished length for each cord. For example, a 20cm bracelet needs 60cm for each cord. As a rough guide, I use lengths of 60cm for bracelets and 120cm for necklaces and I would expect to have a bit of cord left over, but it is better to overestimate because cords cannot be added easily if they are too short.
The braiding equipment used was the round disk, the square plate and, of course, the Prumihimo disk (available on this website in both regular and extra-thick versions)
These instructions and guidelines are written for those with some experience of kumihimo. If you are new to kumihimo you can learn more from the videos on my YouTube channel. There you will find over 60 great videos, giving instructions on how to braid with the round disk, the Prumihimo disk and the square plate.
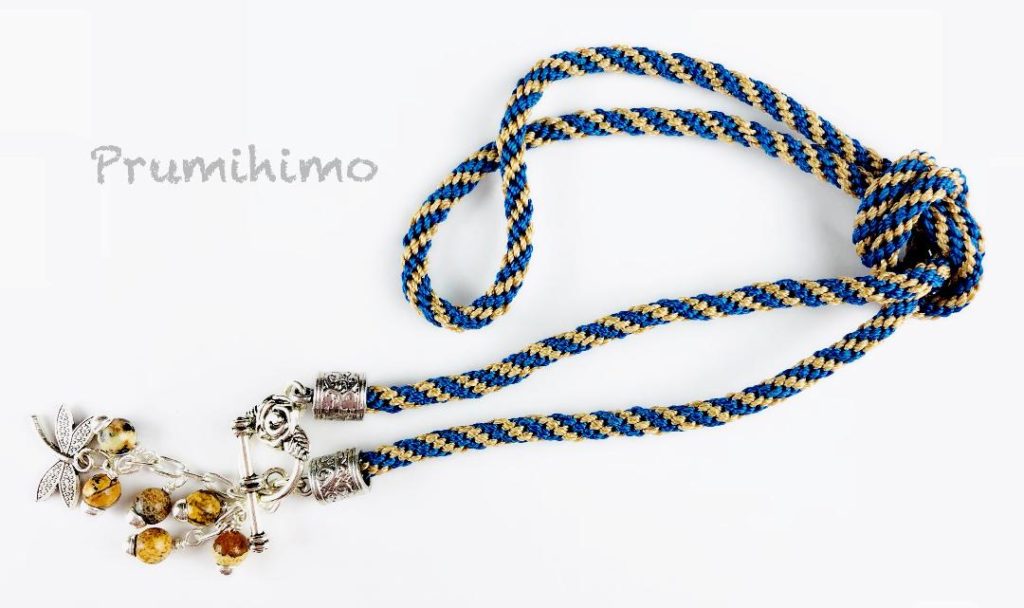
Cover image and other composite braids (p2, 5 and 19) – These were made for display, not for wearing!
- The blue one was made on the Prumihimo disk with varigated/ombre satin cord and S-Lon cord.
- The brown one was made on the round disk. It is a regular 8 cord round braid/kongo gumi with size 8 beads on all 8 cords. The beads are a random mix of tones of beige and gold.
- The green one was made on the Prumihimo Disk using Soutache cord. This video shows how to use this material on the Prumihimo Disk.

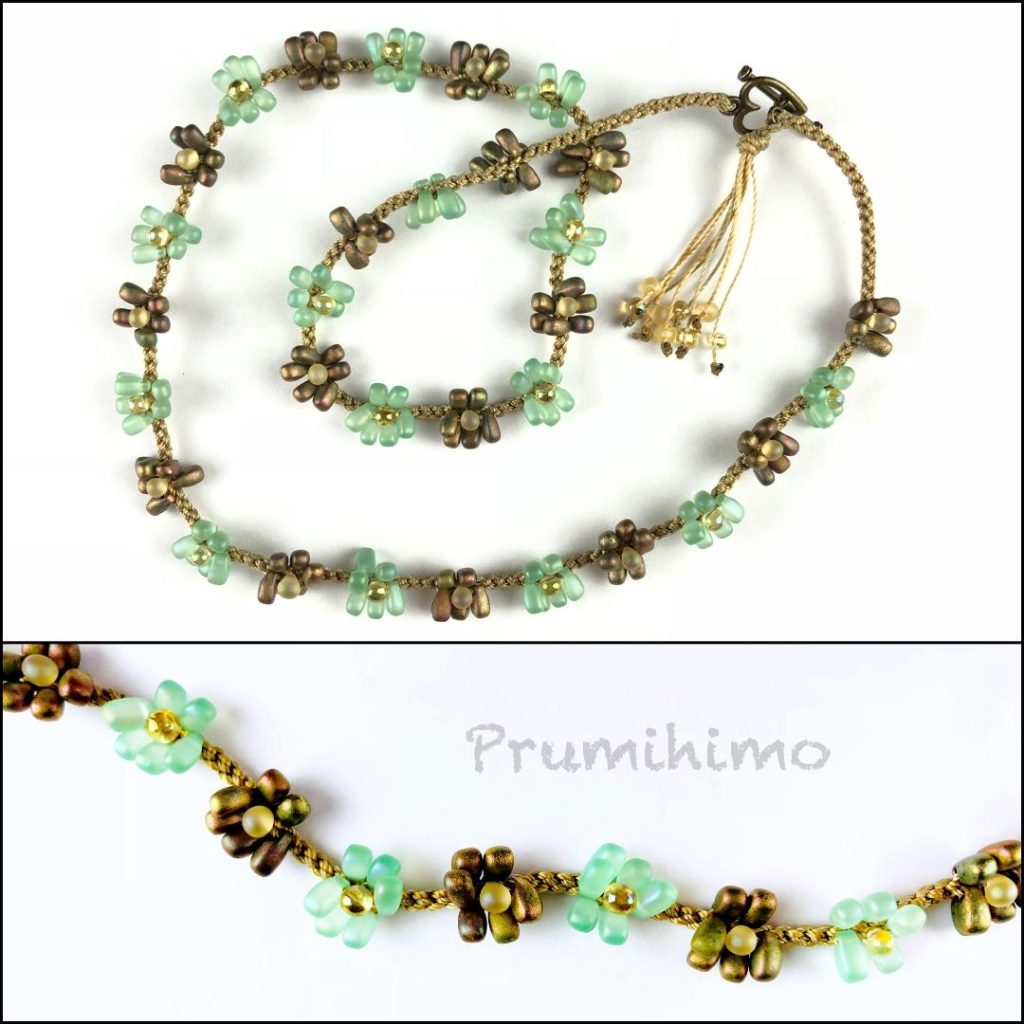
Inside Cover
This design was first published by the US magazine, Beadwork, in 2016. I have now rewritten, renamed and expanded the instructions and I send it as a PDF file when the Kumihimo Endings book is bought from this website, as a way of offsetting the shipping charges. It is currently not available for purchase in any other way. This charming bracelet was originally called Midas Berries because the original design in the magazine was made up in tones of gold, but it is now called Beaded Cluster Double Bracelet to reflect the variety of effects you can achieve by using different colours.
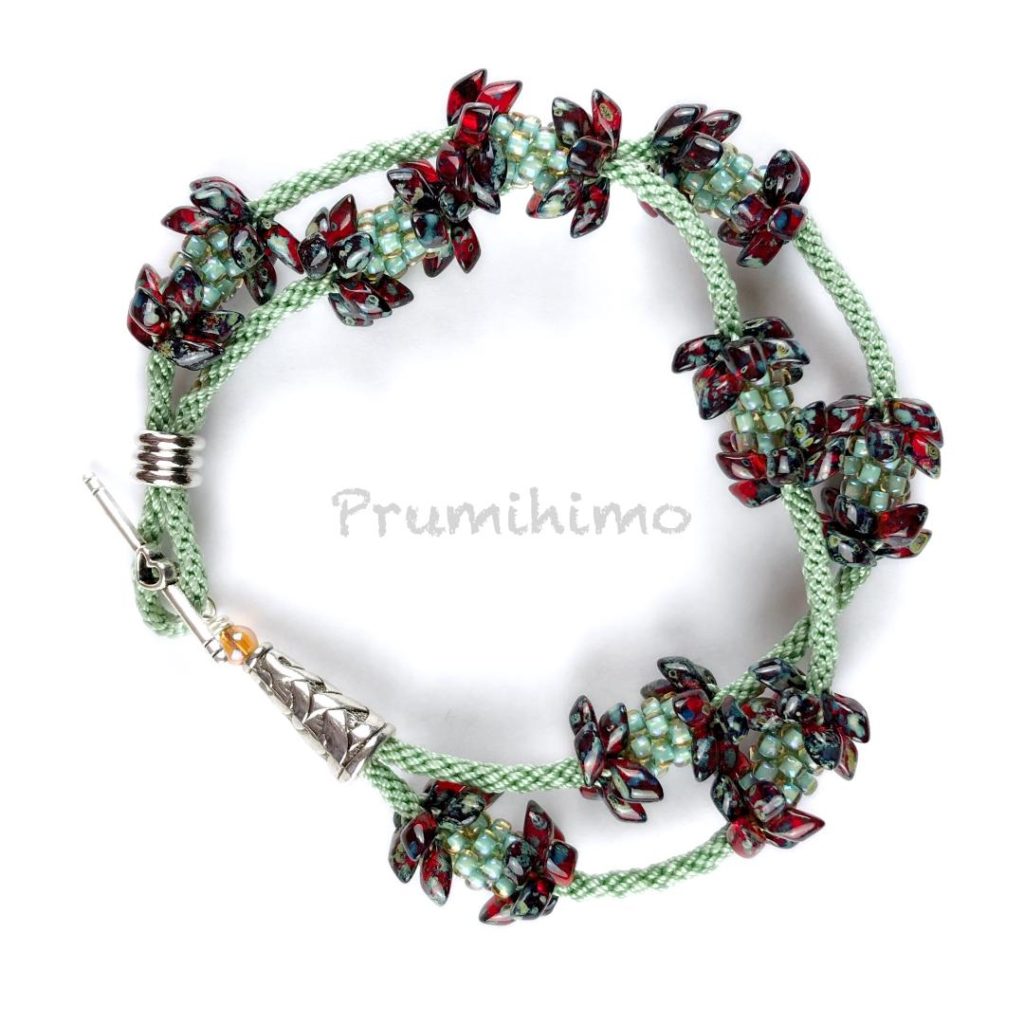
Page 4 (Also on pages 27-8)
This bracelet was made on the round disk. The braid structure is 8 cord Round Braid/Kongo Gumi and the bead set up is the same on all 8 cords – 3 size 8 beads-3 rizos-3 size 8 beads-3 rizos, repeated until there are 9 groups of rizos and then finish with 3 size 8 beads. Rizos have very small holes so I used thin S-Lon cord (0.4mm/Tex 135). Daggers, drops or other small top drilled beads could be used instead of Rizos.
Instructions on how to braid with beads can be found in this YouTube video.
Page 5
You will need a Prumihimo Disk to make this bracelet. The cords used were a silky chainette knitting yarn, with beading cord. Size 8 beads were used on the top and bottom cords at number 3. At number 4 size 8 beads were alternated with bow beads and they were added in every alternate sequence of moves.
Instructions on how to braid with beads on the Prumihimo disk can be found in this YouTube video.
Page 8 (Also on page 33)
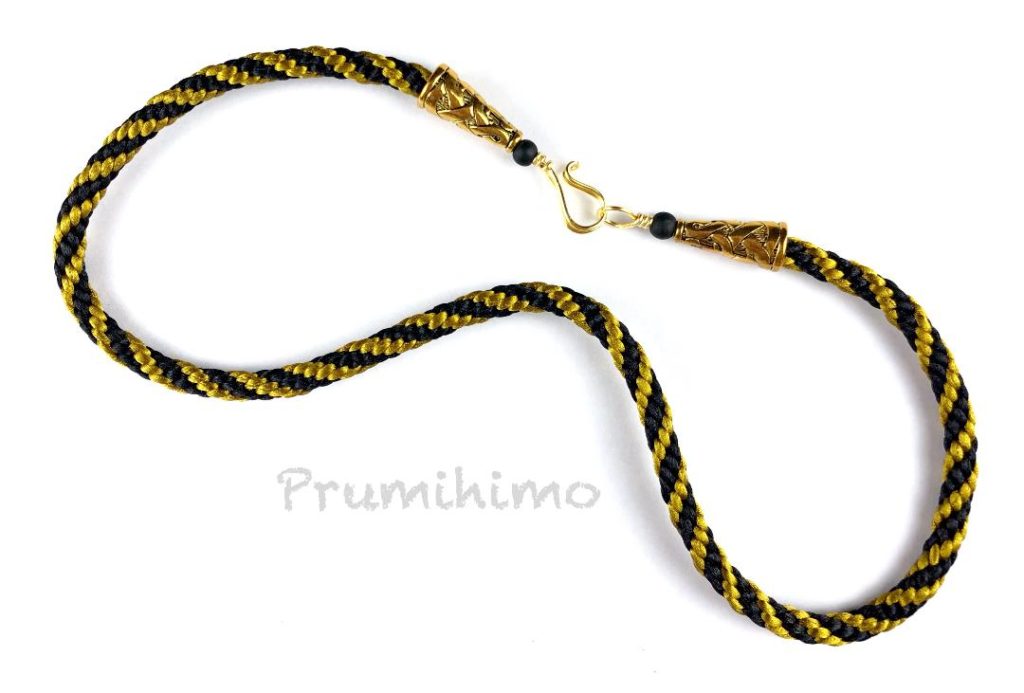
Simple yet effective! This necklace was made on the round disk, using 4 cords of gold satin cord (1mm) and 4 cords of black satin cord (1mm). One colour goes in the north and south slots and the other goes in the east and west slots. If you want to attach a pendant, make sure to do it before you attach the ends.
Instructions on how to braid on the round disk, as well as lots of useful hints and tricks can be found in this YouTube video.
Page 16
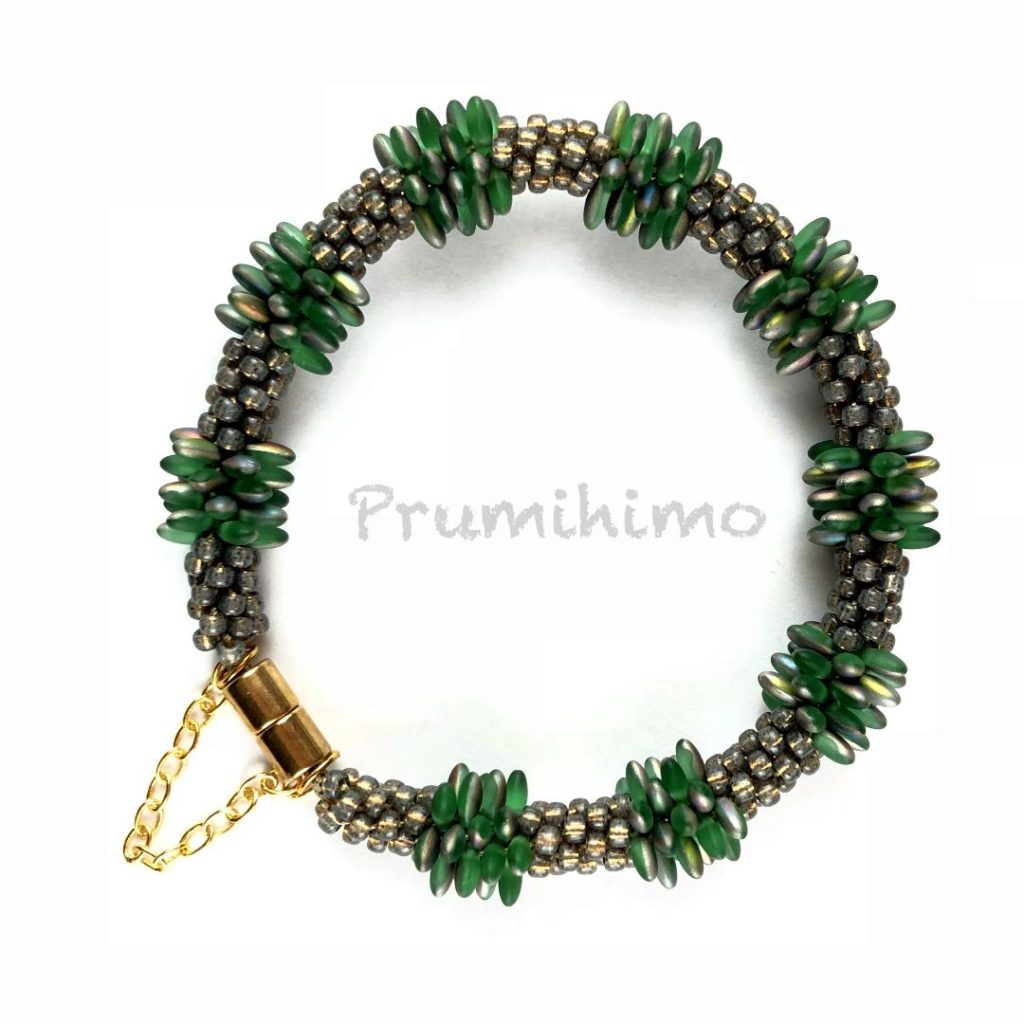
The extra-thick Prumihimo disk was used to make this delicate necklace because it was designed to maintain a tight grip on even the thinnest of cords. This is an advanced level tutorial, available from me on request. I do not like to supply this tutorial unless I know that the person has bought the extra-thick disk and that they have had some experience of working with the Prumihimo disk. For this design I have used Miyuki Long Drop beads, but other small, top-drilled beads would also be very effective. For more information about the extra-thick disk please check out this YouTube video.
Page 18 (Also on page 47)
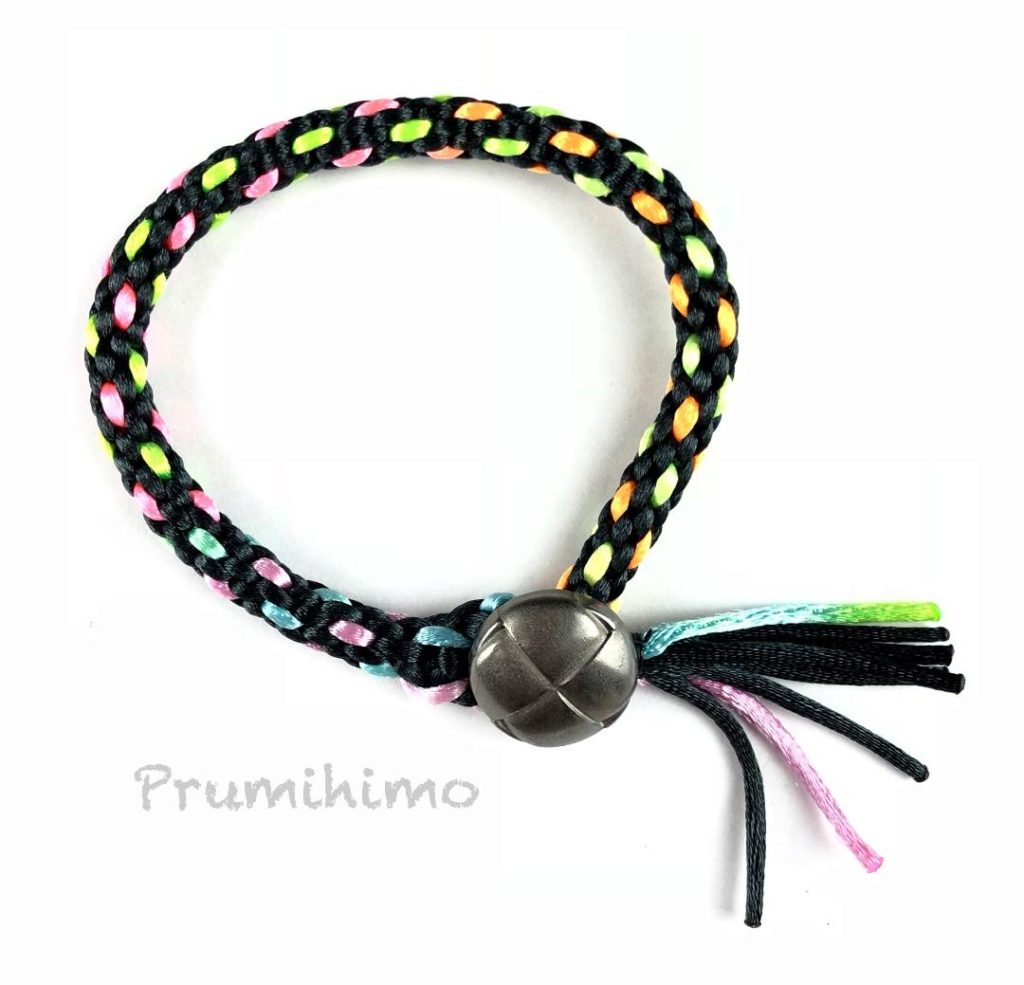 You can have a lot of fun with multi-coloured cord! This is a simple Round Braid/Komgo Gumi made on the round disk with 6 cords of black and 2 cords of the multi-coloured cord, in diagonally opposite slots. The cord I used was pastel colours and you can also find a very bright version of the cord. I show another way of using multi-coloured cord in this YouTube video.
Instructions on how to braid on the round disk, as well as lots of useful hints and tricks can be found in this YouTube video.
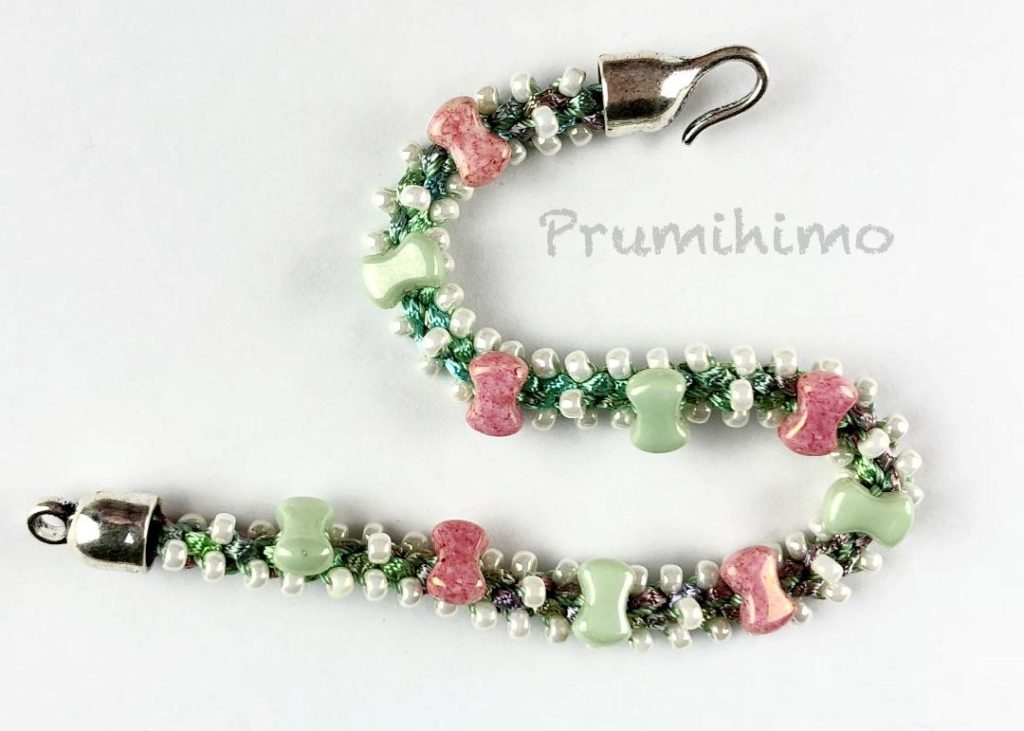
Page 20 (Also on page 29)
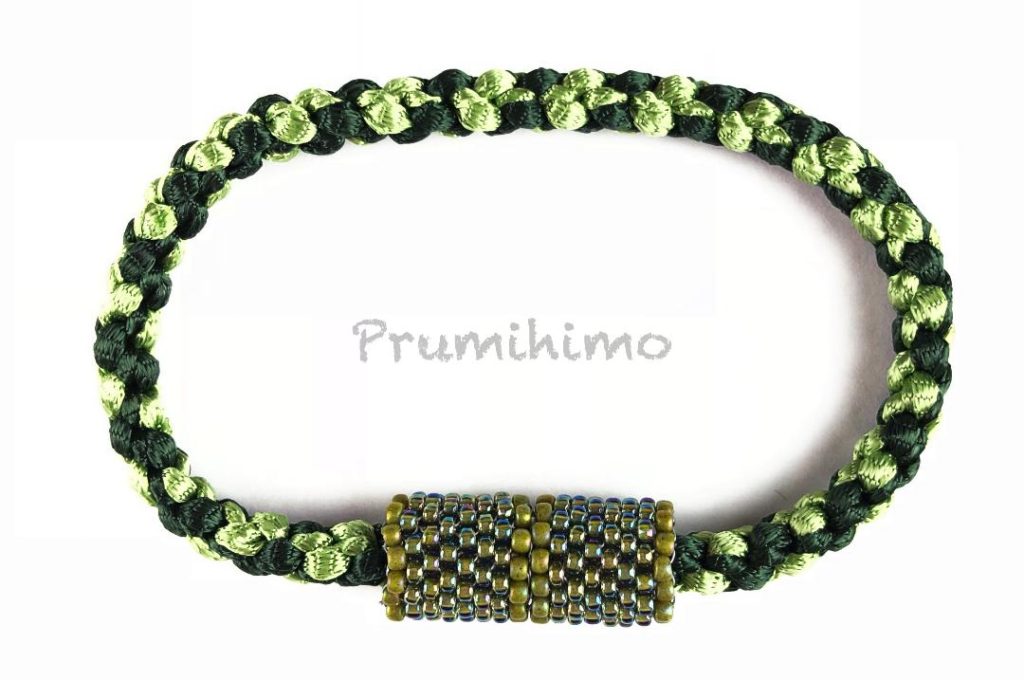
This bracelet could be made with many types of braid and all sorts of materials. I used a type of knitting yarn called chainette or tape yarn and made the braid on the Prumihimo disk. The yarn is fairly narrow, so I used 3 strands in each slot at the top and bottom at numbers 1 and 2 and I used just one strand in the top and bottom slots at numbers 3 and 4. Hollow braid made on the round disk would work very well for this type of design.
Instructions for Hollow braid can be found in this YouTube video.
Page 21
I included this design in the Kumihimo Endings book because it is another great example of how the simplest kumihimo is often the most effective. This braid was made on the round disk. I used beading cord (0.5mm/Tex 210), which would work up into a very thin braid of 8 cords, so I doubled up the cords in the slots. Blue was used in the slots in the north and south positions and beige was used in the slots in the east and west positions. After finishing off with a glued ending I attached a charm and beads on headpins to chain and attached this to the end cap so that the ending can be worn at the front as a feature.
Pages 23 and 28

Of course this bracelet could be made with any sort of braid and many sorts of cord. This braid was made on the Prumihimo disk. I used a knitting yarn known as chainette or tape yarn. It is made of viscose and has a knitted construction, which give a braid a lovely shine and texture. In the top and bottom slots at 3 and 4 I used one strand of light grey in each slot. To give extra structure and width to the braid I used 3 strands in each slot. In the top at 1 I used turquoise and in the bottom at 1 I used puple. In the top slot at 2 I used cerise and in the bottom slot at 2 I used khaki.
Pages 24 and 25
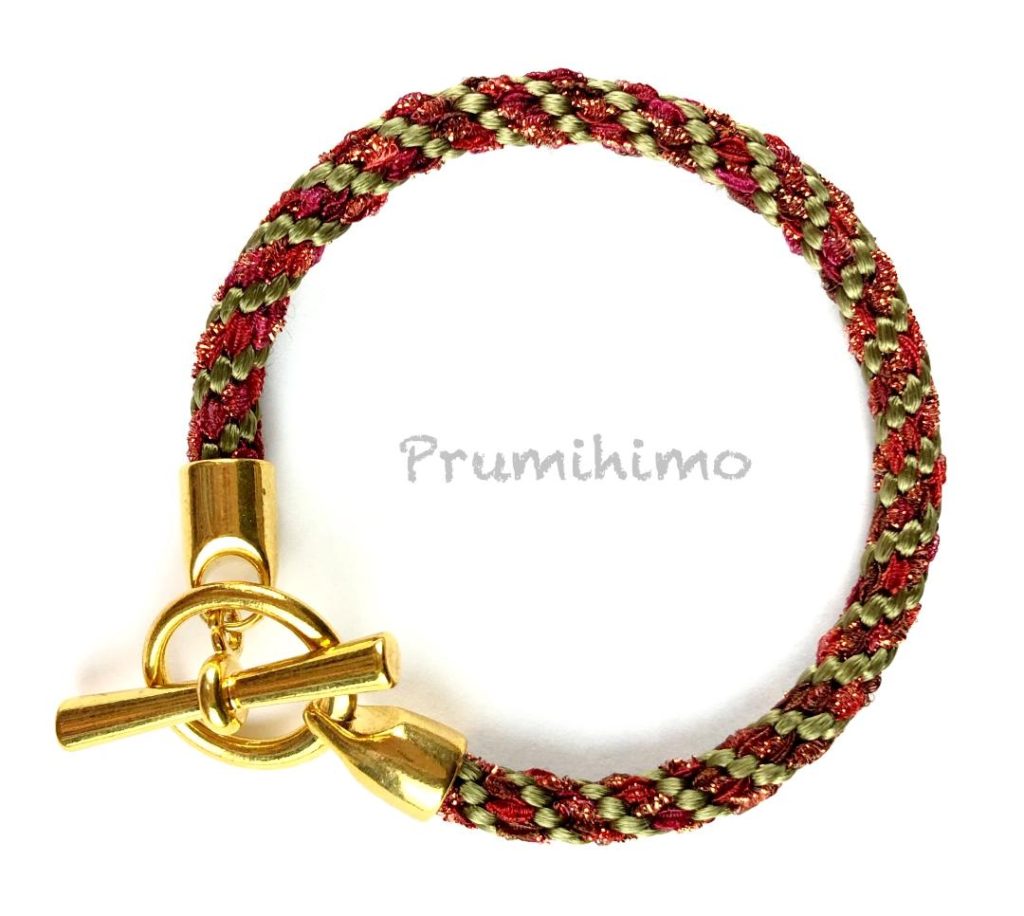
Using knitting yarn instead of popular types of cord is a great way to add individuality into a simple braid. This was made on the round disk and the structure is 8 cord Round Braid/Kongo gumi. I used a sparkly yarn (called Sari Ribbon by Louisa Harding) for this braid, but I found it rather scratchy, so I worked it with satin cord to give it a smoother finish. I also found that the sparkly yarn was slightly stretchy, so by adding satin cord the stretch was minimised. The contrast between the two materials is both attractive and funtional.
Page 27 and back cover
Throughout the book I tried to stick to fairly simple designs because I did not want the jewellery to detract from the ending, which is what the Kumihimo Endings book is all about. However, in this case I needed to be able to show how a double width bracelet like this one can be finished. This design is called Candy Cuff and is available as a tutorial in which I explain three different layouts depending on the size of the cord used. This makes the tutorial very flexible because it can be used for other types of bead. It is also available as a special free shipping offer, when it is bought with the Desdemona tutorial and the Kumihimo Endings book. Please note that both of these designs are made on the Prumihimo disk. Free shipping offer
This page is a work in progress and will be added to with the rest of the designs from the book at a later stage.
Watch this space!