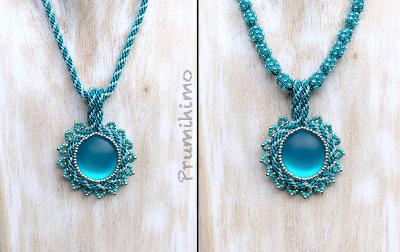
One of my aims is to inspire people to develop their braiding skills and to explore the wonderful world of kumihimo. It gives me great pleasure to see people learning new skills and of course, I enjoy being able to show my work and new ideas to an appreciative audience. However, inspiration is not just one way traffic and a great example of this happened this week.
One of my most popular tutorials is Kumi-cabs 1, which shows how to combine bead embroidery and braiding to make a very special integrated pendant design. Another popular tutorial is Treasure Nets, which instructs on the inside out method to make an unusual beaded braid. One of my talented friends, Tracey Mack, posted a great design combining these two tutorials to stunning effect. However, just combining the two tutorials is not quite enough to make her design, because I had supplied her with some additional information, which enabled her to change the integrated pendant design to a pendant with a braided bail. This technique came about when I was asked to teach a workshop for the Kumi-cab design. The original design was not going to work well as a workshop because a long length of braid needed to be made before the cabochon part could be completed, leading to an imbalanced workshop, with all the technical parts at the end of the day. This would risk slower braiders not getting the tuition they needed and would also mean that the most technical part of the workshop would need to happen when students might be getting tired and less able to concentrate. For these reasons I worked out a way of making a braided bail, so that students could make the more complex parts in the morning and then do the long braid in the afternoon or later at home. Having seen Tracey’s work I realised that it would be good to supply this supplementary information in the original tutorial, so that is what I have been working on today. This means that anyone who has already bought the tutorial can access the update by logging in to their account. Those who did not create an account can contact me and I will be happy to email the update to them, at no extra cost, of course. New customers will automatically get the updated tutorial with the supplement.
This is not the first time I have added extra information to a tutorial and it won’t be the last. In the case of the Candy Cuff tutorial, which used candy beads, I later made a similar bracelet with the baroque 2-hole cabochon beads and a few changes needed to be made to the original design to make the bracelet work with the new beads. As a result I added the new instructions to the tutorial in the form of a supplement at the end. This method means that I can keep my tutorials current and my customers get good value and are hopefully encouraged to return to the tutorial.
Don’t forget that I am offering a special deal on my tutorials for the lockdown period. If you buy 4 totorials I will contact you and offer you two more, of your choice, free. More details can be found in the following blog.
Kumi-cabs 1 Tutorial (with supplementary material)

