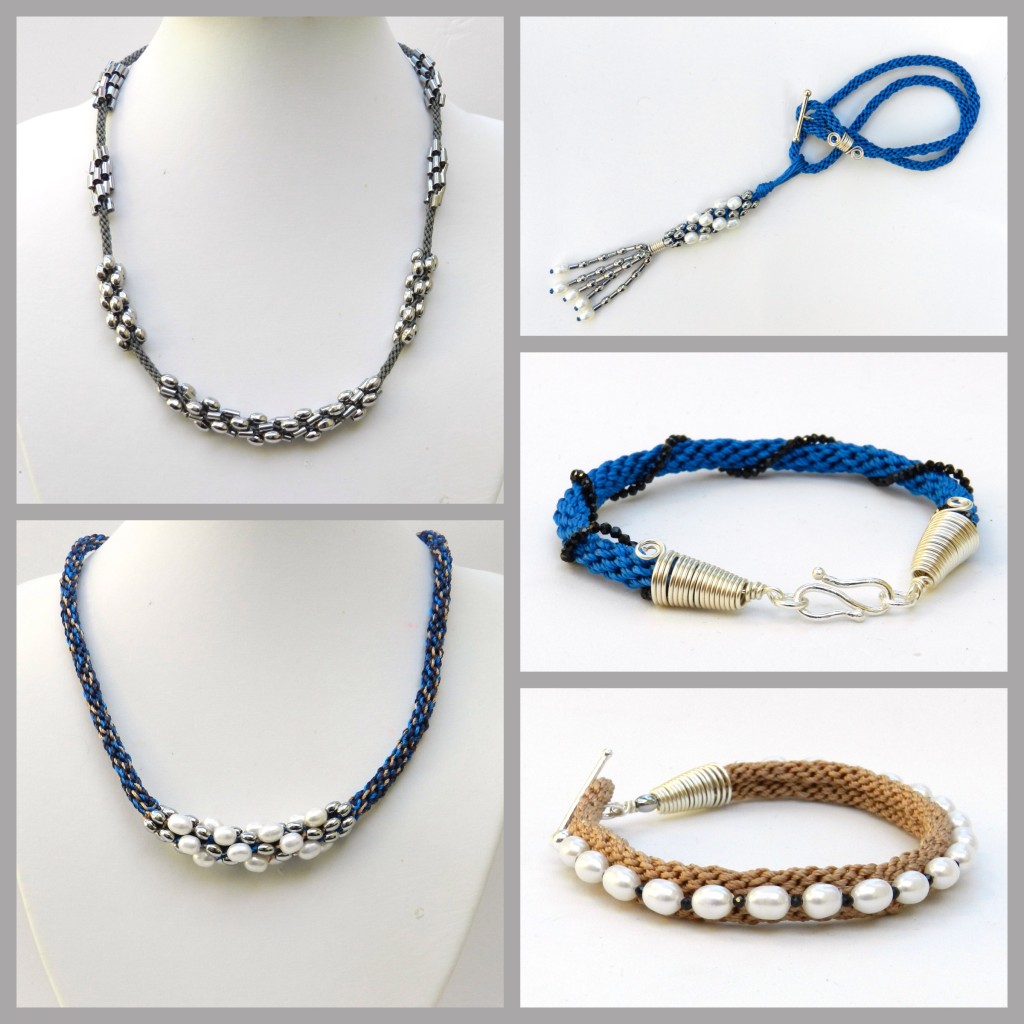
This kit was demonstrated on 8.9.15. Along with lots of S-Lon in all 3 sizes I was given hematite beads in tube and rice shapes, tiny black spinel faceted beads and some rice shaped pearls. If you want to substitute other beads you may need to experiment with a few trial braids if you want to mix the beads together.
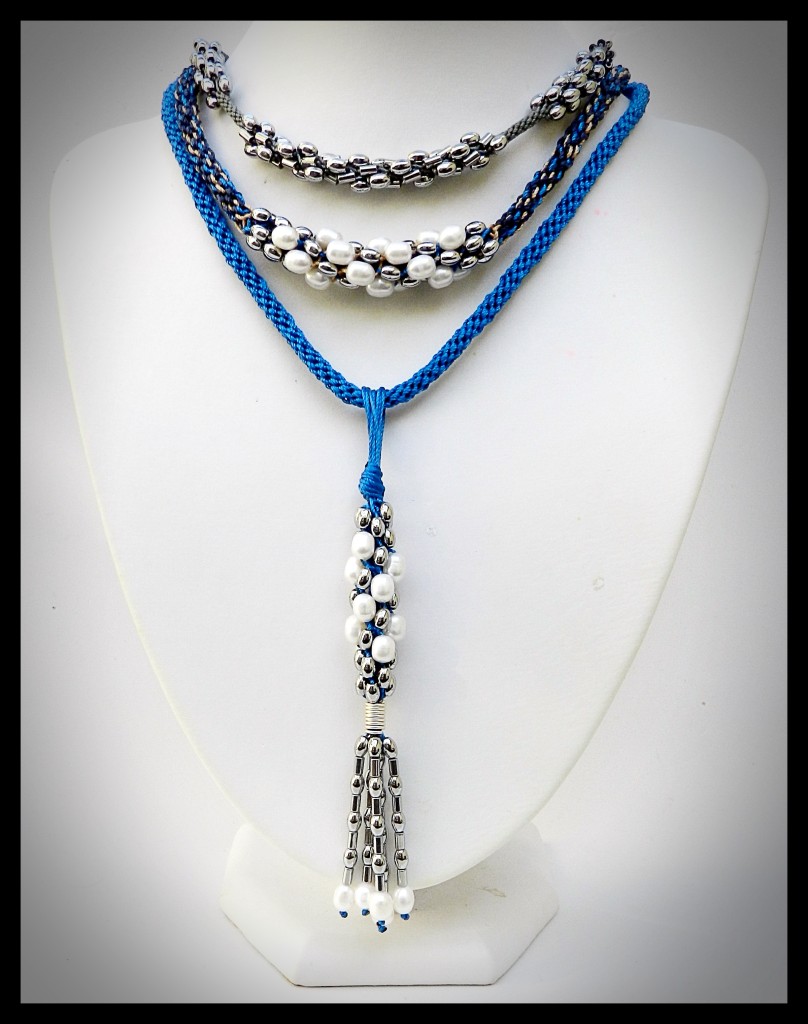
Pendant Necklace – Neptune’s Mane
This was the necklace I demonstrated on the show, but unfortunately the YouTube recording is not available.
A competition was held to name this piece and the winner was Neptune’s Mane, which I chose because it conveyed a sense of movement.
Braid
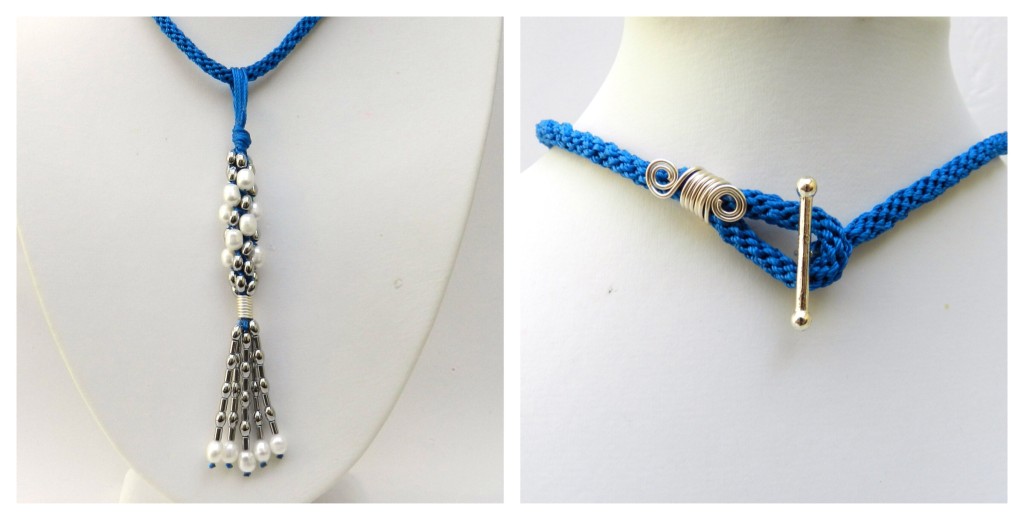
Cut 8 x 2m regular S-Lon, thread through the ring on a toggle from a toggle clasp and centre the toggle on the cords. Position the cords on the disk on either side of the dots with 2 cords per slot. Braid to the end. Remove from the disk and tie in an overhand knot. Glue the braid end to bind the cords and trim off the knot when dry. Bend over the end of the braid to form a loop, add a drop of glue to the join and bind together with cord. Wind 0.8mm wire around the join and finish off both ends of the wire with a spiral.
When I plan my demonstrations for JM I am aware that some people are brand new to kumhimo, while others are looking to expand their skills. For this reason, I demonstrated two ways of making the pendant section of the design.
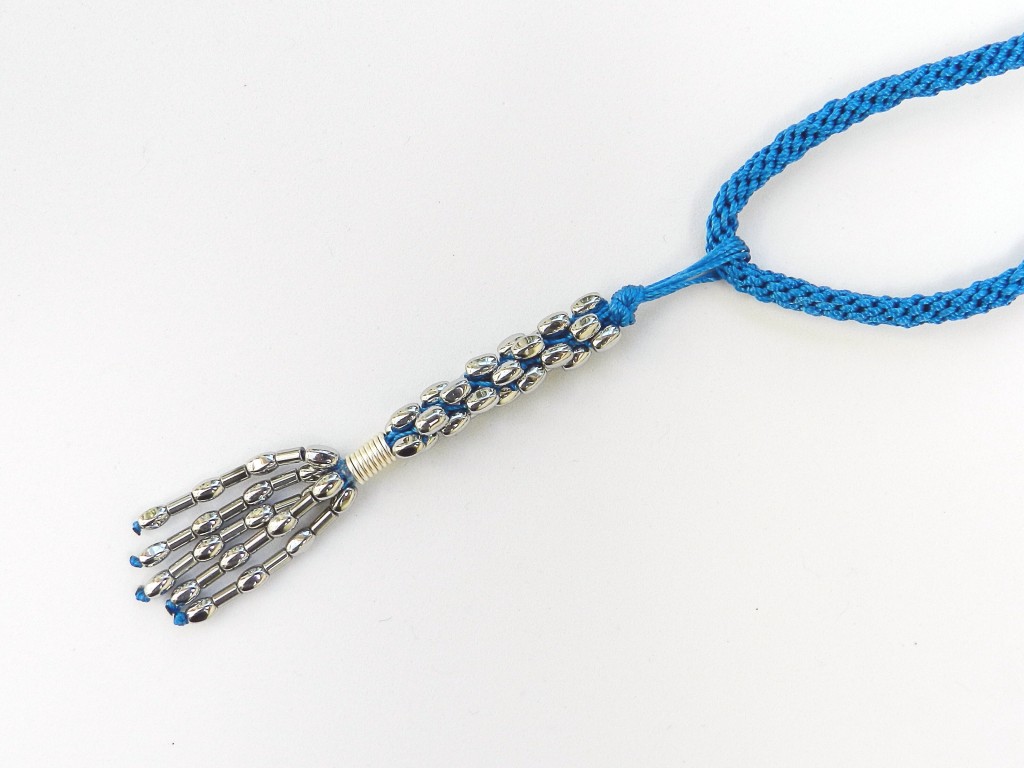
Simple Pendant
1. Cut 4 x 60cm regular S-Lon. Fold in half and tie in an overhand knot to form a loop. Make sure that the finished braid will fit through the loop. Position the cords on the disk on either side of the dots. Braid for 8 individual moves.
2. Thread 6 rice beads onto the 4 cords at north and south. The braid structure is Round Braid. Braid in the beads each time a cord with beads is moved. (Instructions for braiding with beads) Rice beads can have the tendency to move out of position, so keep them in place with a finger if necessary. Braid in all the beads and continue with the instructions for finishing.
Advanced Pendant
This method is useful when the beads are fairly large, but have small holes. Larger beads need thicker cords to secure them properly in the braid. Using thinner cords alone with these pearls would not produce a firm braid. An inner core is braided to provide additional support and structure. This is quite a complex method, so I do not recommend it unless you have had a bit of experience with beaded kumihimo.
1. Cut 8 x 60cm regular S-Lon and 2 x 60cm thin S-Lon (0.3mm). Fold in half and tie in an overhand knot to form a loop. Make sure that the finished braid will fit through the loop. Position 8 of the cords on the disk on either side of the dots. Leave the other cords to hang freely from the underside of the disk.
2. Braid for 3-4cm. Remove the braid from the disk and tie the end in an overhand knot. Seal the last cm of the braid with glue and allow to dry. This is the core braid and it will be trimmed later.
3. Position the remaining 8 cords on the disk on either side of the dots. Position the thin cord on either side of the dots at north and south, along with the regular cord.
4. On 4 cords at east and west thread 5 hematitie rice beads. On the thin cords at north and south thread 1 rice bead, 3 pearls, 1 rice bead.
5. Braid for 8 individual moves without beads, keeping the core braid in the middle of the braiding. Braid in the beads, still keeping the core braid in the middle. Make sure that the regular S-Lon cords are pulled in close to the braid when the pearls are braided. Otherwise they will be visible on the outside of the beads.
6. Once all the beads have been braided, trim the core braid to the same length as the beaded section and braid for 16 moves to close up the middle of the braid.
Finishing for both Versions
Braid for 1cm without beads. Glue this section of braid before removing the braid from the disk. Thread on a coil of 0.8 wire and pull it close to the beads. To make a tassel thread beads onto 5 or 6 of the cords and secure them with a knot. The knot can be sealed very carefully with a naked flame or a thread burner. Trim off the remaining cords close to the coil of wire.
Beaded Necklace
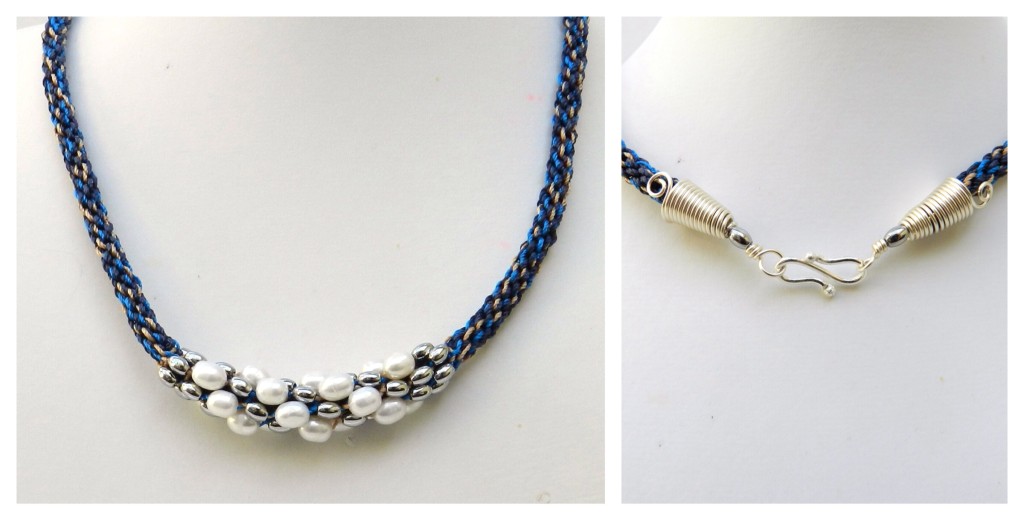
This necklace is made with a combination of regular and thick S-Lon, with one regular and one thick cord in each of the 8 slots on either side of the dots. This produces a chunky braid. The beads are threaded onto the regular cords only. When the beads are braided the thicker cords are removed from the slots so that they form the core to the braid. Unlike the pendant design, these cords are not braided. They provide structure to the beaded section, but it needs to remain flexible so that it can curve.
To make this design quite a few of the pearls need to be reamed slightly to accommodate the S-Lon.
On the 4 cords at north and south thread 7 rice beads. On the 4 cords at east and west thread 1 rice bead, 5 pearls, 1 rice bead.
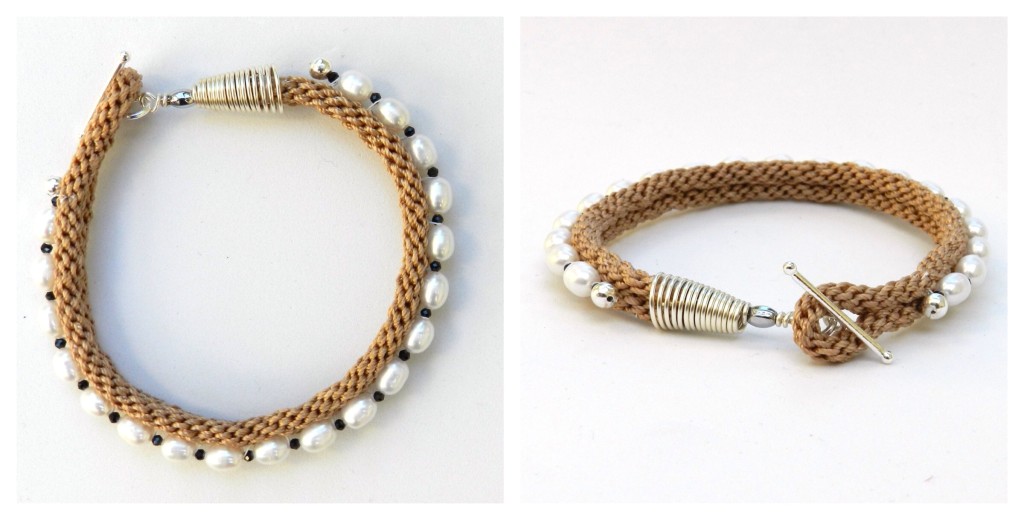
Pearl and Spinel Double Bracelet
Simple sewing with a needle and thread is required for this bracelet. When sewing kumihimo try to sew in between the ‘stitches’ of the kumihimo. When the thread is pulled tight it will disappear into the braid.
Cut 8 x 1m regular S-Lon and braid to the end. Fold the braid in half and stitch together, leaving a 1cm loop at the fold. Thread pearls and spinel onto beading thread/wire and crimp at both ends. Sew the row of beads into the groove between the braids. Finish off with an end cone and the toggle from a toggle clasp.
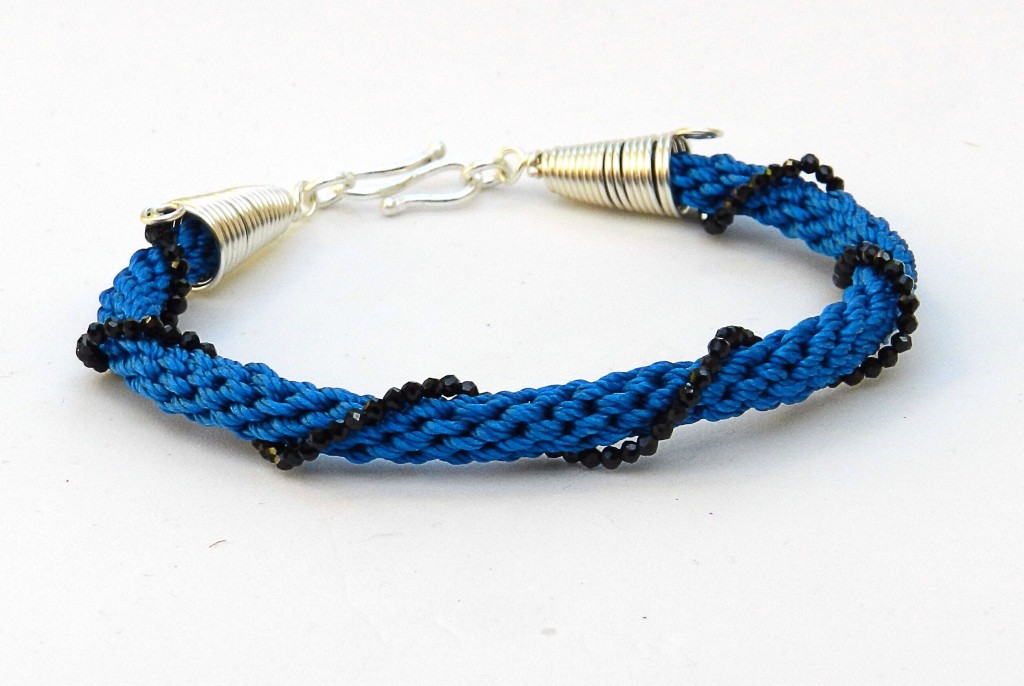
Spinel Spiral Bracelet
Cut 75cm x 16 thick S-Lon, 0.9mm. Braid with 2 cords per slot. Finish off the bracelet with wire cones.
Thread beading thread/wire through the braid, just inside the cone, and secure with a crimp. Thread on spinel and wrap it around the braid. Secure the other end in a similar manner. The amount of spinel required will vary greatly depending on the way it is spiralled around the braid.
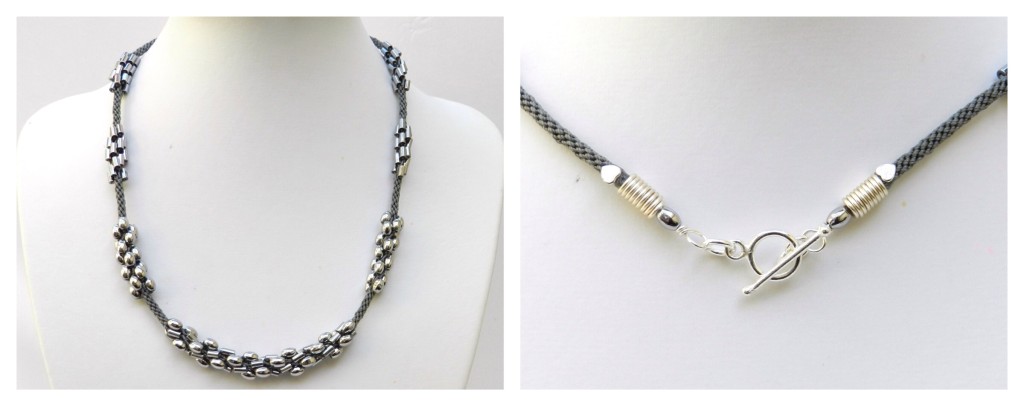
Hematite beaded necklace
Oh dear. This was the necklace where I got the reels of S-Lon mixed up and used a reel from the other kit. Once I had spent all that time making the necklace I was not going to undo it and I did not have enough beads to remake it! I like the subtle effect of the hematite with the grey cord, but this is one of those designs where anything goes. Imagine red or purple cord!
The key to a necklace like this is the spacing between the sections of beads. Either count the individual moves and be consistent or start the plain sections when the cords are on either side of the dots and braid until they return to these positions. In this necklace there are 64 individual moves between the beaded sections, which is the same as going from dots to dots twice. It is easiest to load the beads section by section, rather than all together. Beads are only used on the 4 cords at north and south. For each section of beads at the sides I used 5 beads on the 4 cords. The middle section is made up of 10 beads, 2 of rice beads – on diagonally opposite cords and 2 of tubes – on diagonally opposite cords.
And Finally …
It is London Fashion Week, so wear them all together to make a catwalk statement!

