
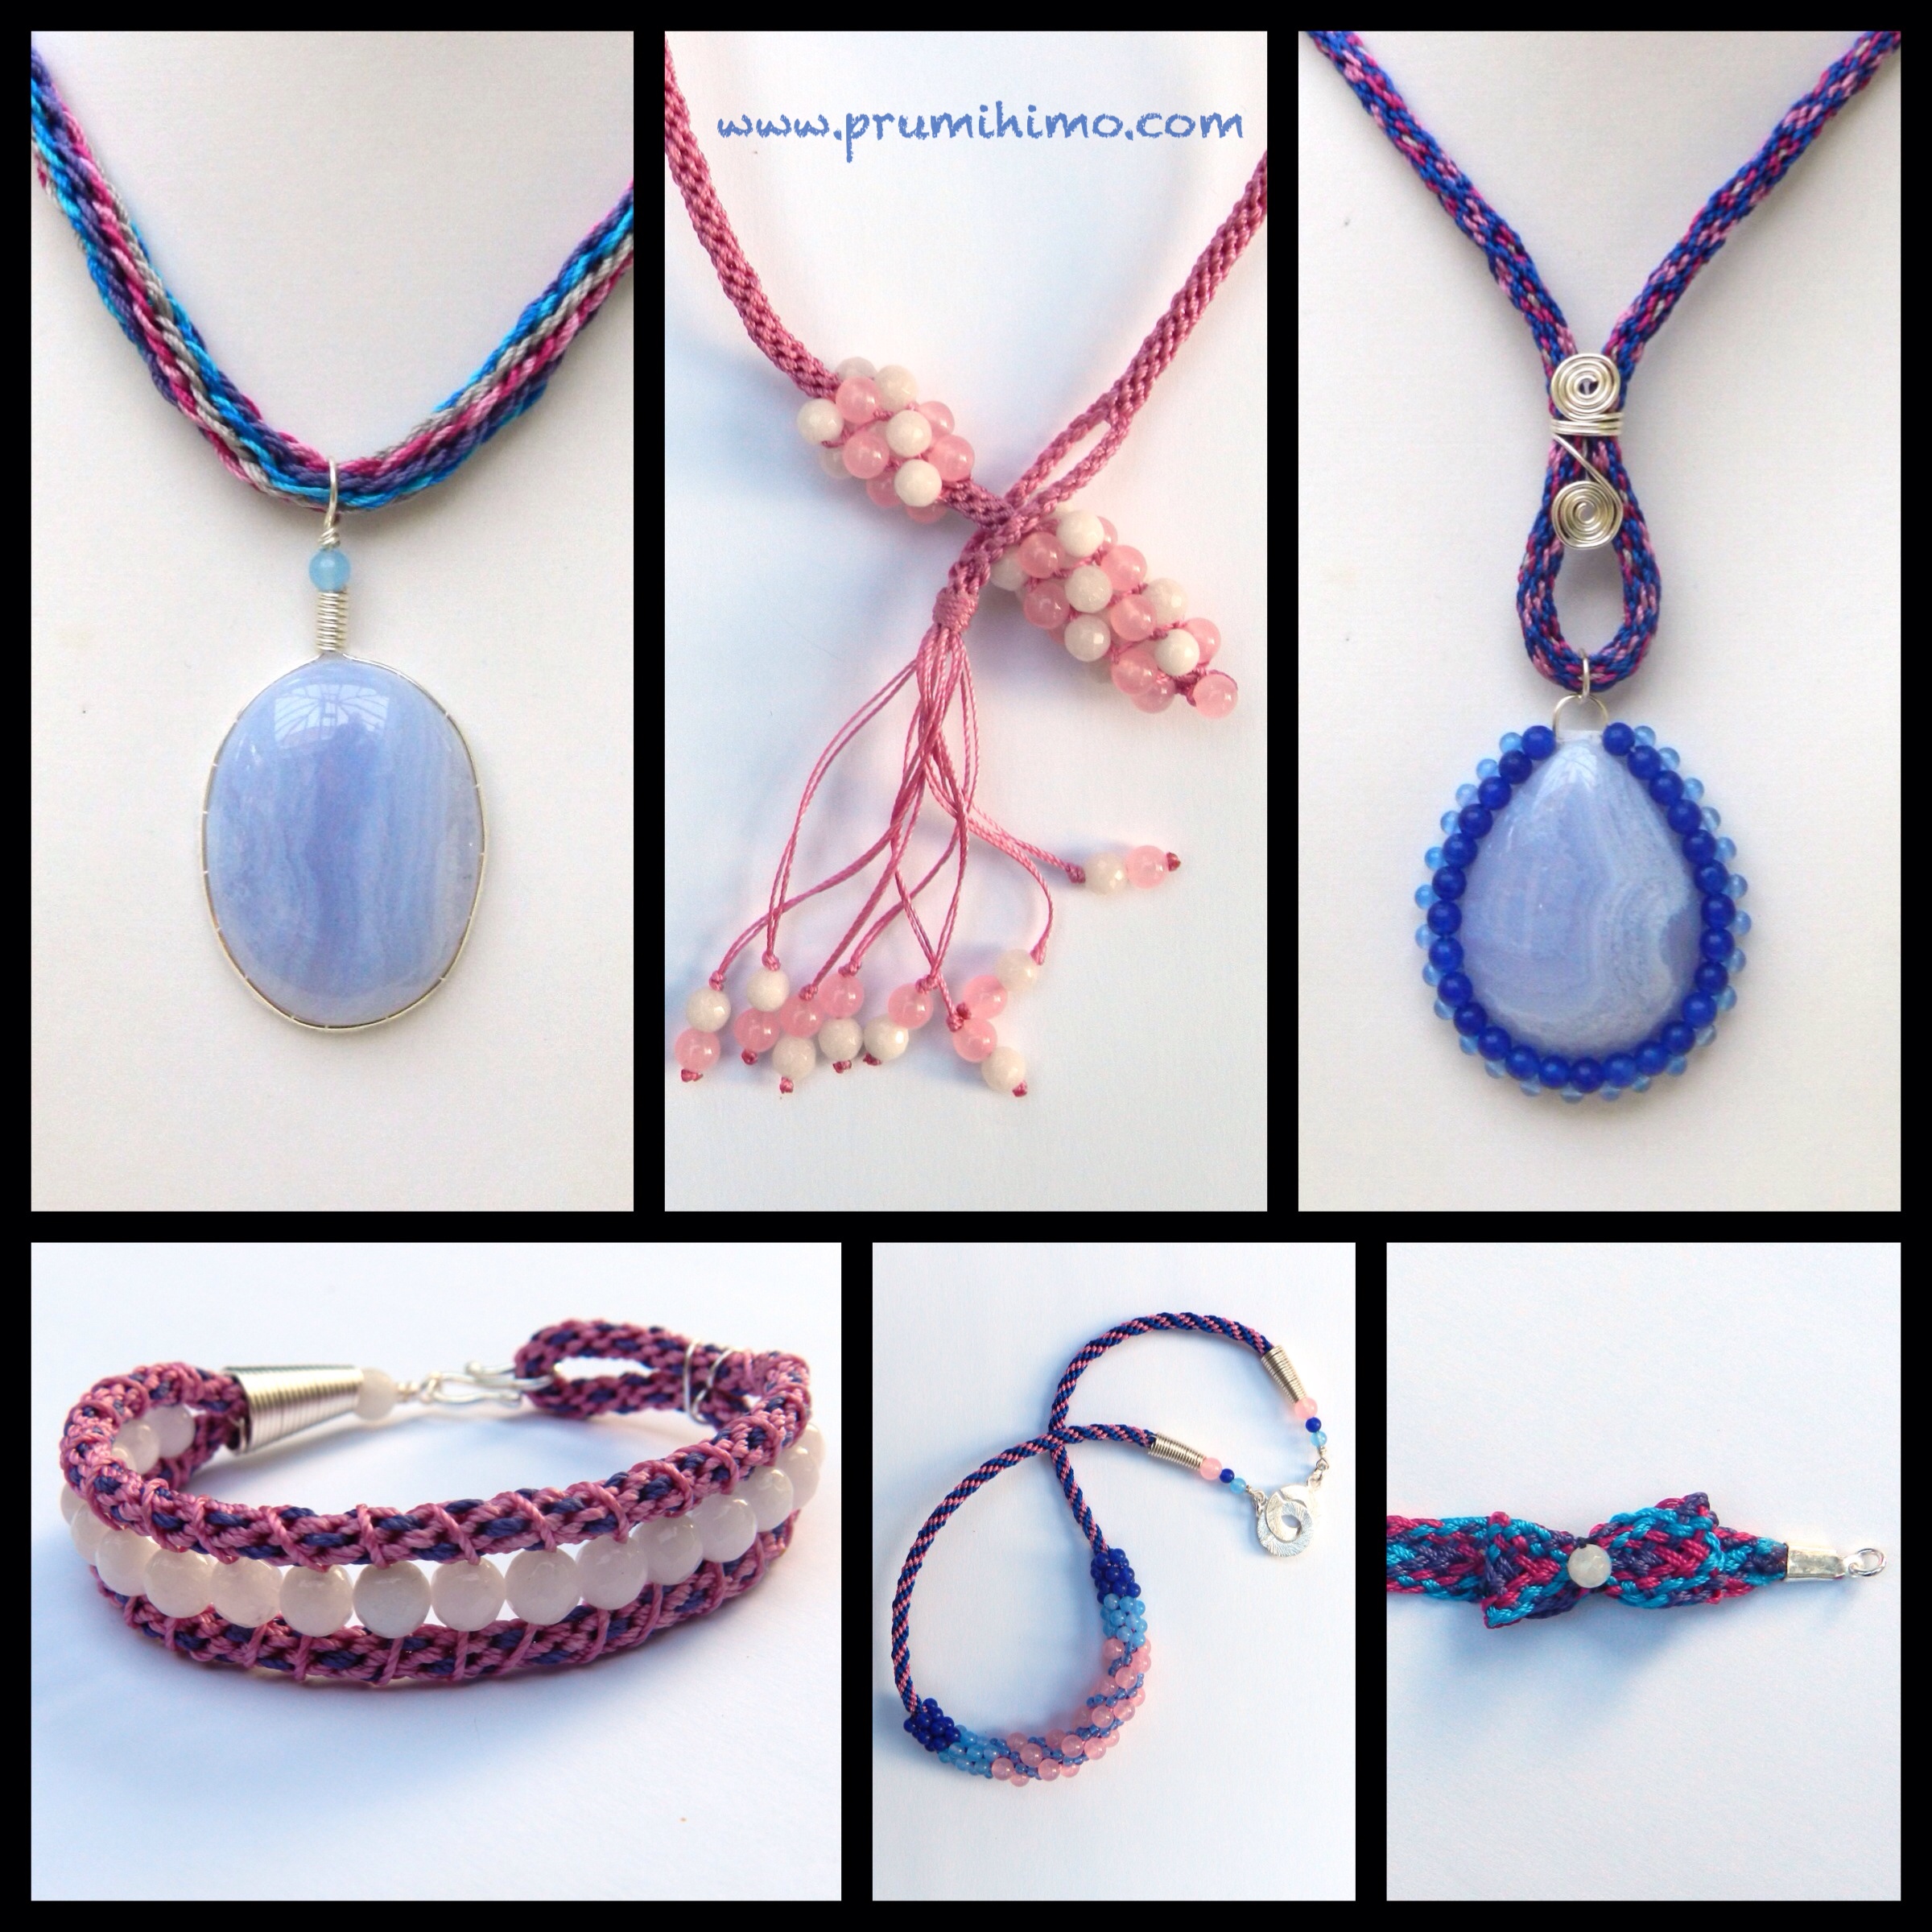
On 9.12.14 I demonstrated kumihimo jewellery made using this delightfully pretty and feminine kit. A total of 7 reels of SLon cord was included in the kit, making it wonderfully versatile and a real stash builder at the same time. The kit also included 2 cabochons and a selection of gemstone beads sized 3mm, 4mm, 5mm and 6mm. Any round beads of similar sizes can be used to make these designs. To watch a recording of the show, click here.
Designs using Cabochons
There are lots of different ways of using cabochons in kumihimo jewellery. For the two cabs in the kit I stuck them onto backing fabric and used a needle and strong thread to attach beads or wire. Please look back through some of the other instructions for Jewellery Maker shows for ideas or take a look at my very detailed tutorials, which are full of step-by-step photos and helpful advice.

Pink Lariat
Pink and white 6mm gemstone beads were used for this design, but a completely different look can be achieve with different colours.
Cut 240cm x 8 SLon cord
Thread one pink bead onto the middle of one cord. Use this cord to tie the other 7 cords together in the middle. Position two cords in each slot on either side of the dots and braid in Round Braid for 8 individual moves.
Thread 5 pink beads onto each of the 4 cords at north and south and 5 white beads onto each of the 4 cords at east and west.
Braid in the first 3 beads on each cord. A gap will form in the middle of the braid. Pop three beads into this gap, one by one as it forms. This method was shown on the show, so refer to the YouTube video for more information.
Braid without beads for 1cm. The gap will close up and trap the loose beads.
Braid in the last 2 beads, adding just one bead to the gap. Braid without beads for 50cm or however long you want the lariat to be.
Change braid structure to create the button hole. Click here to find the instructions. A total of 10 repeats is needed on each side. Check before going further that the beaded end will fit through this button hole.
Braid in round braid for 0.5cm. Add a drop of glue to the end of the braid while it is still on the disk. When it is still tacky remove it from the disk and squeeze the glued section together, so that all the cords sit neatly. Leave to dry fully.
Use one cord to form a binding over the glued section. I demonstrated the whipping method on the show. It can be a bit fiddly and I needed two attempts to get it right! This is not unusual! It is worth persevering with this as it forms a very neat binding, with the loose end secured under the wraps. Alternatively, just wrap the cord and secure it with a knot or a few stitches.
To make the tassel, take two cords, tie them together in an overhand knot at the point where you want the beads, thread on two beads. Separate the two cords and tie them in a double knot, close to the beads. Repeat for all the cords.
Bow Bracelet
This is made on the flat plate using 12 cord flat braid with 3 lengths of SLon in each slot. This is similar to 10 cord flat braid. The only difference is that the cords at the sides are moved to the bottom row and not the top row at the end of the sequence of moves.
Cut 8 x 60cm of each of 3 colours.
Position the colours in this order on both the top and the bottom of the plate,
Colour 1 – colour 2 – colour 3- colour 3 – colour 2- colour 1
To make the bow, fold the braid to form a mock bow and sew it into shape with thread and a single bead.
20 Cord Round Braid
The braid in the top right of the photograph is made with 20 cords. This is the set up.

Pink and Blue Beaded Necklace
This is made with 2 cords in each slot. Cut 8 x 1m blue SLon and 8 x 1m pink SLon. Position the colours with pink on either side of the north and south dots and blue on either side of the east and west dots. Braid in Round Braid for 10-15cm, depending on the required length for the necklace. Remove one cord from each slot, twist them loosely together and use them as a core to the beaded part of the braid. This technique was shown for a different necklace in the second half of the show. Thread the following beads onto the remaining cords in the 4 slots at north and south,
2 dark blue, 2 pale blue, 6-10 pink, 2 pale blue, 2 dark blue
and the following beads onto the rest of the cords
2 dark blue, 10-14 pale blue, 2 dark blue
After all the beads have been braided in, return the core cords to the 8 slots and continue to braid.
Bead Wrap Bracelet
Use 2 cords in each slot for this bracelet. 1m is required for each length of cord. The braid structure for this bracelet is Round Braid.
Fold the braid in half and use a wrap of 0.8 wire to form a loop for the fastening.
The beads are added by sewing 50cm SLon through the two braids and centering it, close to the wire wrap. Wrap the Slon around each side of the braid, then cross it over through the hole in a bead and wrap again around each side of the braid. Repeat for the rest of the beads.
The ends of the braid are bound together with wire. Thread on a cone of wire, top with a bead and use a wrapped loop to secure the toggle from a toggle clasp.