
On 8.9.15 Jewellery Maker started broadcasting from its new home in Ivy House and I had the honour of doing the first Designer Inspiration show in the new studio. Unfortunately, a few things were not quite ready and the show was not uploaded to YouTube, so these instructions will have to stand alone!

The kit contained purple Tiger’s Eye round beads, 4mm and 6mm, and 3mm amethyst rounds. In addition there were some pearls, 6-8mm as well as lots of S-Lon 0.5mm and a reel of Wildfire thread. Two tubes of gold seed beads, 0.3mm, and one tube of 0.4mm were sold separately. Substitutes will work well for all of these designs.
The design I demonstrated was a kumihimo/beadwork combo and a competition was held while we were on air to name both this design and the second one I demonstrated. Congratulations to the winners and thank you to everyone else for entering. There were so many amazing entries and I found it very hard to choose.
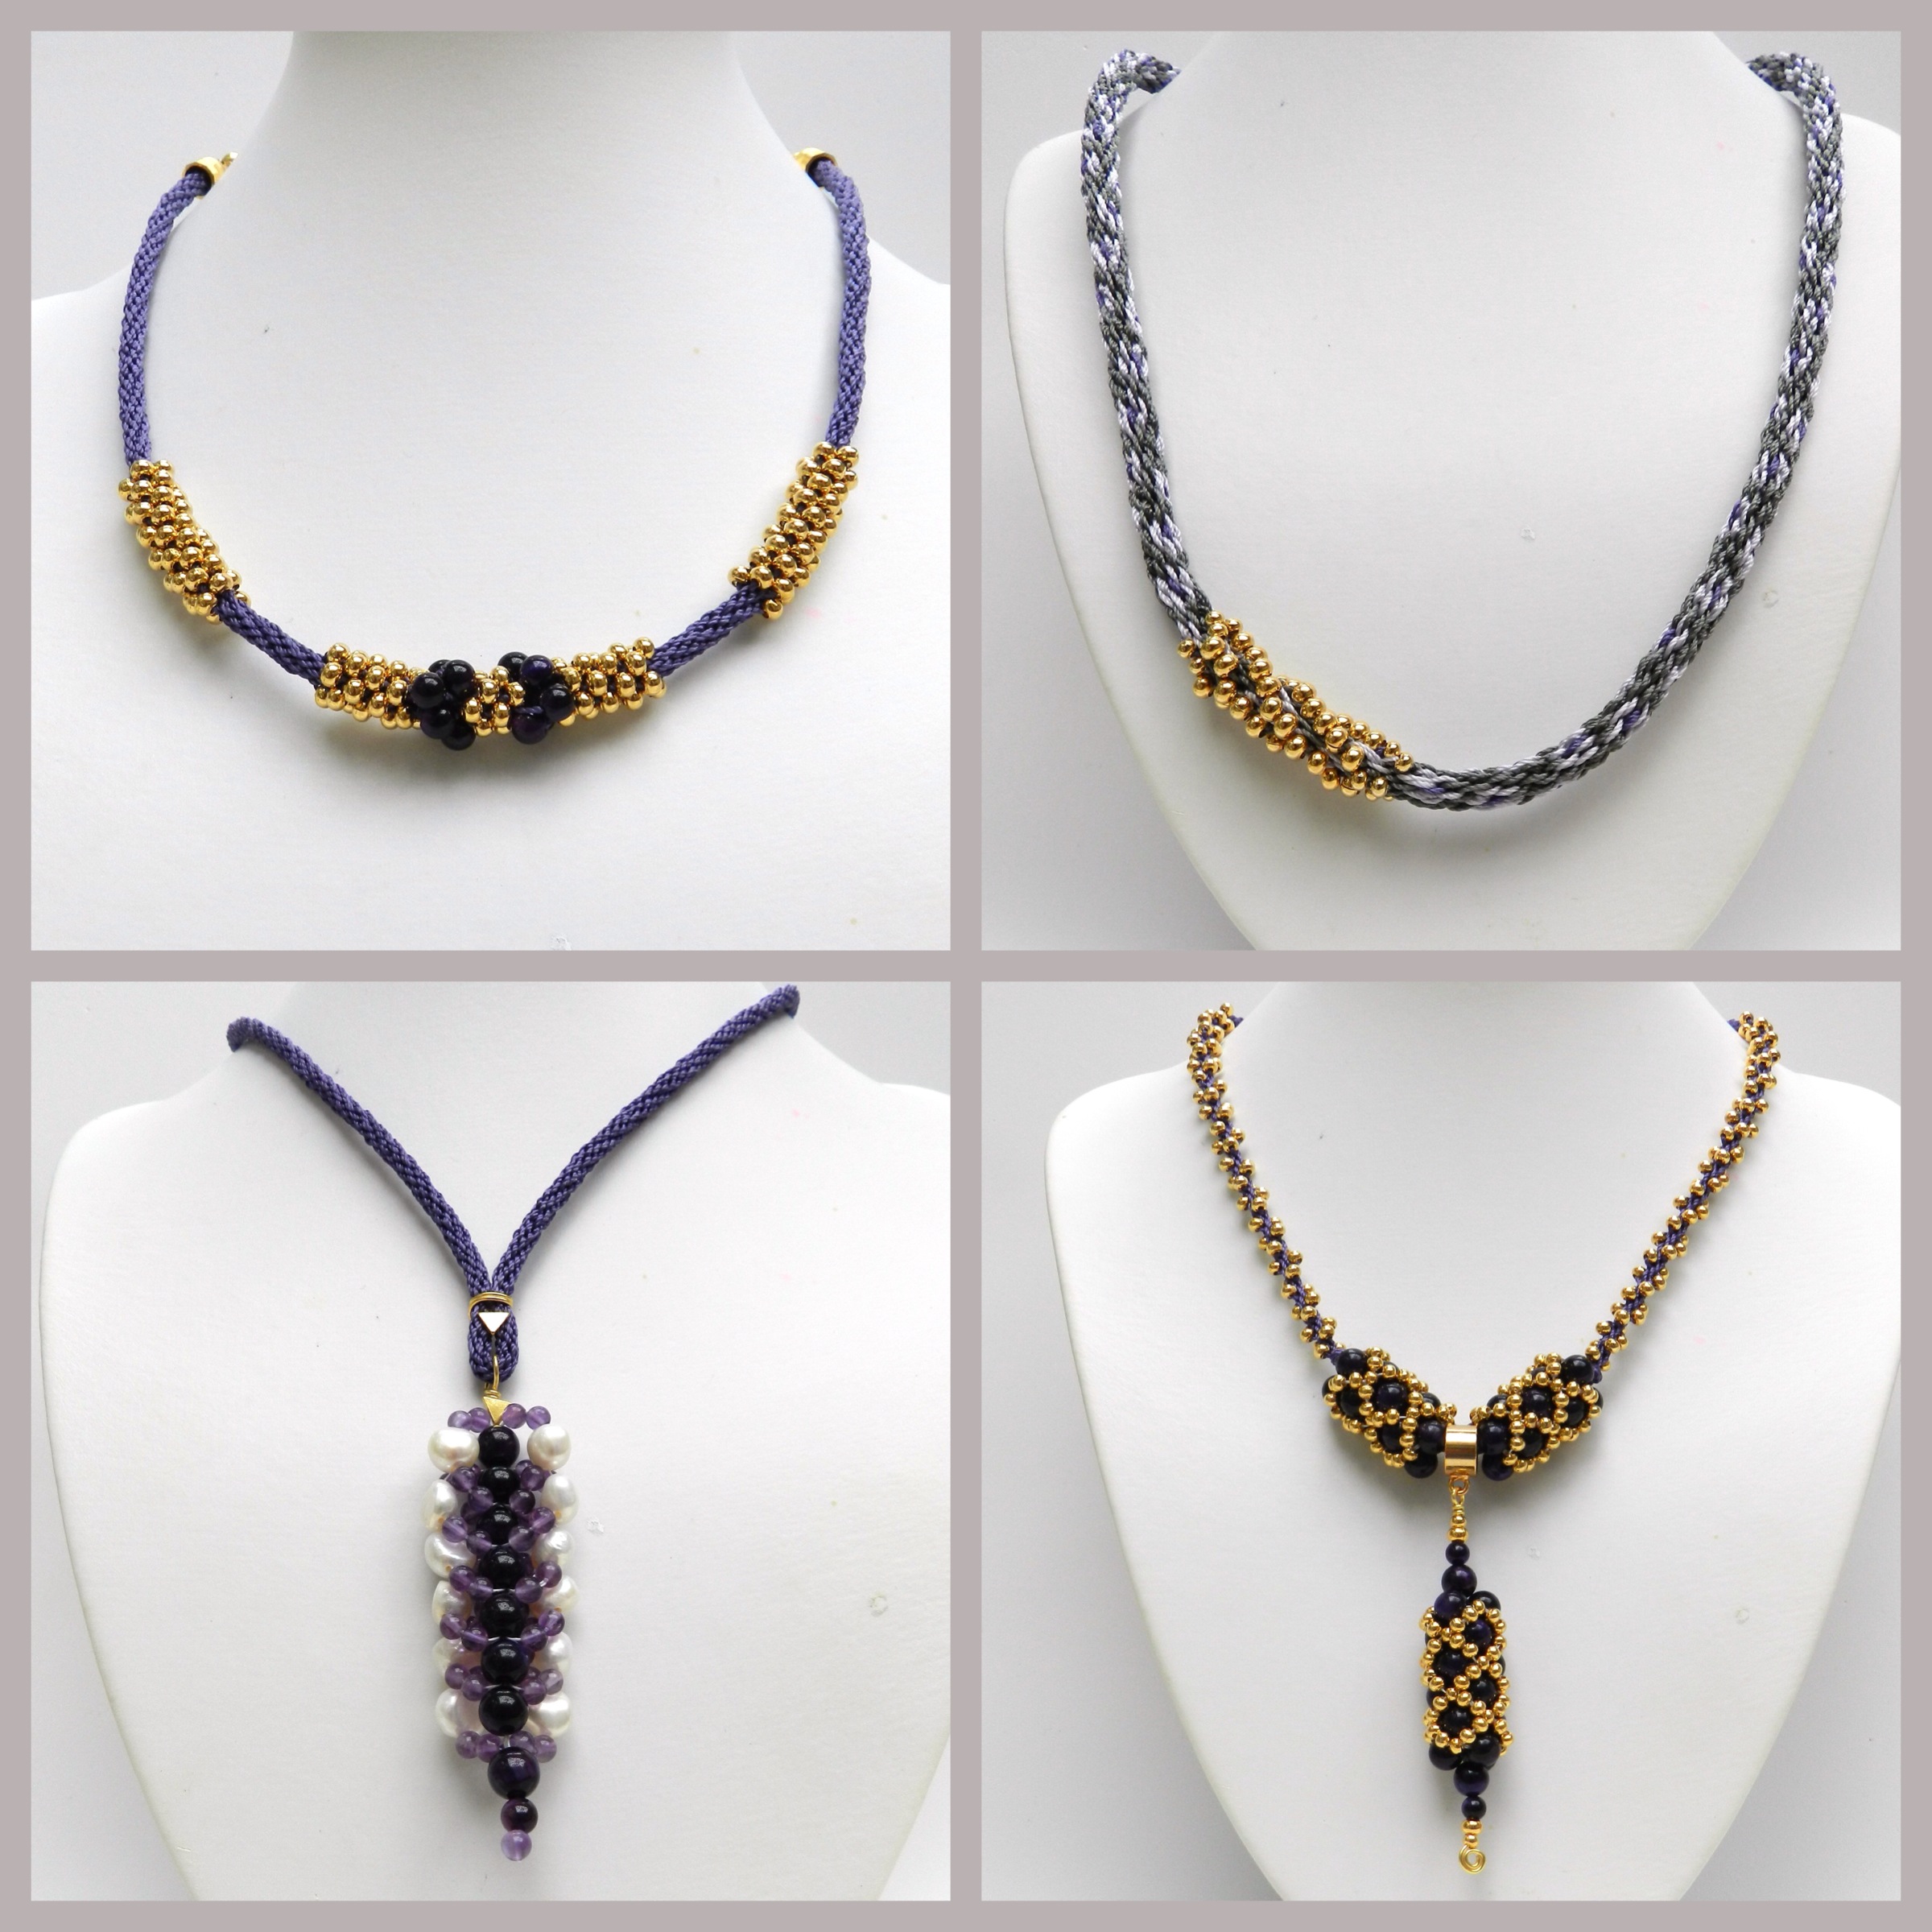
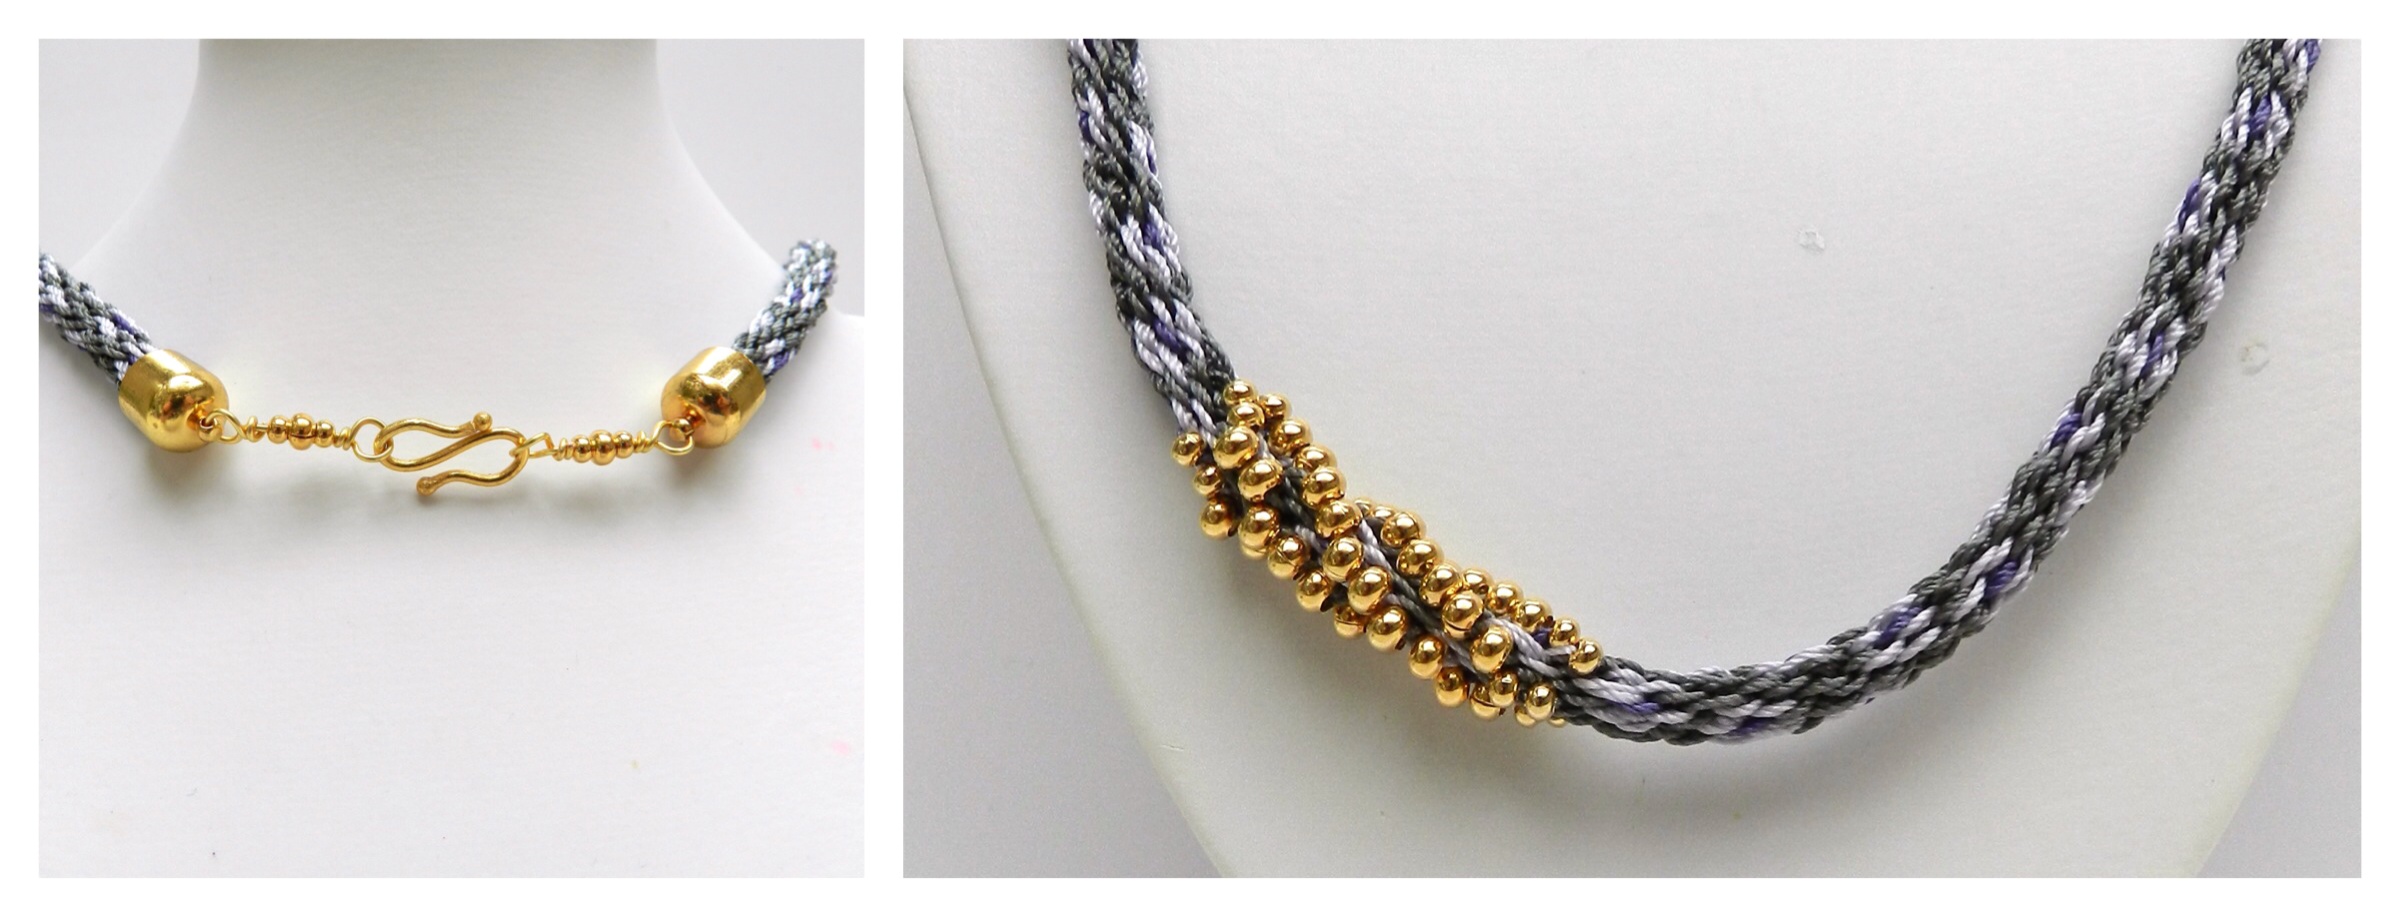
Kashmere Twilight
I would normally hope that for beadwork designs my instructions could be used along side the recording of the show. It is not easy to photograph the steps involved and I do not have the skill to draw up diagrams. However, that will not be possible, so I will do my best to make the steps as clear as possible.
The design requires 3 sections of beadwork, which are all made in the same way using the tubular netting technique.
1. Start with a comfortable lenght of thread on a beading needle and attach a stop bead 15cm from the end. To do this thread through a spare bead (size 6) twice in the same direction and pull tight. The bead can be moved up or down the thread and will stop the other beads falling off the end of the thread.
Row 1 – Pick up an alternating pattern of 3 seed beads and 3 6mm rounds. Pass the needle through all the beads again and then through the the next 6mm and the next seed bead. (In these photos my thread is being worked in a clockwise direction)
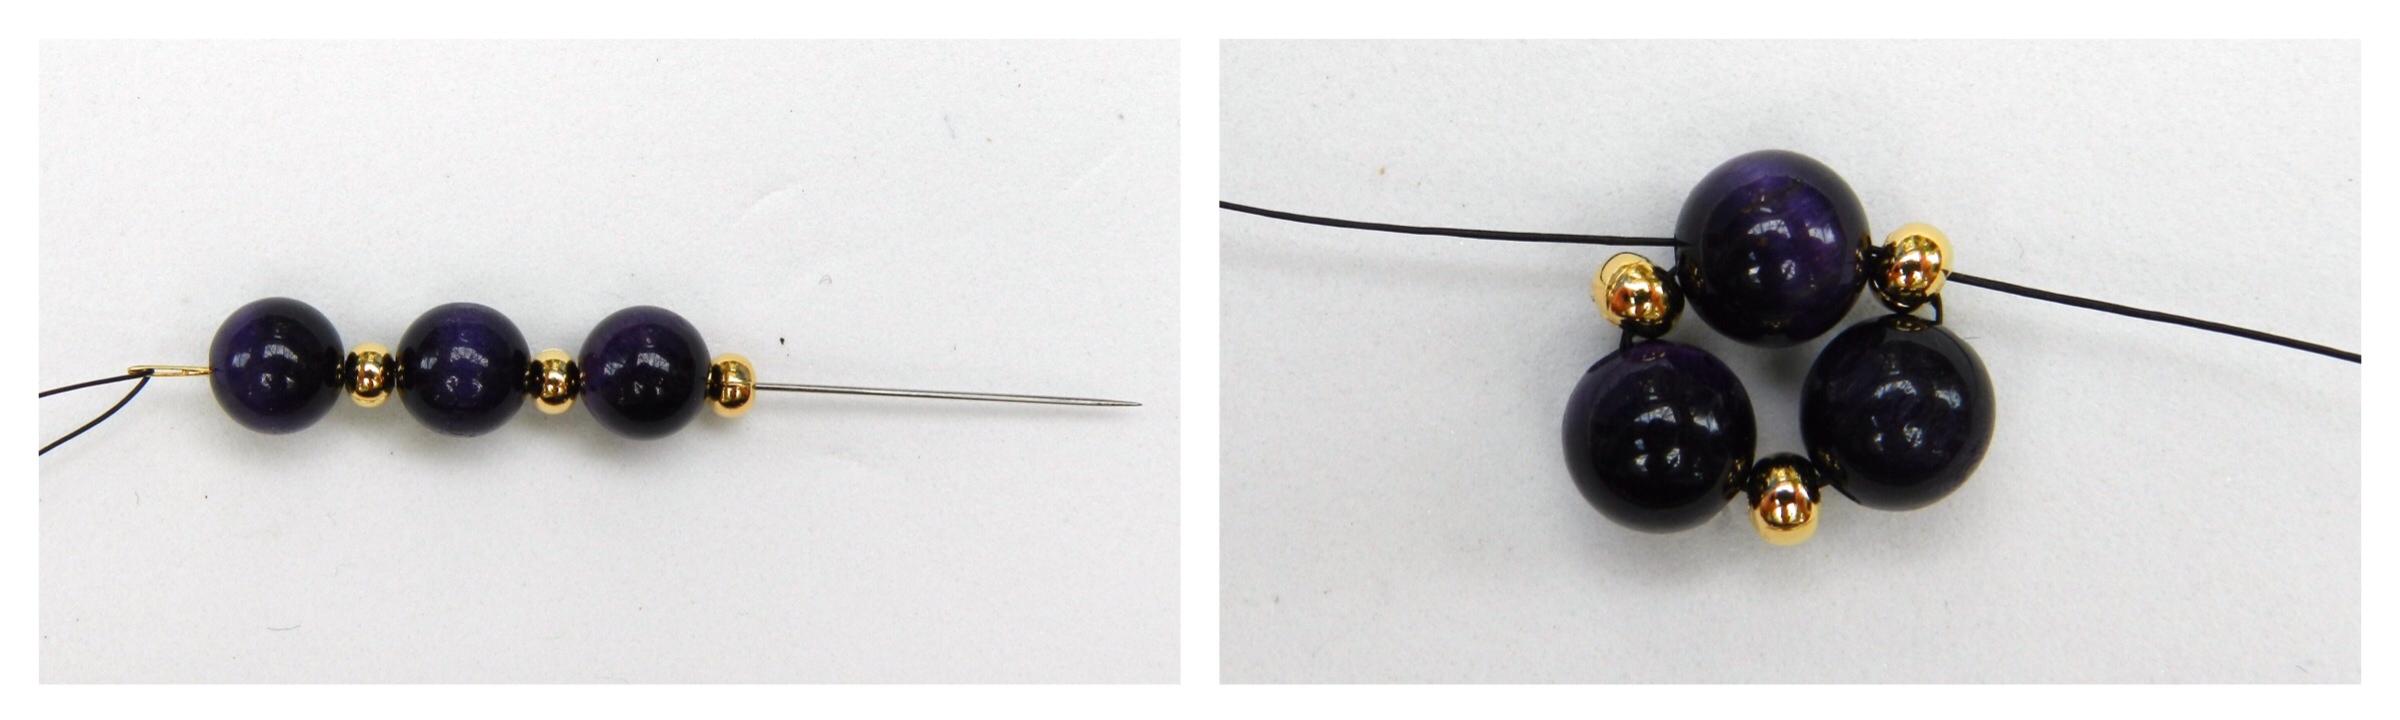
2. Row 2 – Pick up 5 seed beads, miss the next 6mm and pass the needle though the following seed bead to create a loop of beads. Repeat to create a loop of 5 seed beads around the other two 6mm beads.

3. It is now necessary to ‘step up’ to the next row. To do this pass the needle through the next three beads. The thread will now be exiting the middle bead in the first loop of 5 seed beads.

4. Row 3 – Pick up one 6mm bead and then pass through the middle bead of the next loop of 5 beads. Add 2 more beads in the same way.

5. Pull up the thread to tighten up the beads. The loops will now start to look more like diagonal lines of beads. Reinforce this row by passing the needle through the 3 6mm beads and the single seed beads in between. Repeat the row of loops followed by the row of 6mm beads. Reinforce the 6mm beads. Repeat this pattern until there are 4 rows of 6mm beads.

6. The beads will feel loose at this stage. To strengthen the design sew through all the rows again following the original thread path. To finish off the thread, pass the needle under the threads between any two beads. Pass the needle through the loop formed by the thread and pull up tightly into a single knot. Repeat to form a double knot. For extra security, pass through a few more beads and repeat the knotting process. Trim the excess thread. To finish off the other end of the thread, remove the stop bead, thread the needle, pass through some more beads and repeat the knotting process.

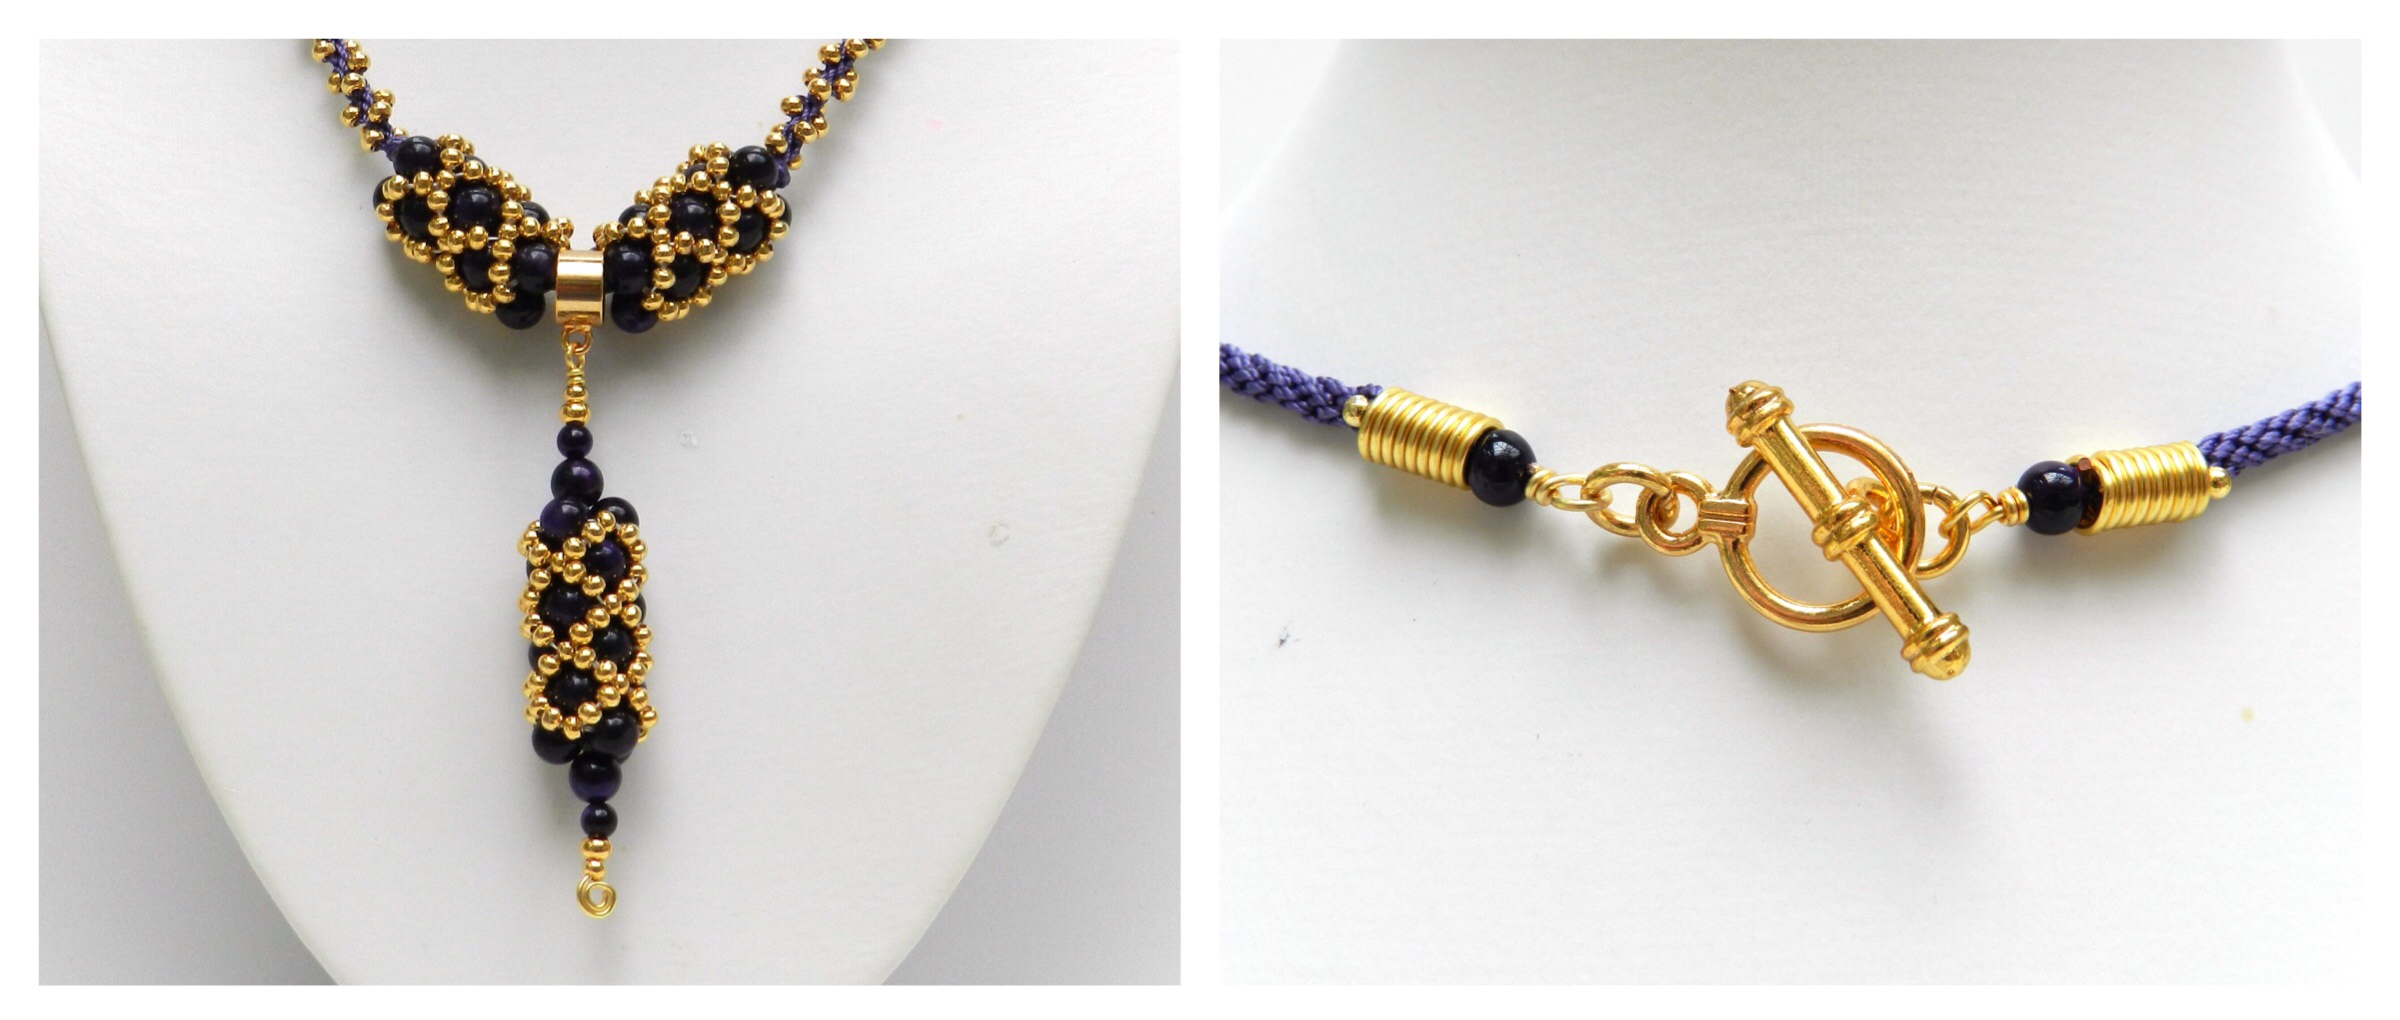
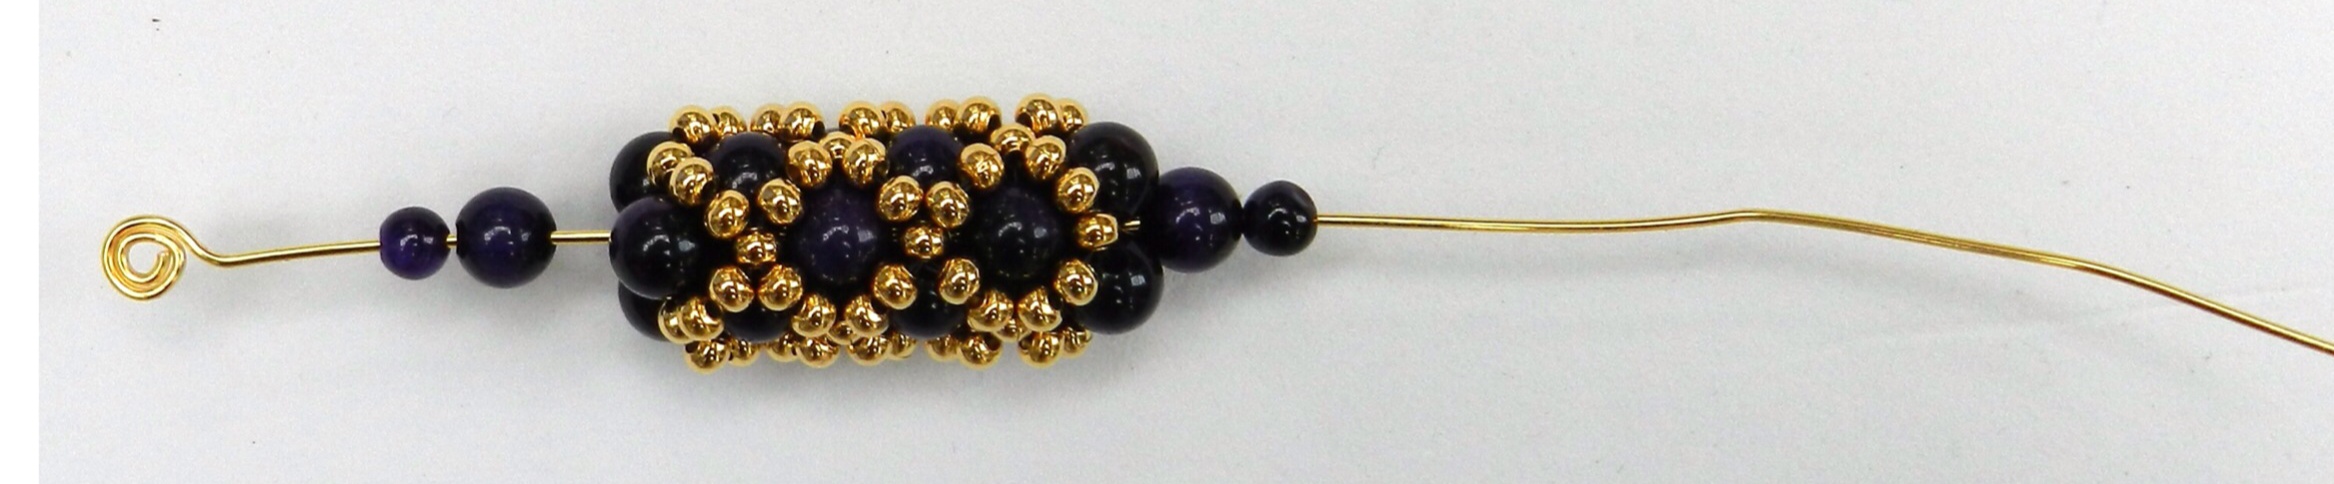
7. Make one more beaded section with four rows of 6mm beads and one longer one with 6 rows of 6mm beads. To make the pendant, use the longer section. Curl the end of a piece of 0.8mm wire into a spiral and thread on some beads and the beaded section as shown in the photo. Attach a bail using a wrapped loop.
8. Cut 8 x 1.2m S-Lon. Thread the cord through the two shorter beaded sections, with the bail and pendant in the middle. Centre them on the cords and tie a neat overhand knot on both sides.
9. Position the cords on one side on a kumihimo disk, with the cords on either side of the dots. The braid structure is Round Braid. Braid for 8 individual moves of the cords. Thread 35 seed beads onto 2 diagonally opposite cords and braid them in each time those cords are moved. (Instructions for braiding with beads) When the beads are finished braid without beads until the required necklace length has been reached. Repeat for the other side of the necklace.
Gold and Purple Beaded Braid Necklace

This necklace was made using 12 cords. Simply position the cords in pairs evenly around the disk and braid and follow the instructions for Round Braid. To make it with the beaded section, use 80cm lengths of S-Lon. To make the braid longer use 1.2m lengths.
Play with the spacing of the beads to create your own effect. This is what I did,
6 seed beads on all cords
2cm gap
3 seed beads on all cords
4 moves without beads (to create space for the gemstones)
1 6mm gemstone on 6 alternate cords
4 moves without beads (to create space for the gemstones)
2 seed beads on all cords
4 moves without beads (to create space for the gemstones)
1 6mm gemstone on 6 cords
4 moves without beads (to create space for the gemstones)
3 seed beads on all cords
2cm gap
6 seed beads on all cords
16 cord Braid
When braiding with 16 cords it is best to use beads on only the 8 cords on either side of the dots (1 x 3mm, 5 x 4mm, 1 x 3mm). Two cords have been used in each of the 16 slots. Thread both cords through the larger beads and just one cord through the smaller ones. Cord length = 1.2m.
Plait Bracelet

This is made with two 8 cord braids and a length of pearls and gemstones on beading thread/wire, crimped at either end. Plait them loosely and bind them together at the ends. Cover the ends with wire cones.
Knot Bracelet
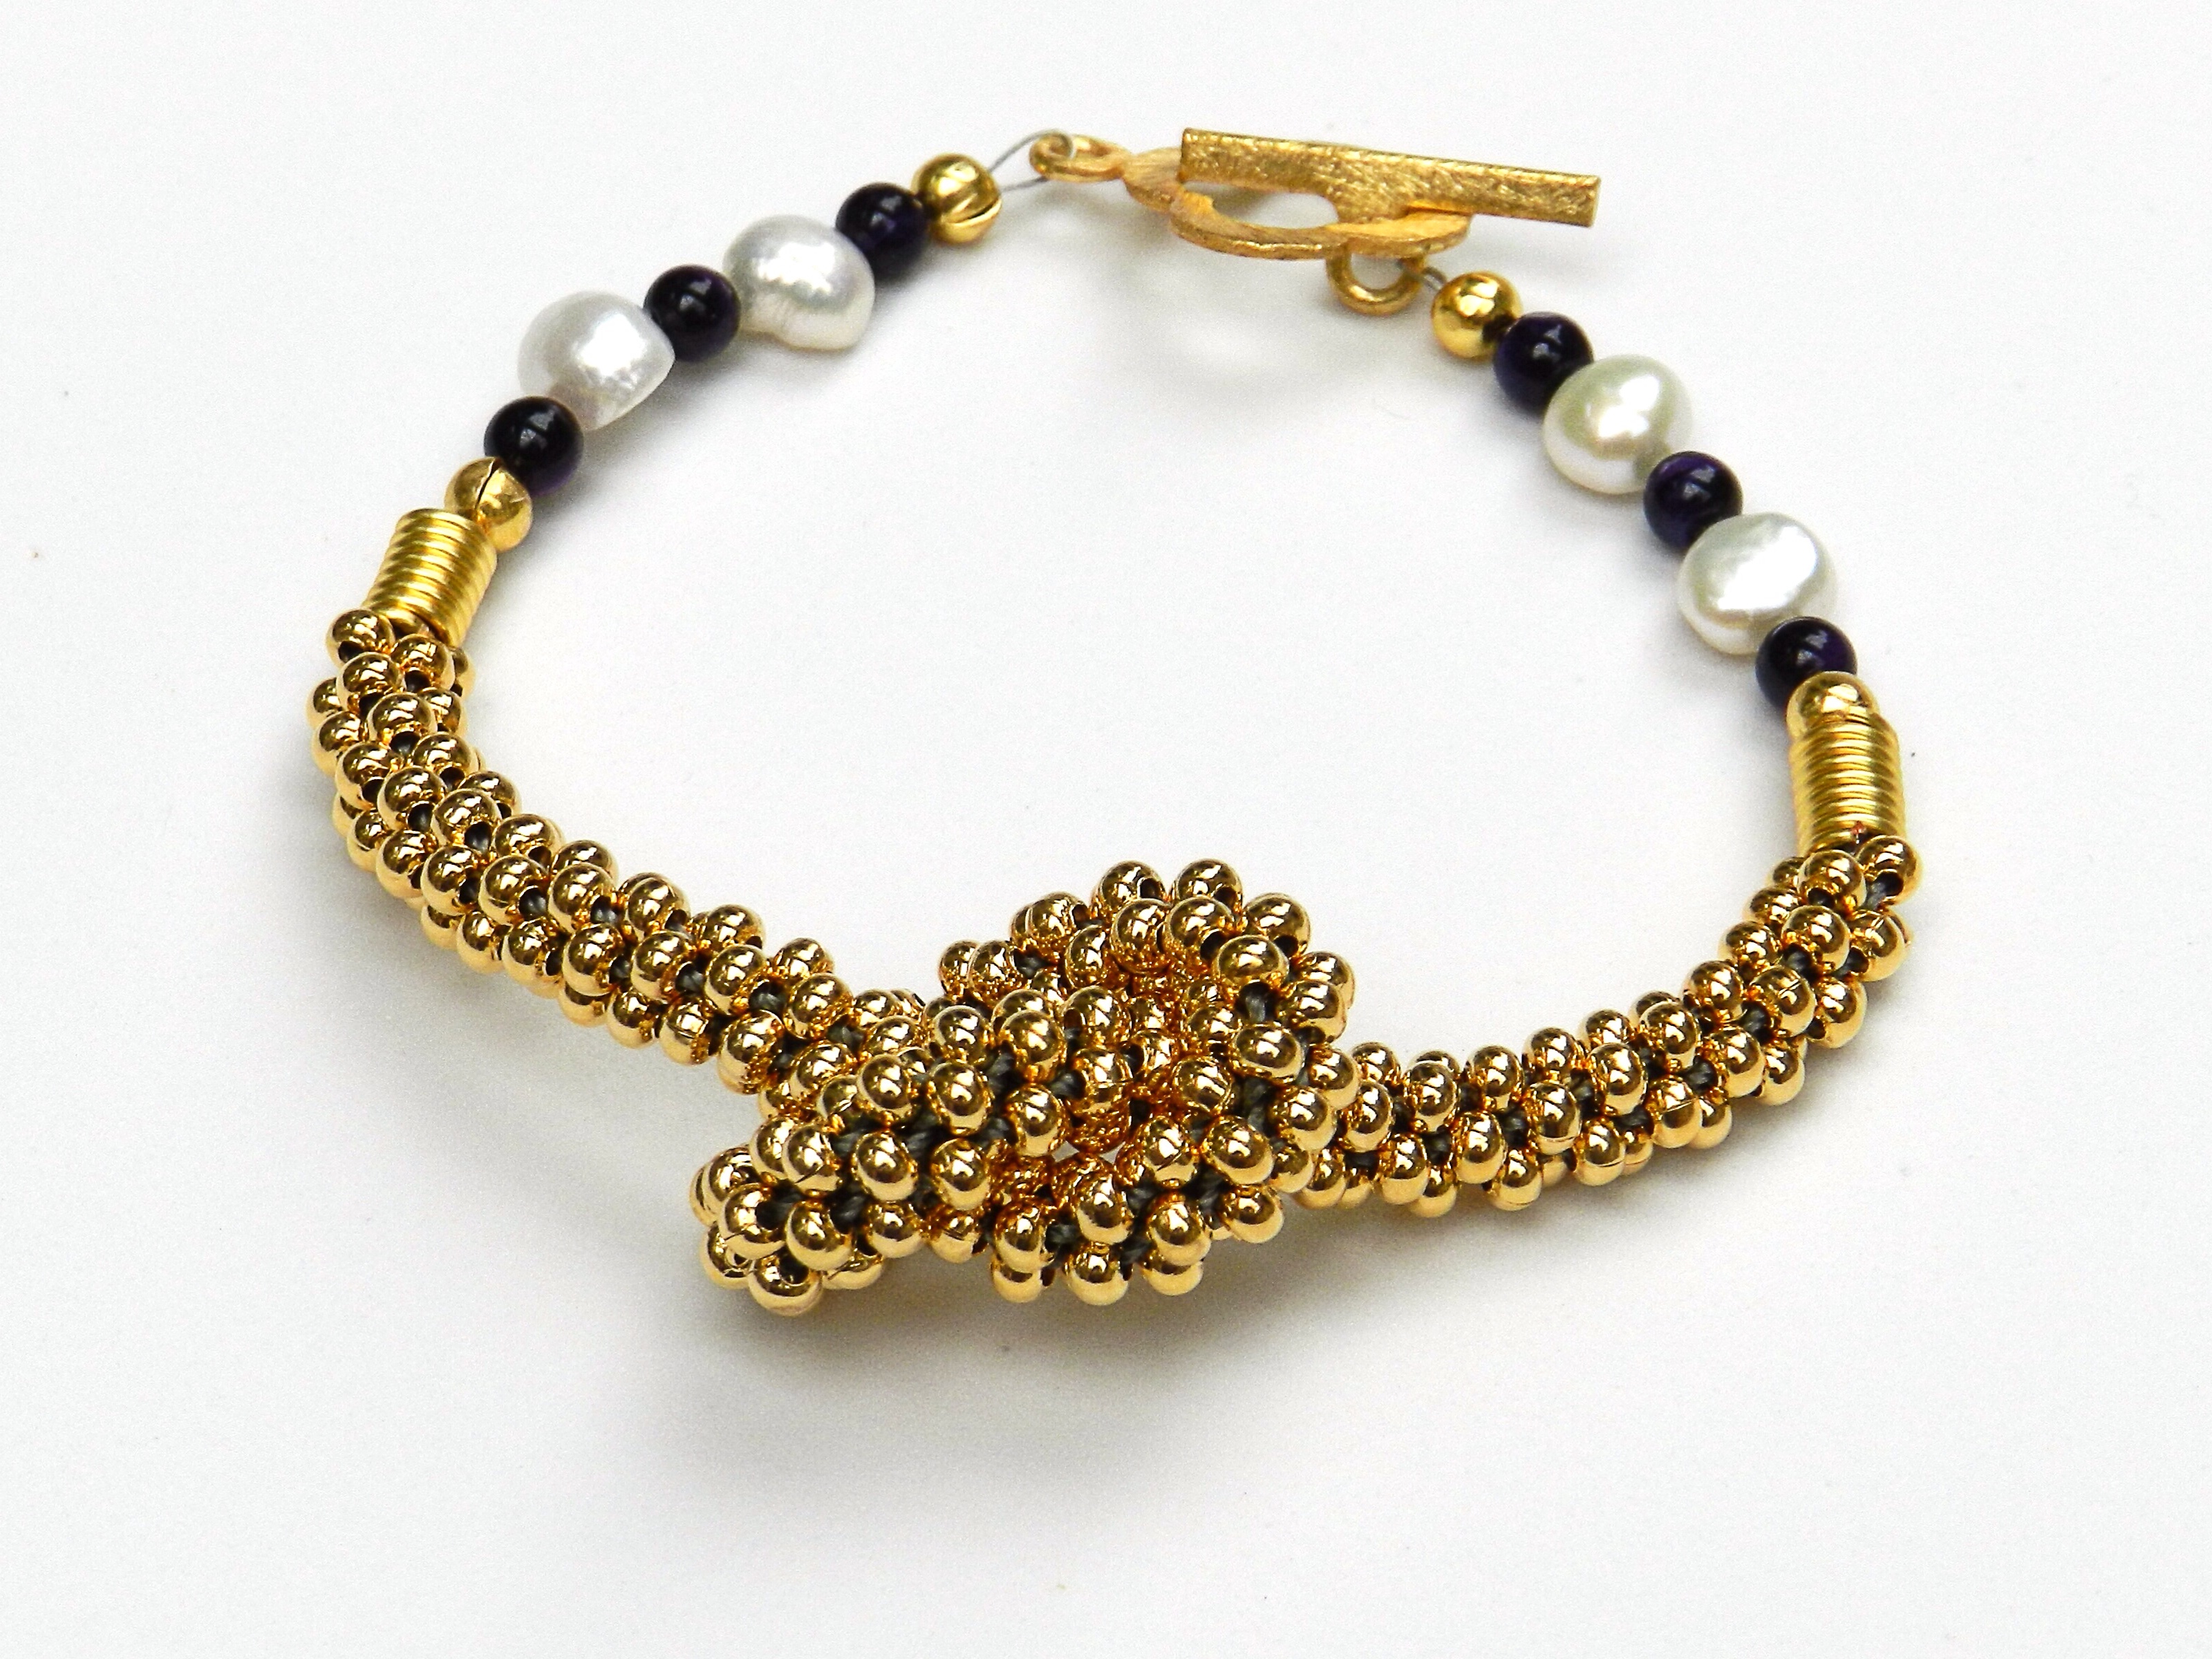
The best way to make this bracelet is to start with the braid. Individual tension will make quite a difference to how tighly the knot can be pulled, but the bracelet length can be adjusted when making the bead and pearl section. Start with 8 cords of 75cm with 50 beads on all cords. Braid in all the beads and before taking the braid off the disk experiment with the knot. Braid in more beads if necessary. Tie an overhand knot in the braid. Bind and glue the braid end and pierce the glued section with some beading thread/wire. Crimp close to the braid and thread on a few pearls and gemstones. Crimp on a clasp and repeat for the other side.
Beaded Pendant Necklace

I am not proposing to give detailed instructions for this bead weaving design because I believe it would be better to be able to demonstrate the technique. I hope to be able to do so on a future show. The technique is Flat Spiral Stitch and I used 6mm gemstones for the spine and pearls with 3mm gemstones for the spirals.