Elegance is a kit containing wire (0.25/30 gauge) chrysoprase chips, fluorite chips and large pearls. For the show I made a necklace as the demonstration piece, with a matching bracelet and earrings. I also made a wire and pearl necklace for which I was able to give a brief demonstration and a pair of earrings to match. These brief instructions are written to accompany the YouTube video, which can be found by clicking here.
These instructions canalso be used for your own selection of chips and pearls.
Chip and Pearl Cluster Necklace
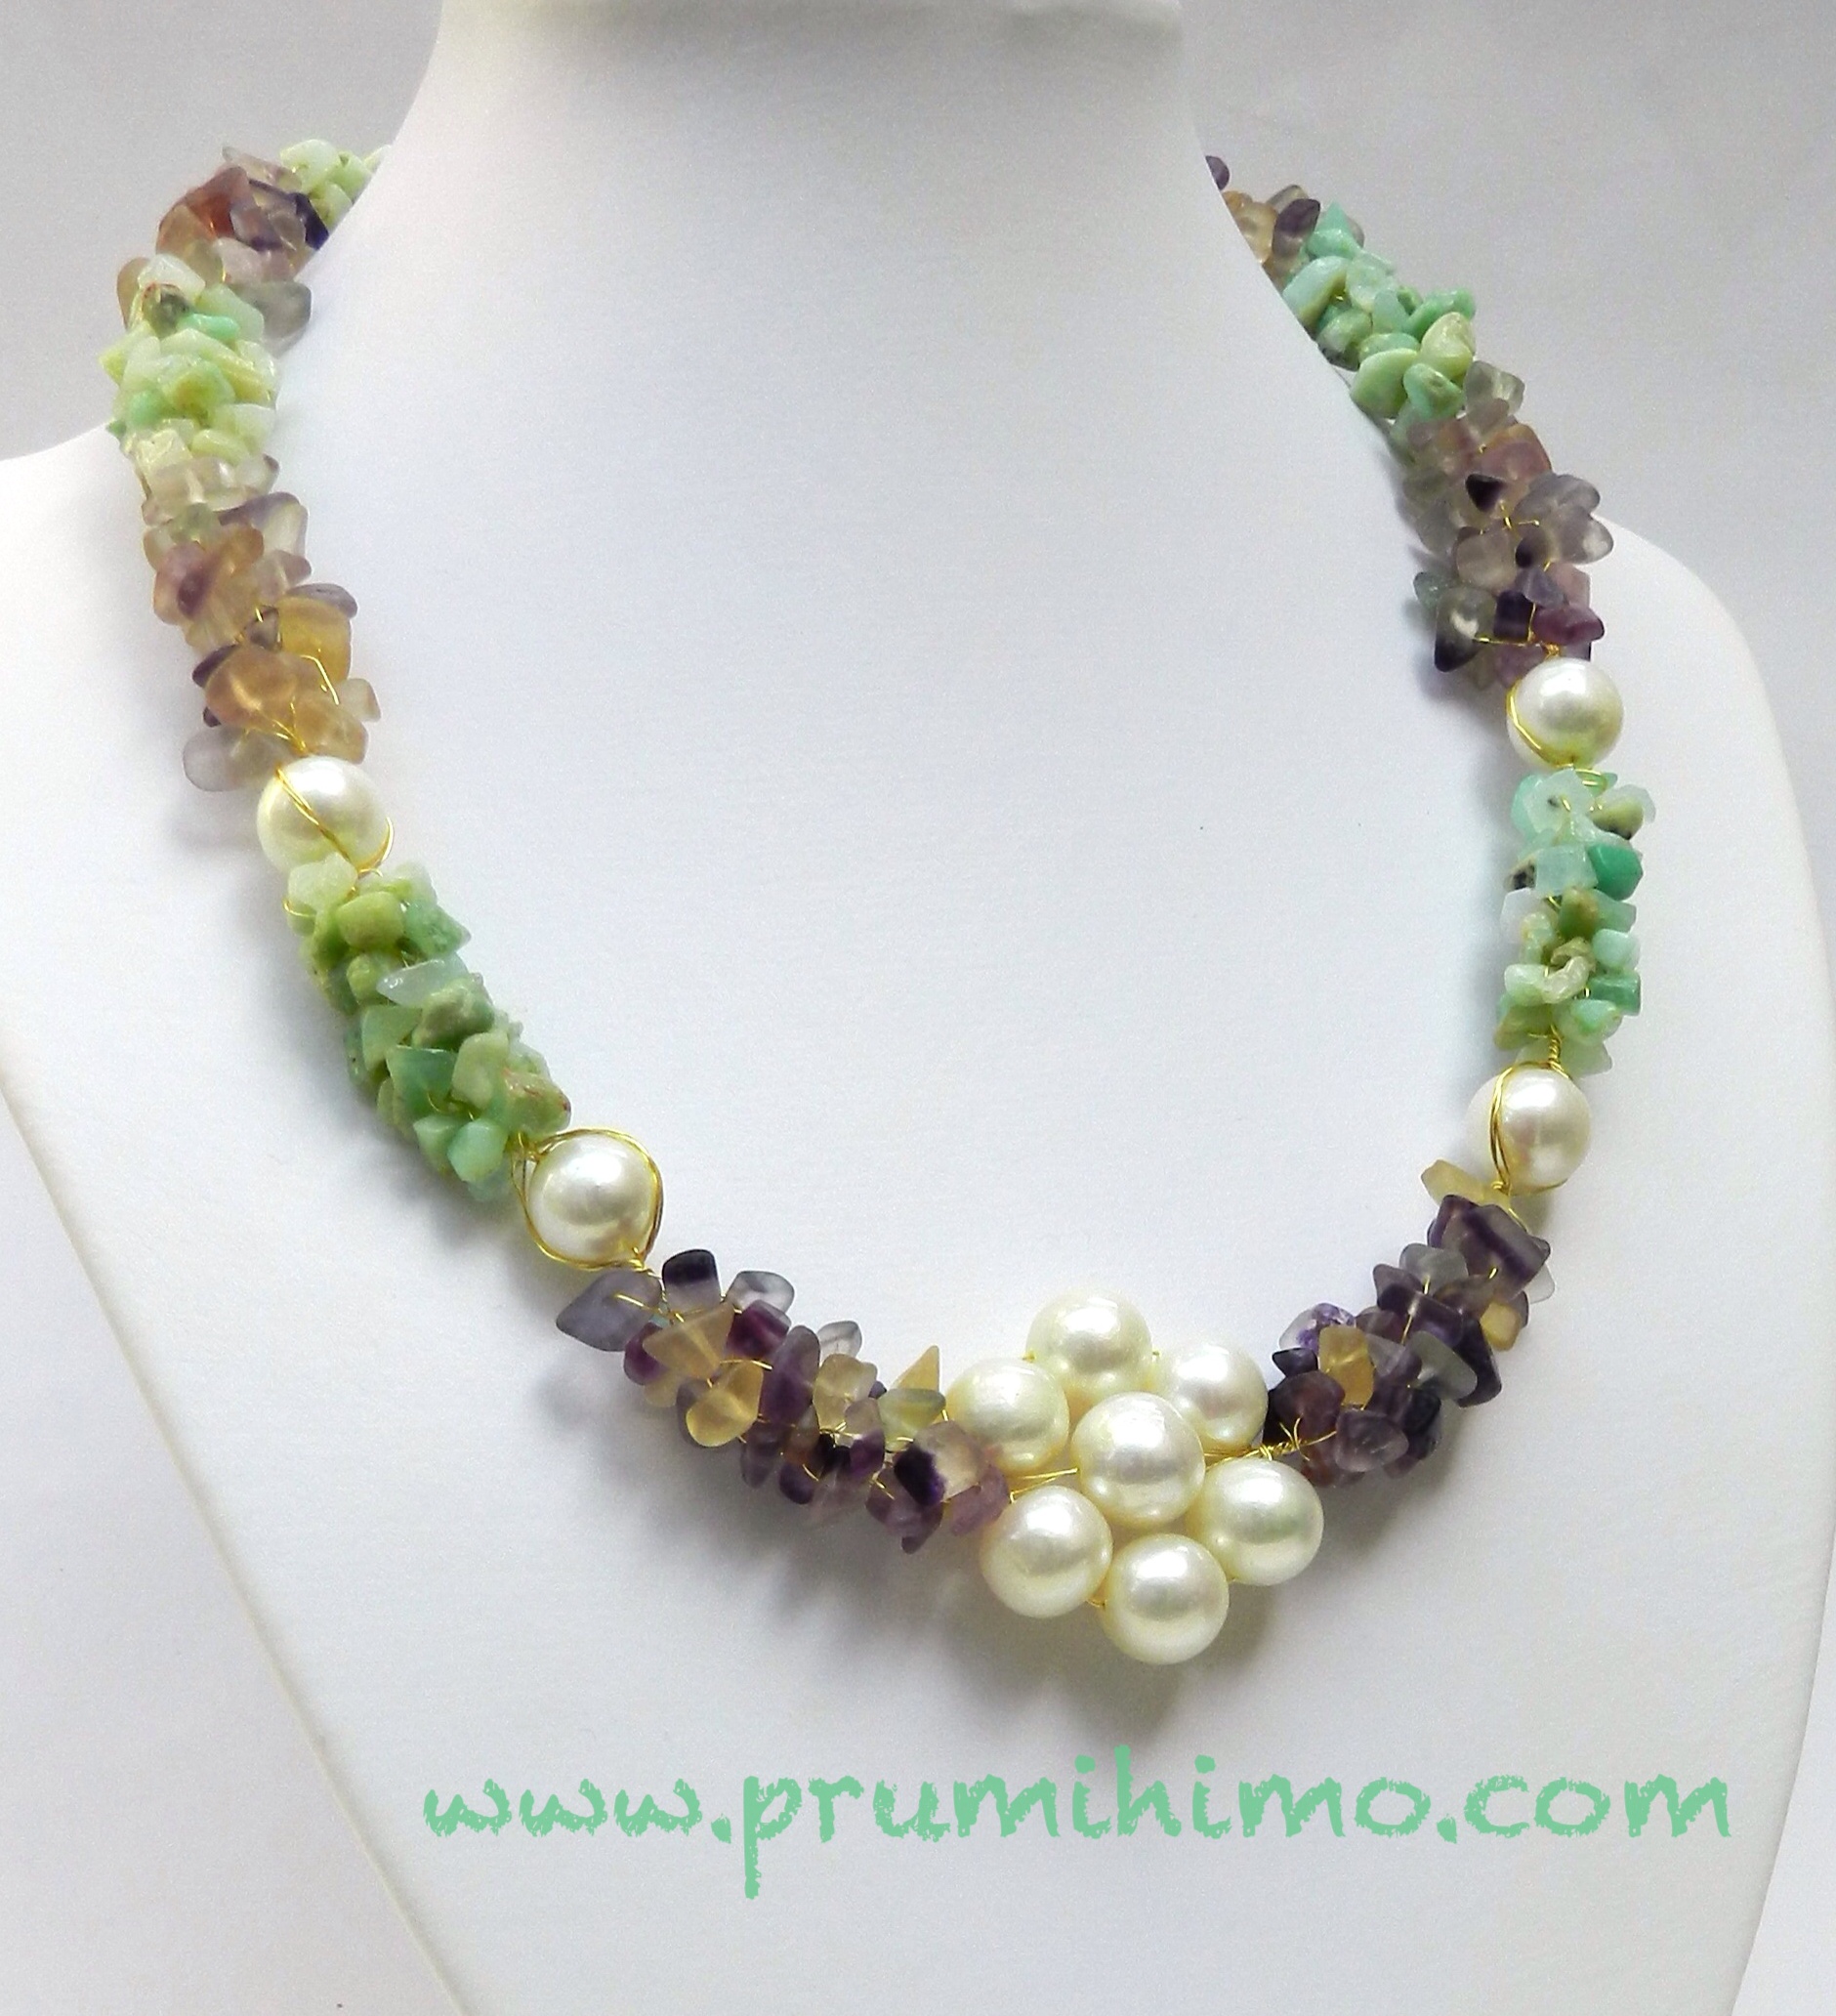
1. Cut 8 lengths of 0.25mm wire each measuring 1m. Twist them together at one end and position them on either side of the dots on the disk.
2. Braid for 3cm using Round Braid.
3. Thread the following beads onto all 8 wires, 4 chrysoprase-4 fluorite-4 chrysoprase-4 fluorite and braid them in.
4. Remove the braid from the disk and twist the wires close to the braid to secure it.
5. Thread 2 wires through a pearl and wrap 3 wires on either side of the pearl. Twist all the wires together close to the pearl.
6. Replace the braid on the disk and thread 4 chrystoprase on all 8 wires. Braid them in.
7. Repeat steps 4 and 5.
8. Replace the braid on the disk and thread 4 fluorite on all 8 wires. Braid them in.
9. Remove the braid from the disk. Thread 2 wires through one pearl. Thread 2 wires through 3 pearls. Form the pearls into a flower shape and twist all the wires together, including the 2 wires without pearls.
10. Repeat the process to make the second half of the necklace and braid without beads for 3cm.
11. Use the end of the braid to make a wrapped loop and attach a clasp.
Bracelet
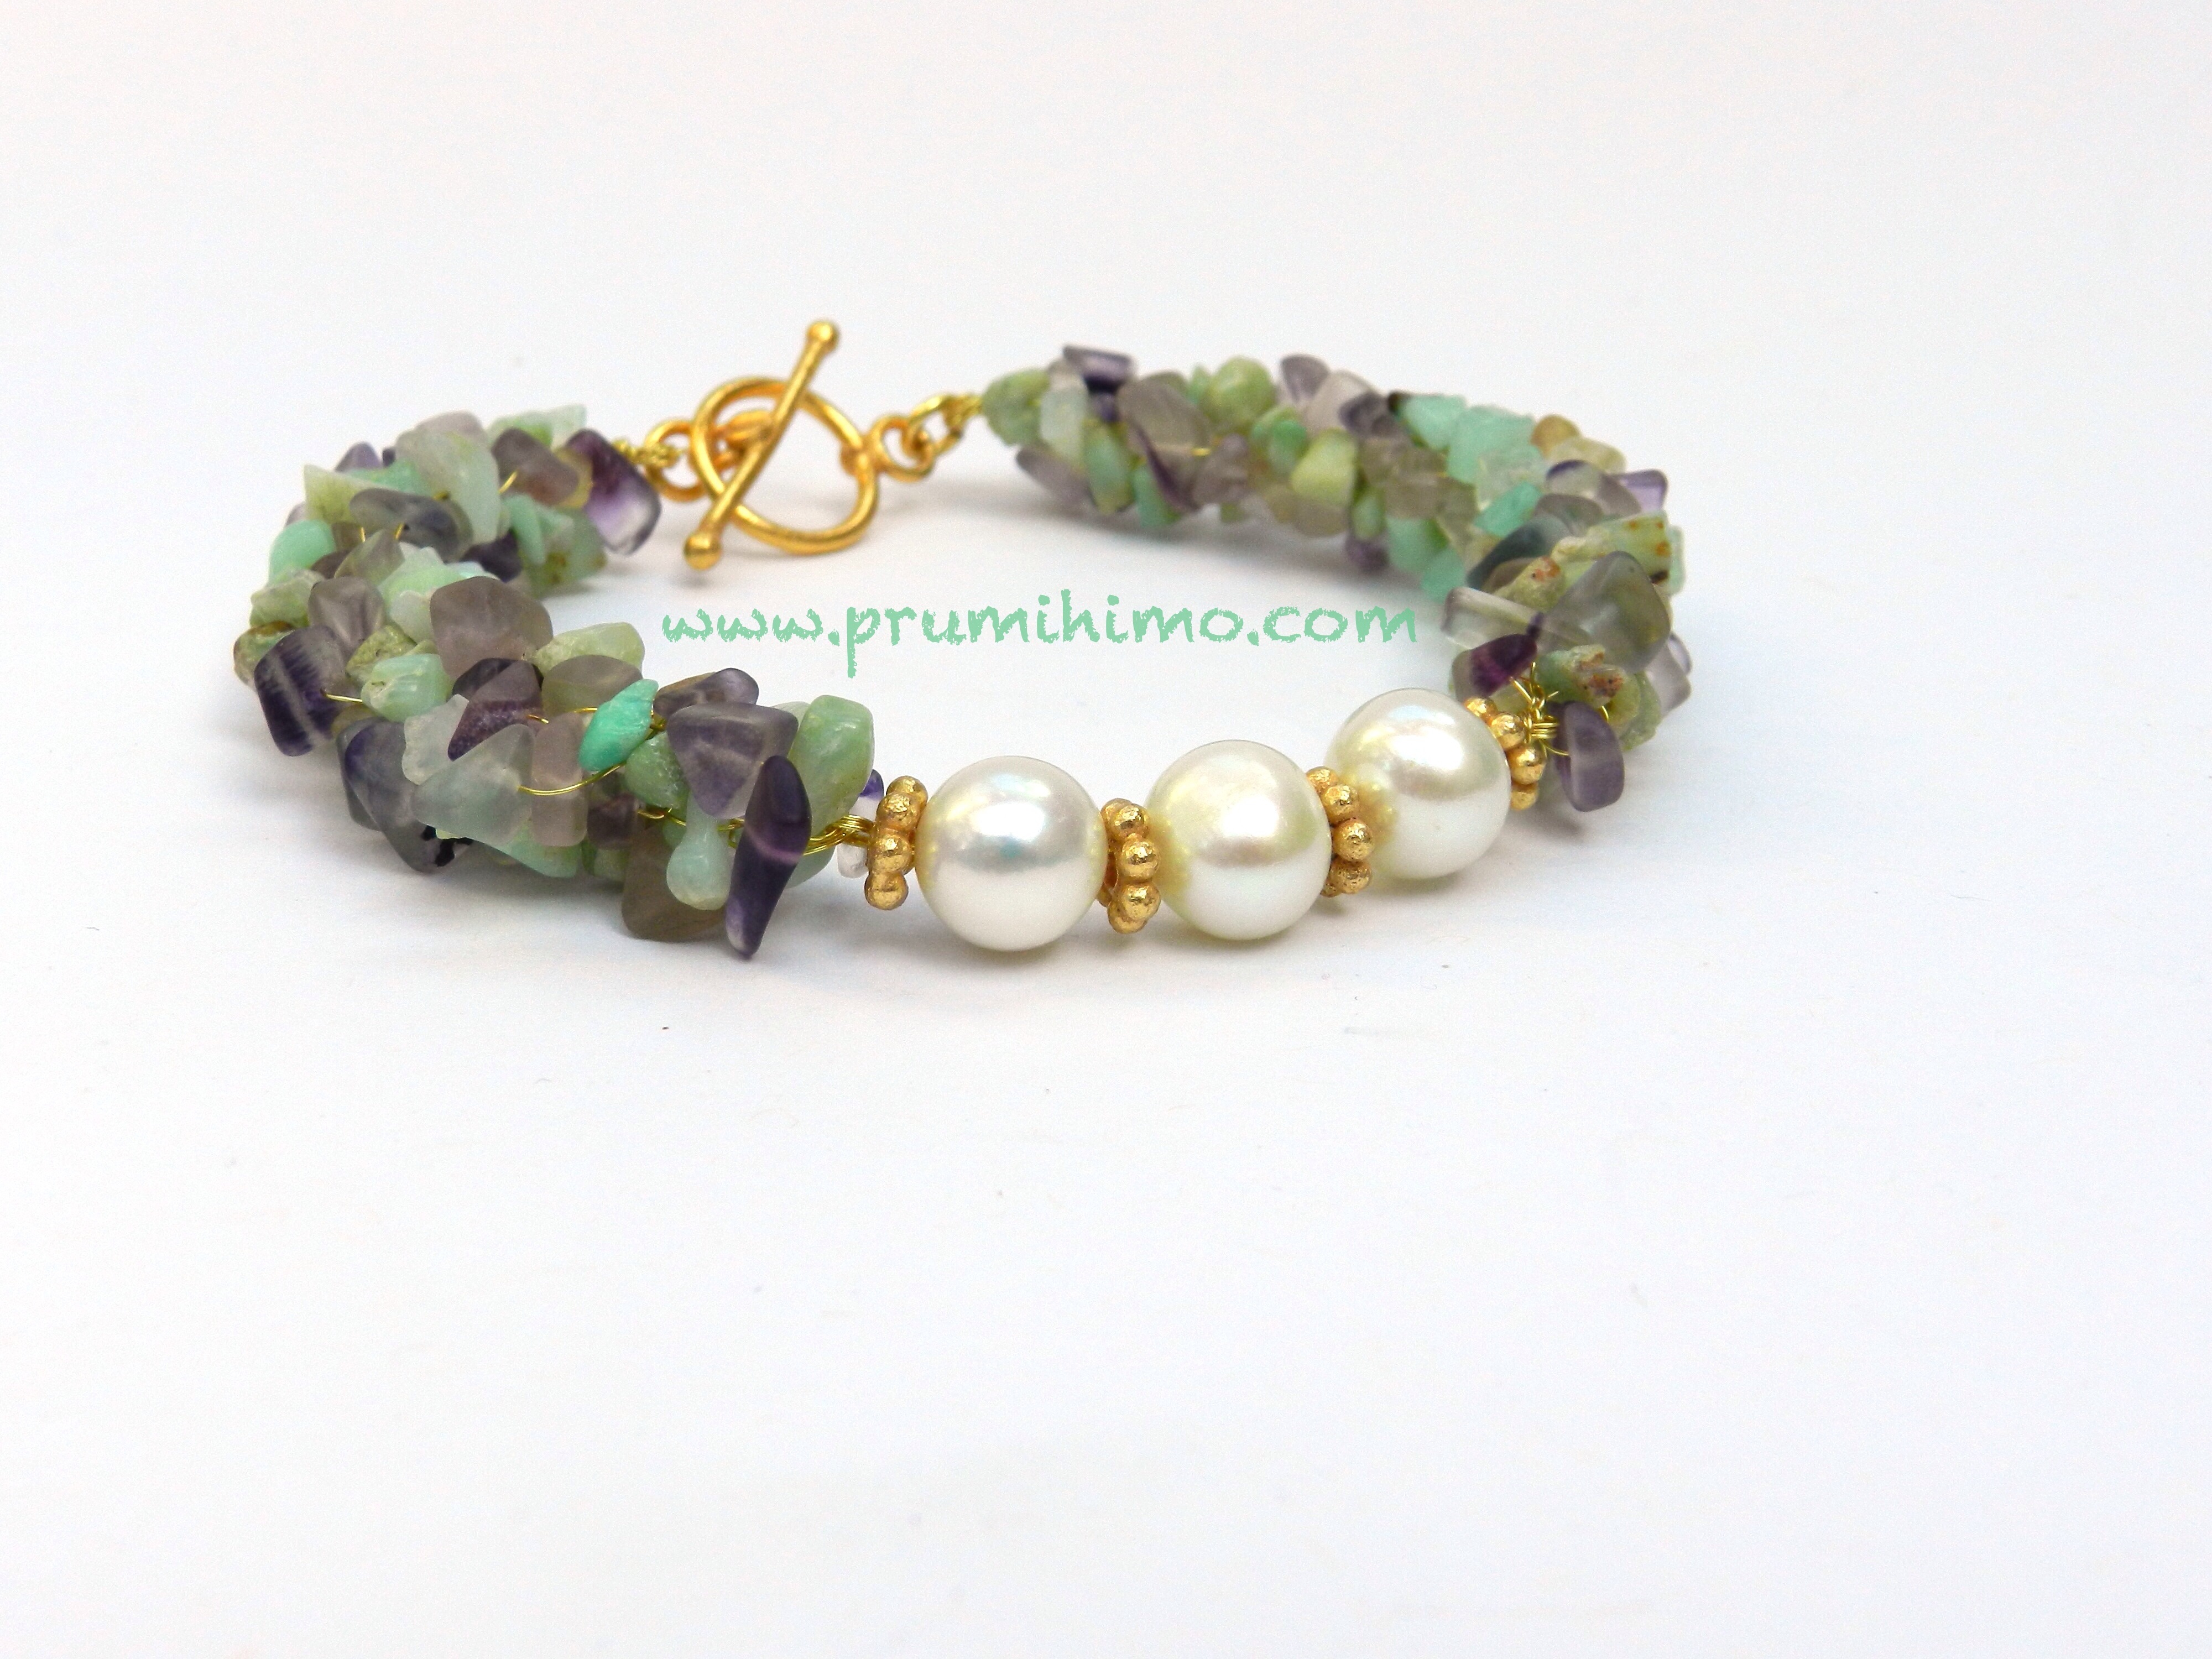
1. Thread a selection of pearls and spacers onto a length of 0.8 wire and make a wrapped loop at either end.
2. Cut 4 lengths of 0.25 wire measuring 50cm.
3. Thread the wire through one of the wrapped loops, centre the wire and position it on the disk on either side of the dots. Use Round Braid to braid for 8 moves.
4. Thread on 20 chrysoprase chips onto 4 wires (opposites on the disk) and 20 fluorite chips onto the other 4 wires.
5. Braid the chips in and braid without chips for 3cm.
6. Use the end of the braid to make a wrapped loop and attach a clasp.
7. Repeat for the other side.
Earrings
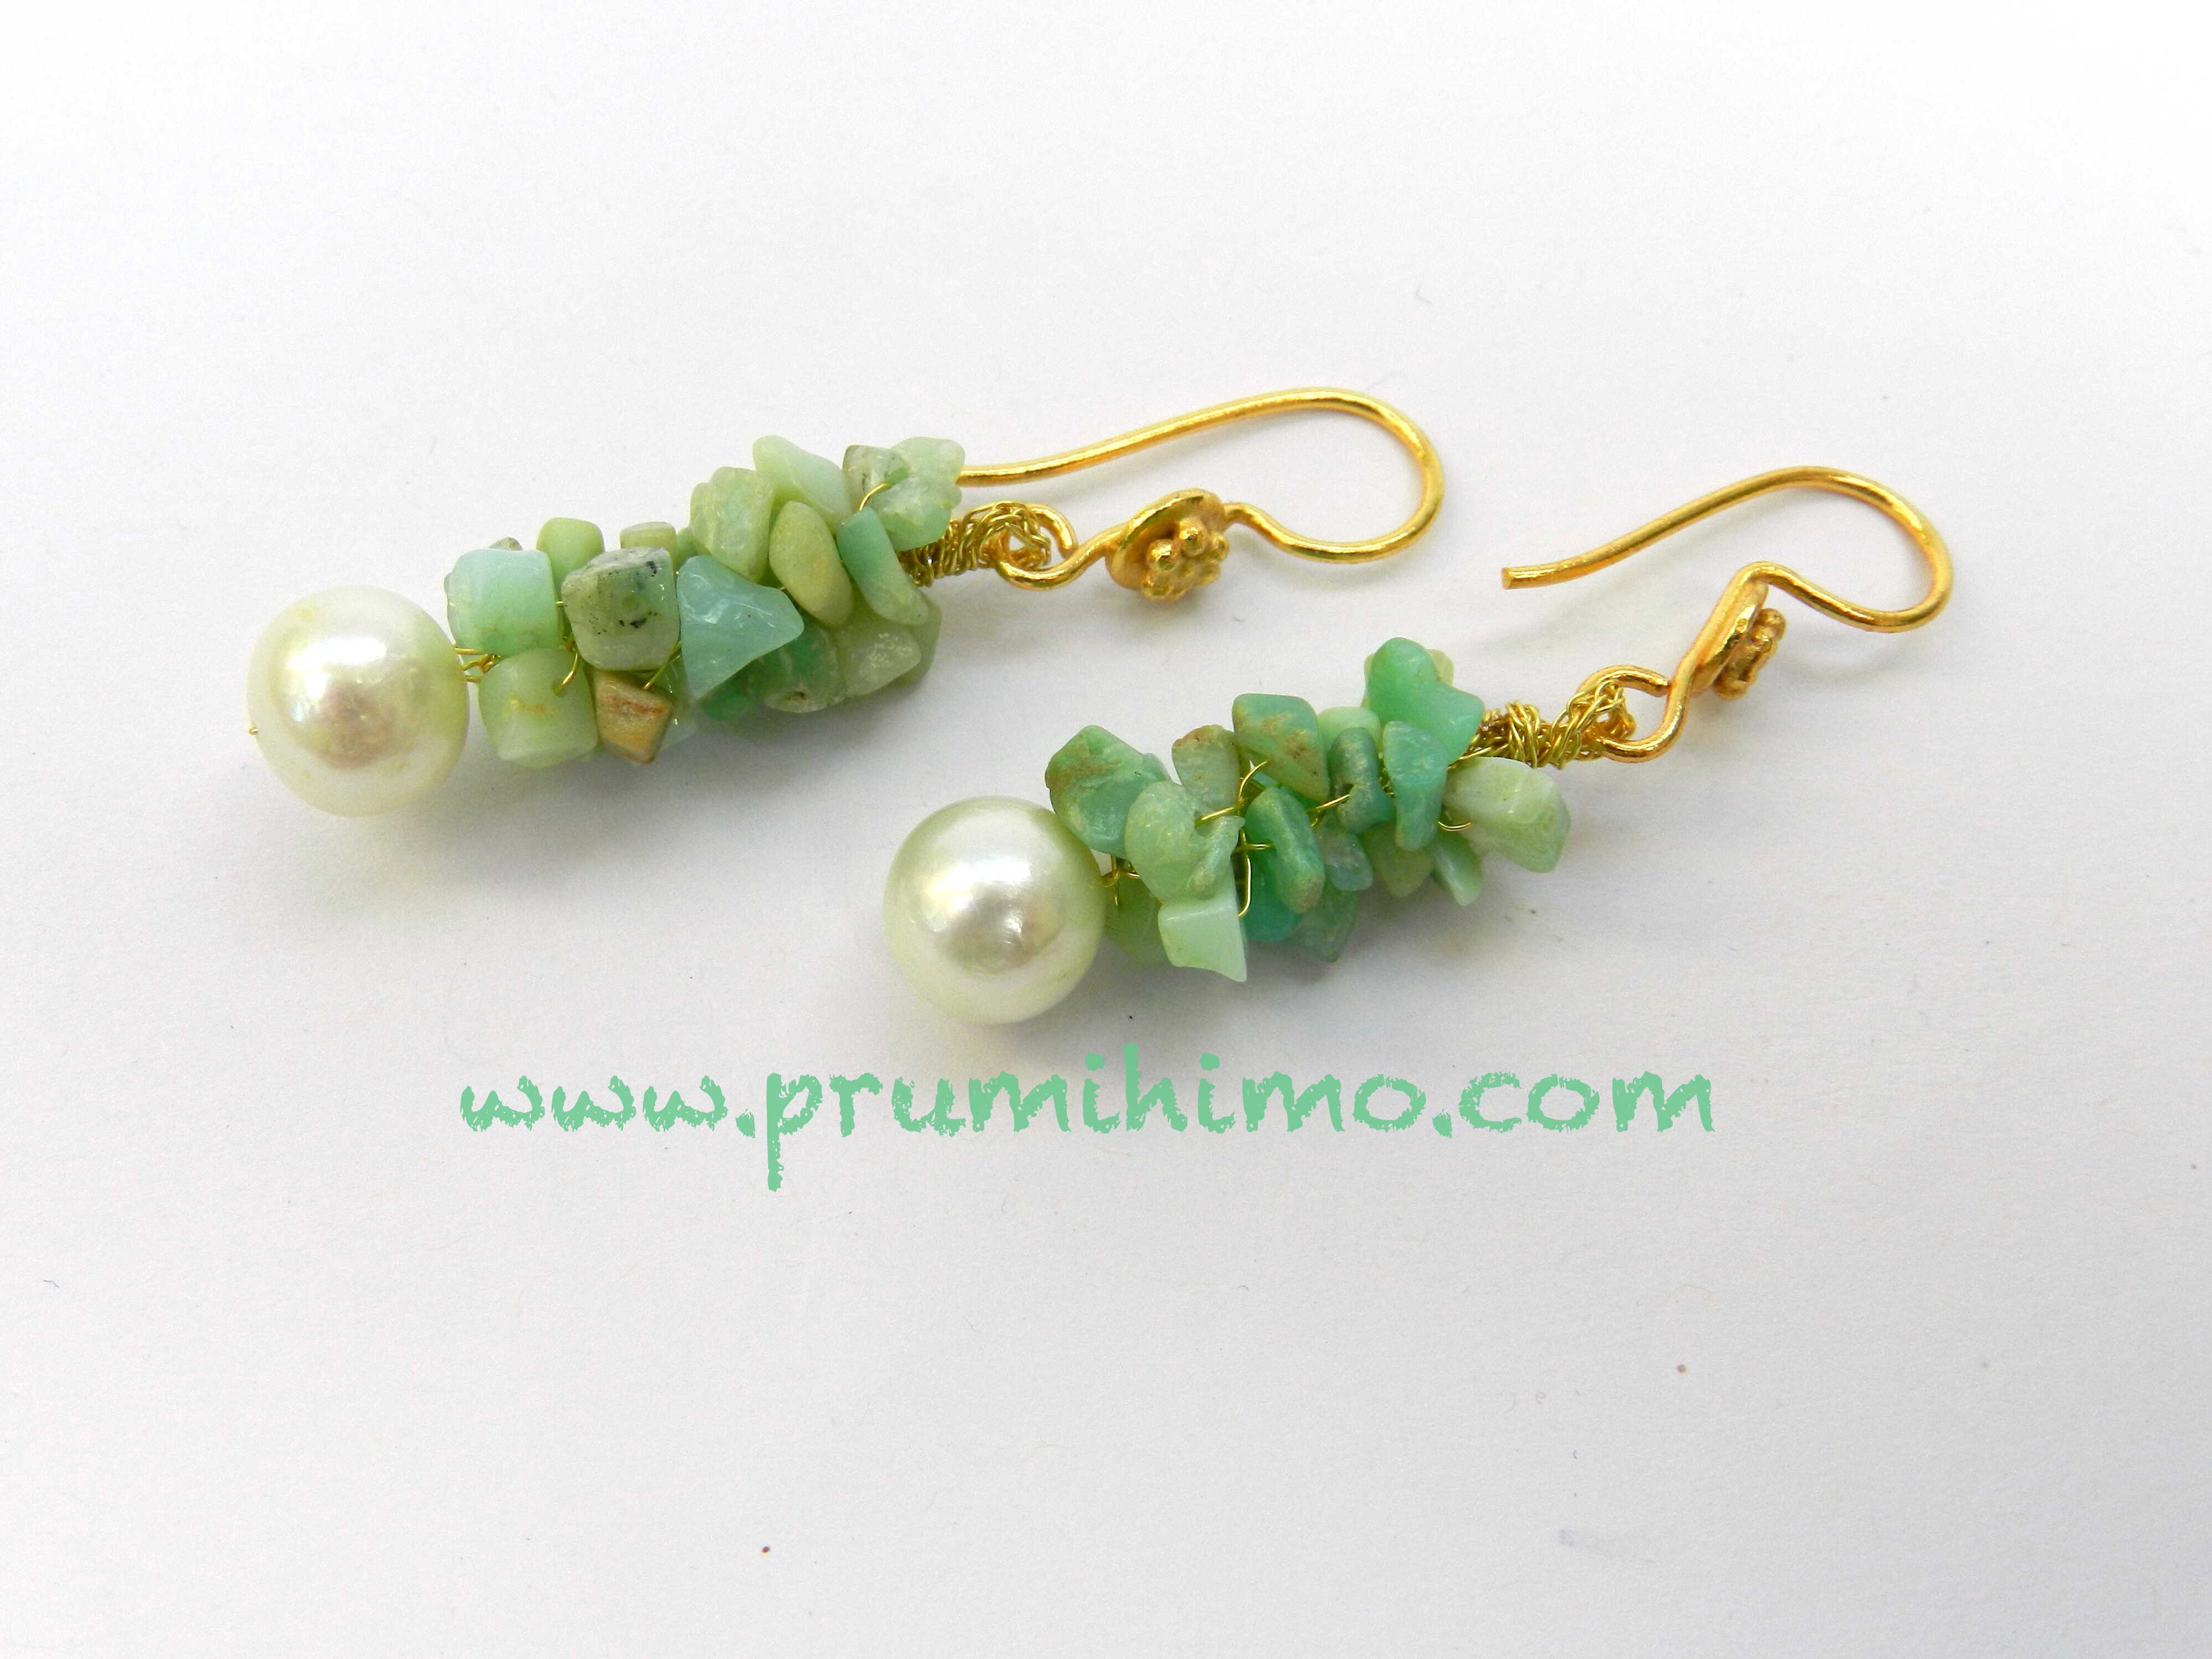
1. Cut 8 lengths of wire measuring 30cm.
2. Bend one length in half and thread the two ends through a pearl, pulling the wire so that only the bend is protruding from the pearl.
3. Use the wire in the pearl to wrap around the middle of the rest of the wiress and position all the wires on the disk on either side of the dots.
4. Thread 4 chrysoprase onto all 8 wires and braid them in.
5. Braid for a further 3cm without chips and use this part of the braid to make a wrapped loop and attach the earring hook.
6. Repeat for the other earring.
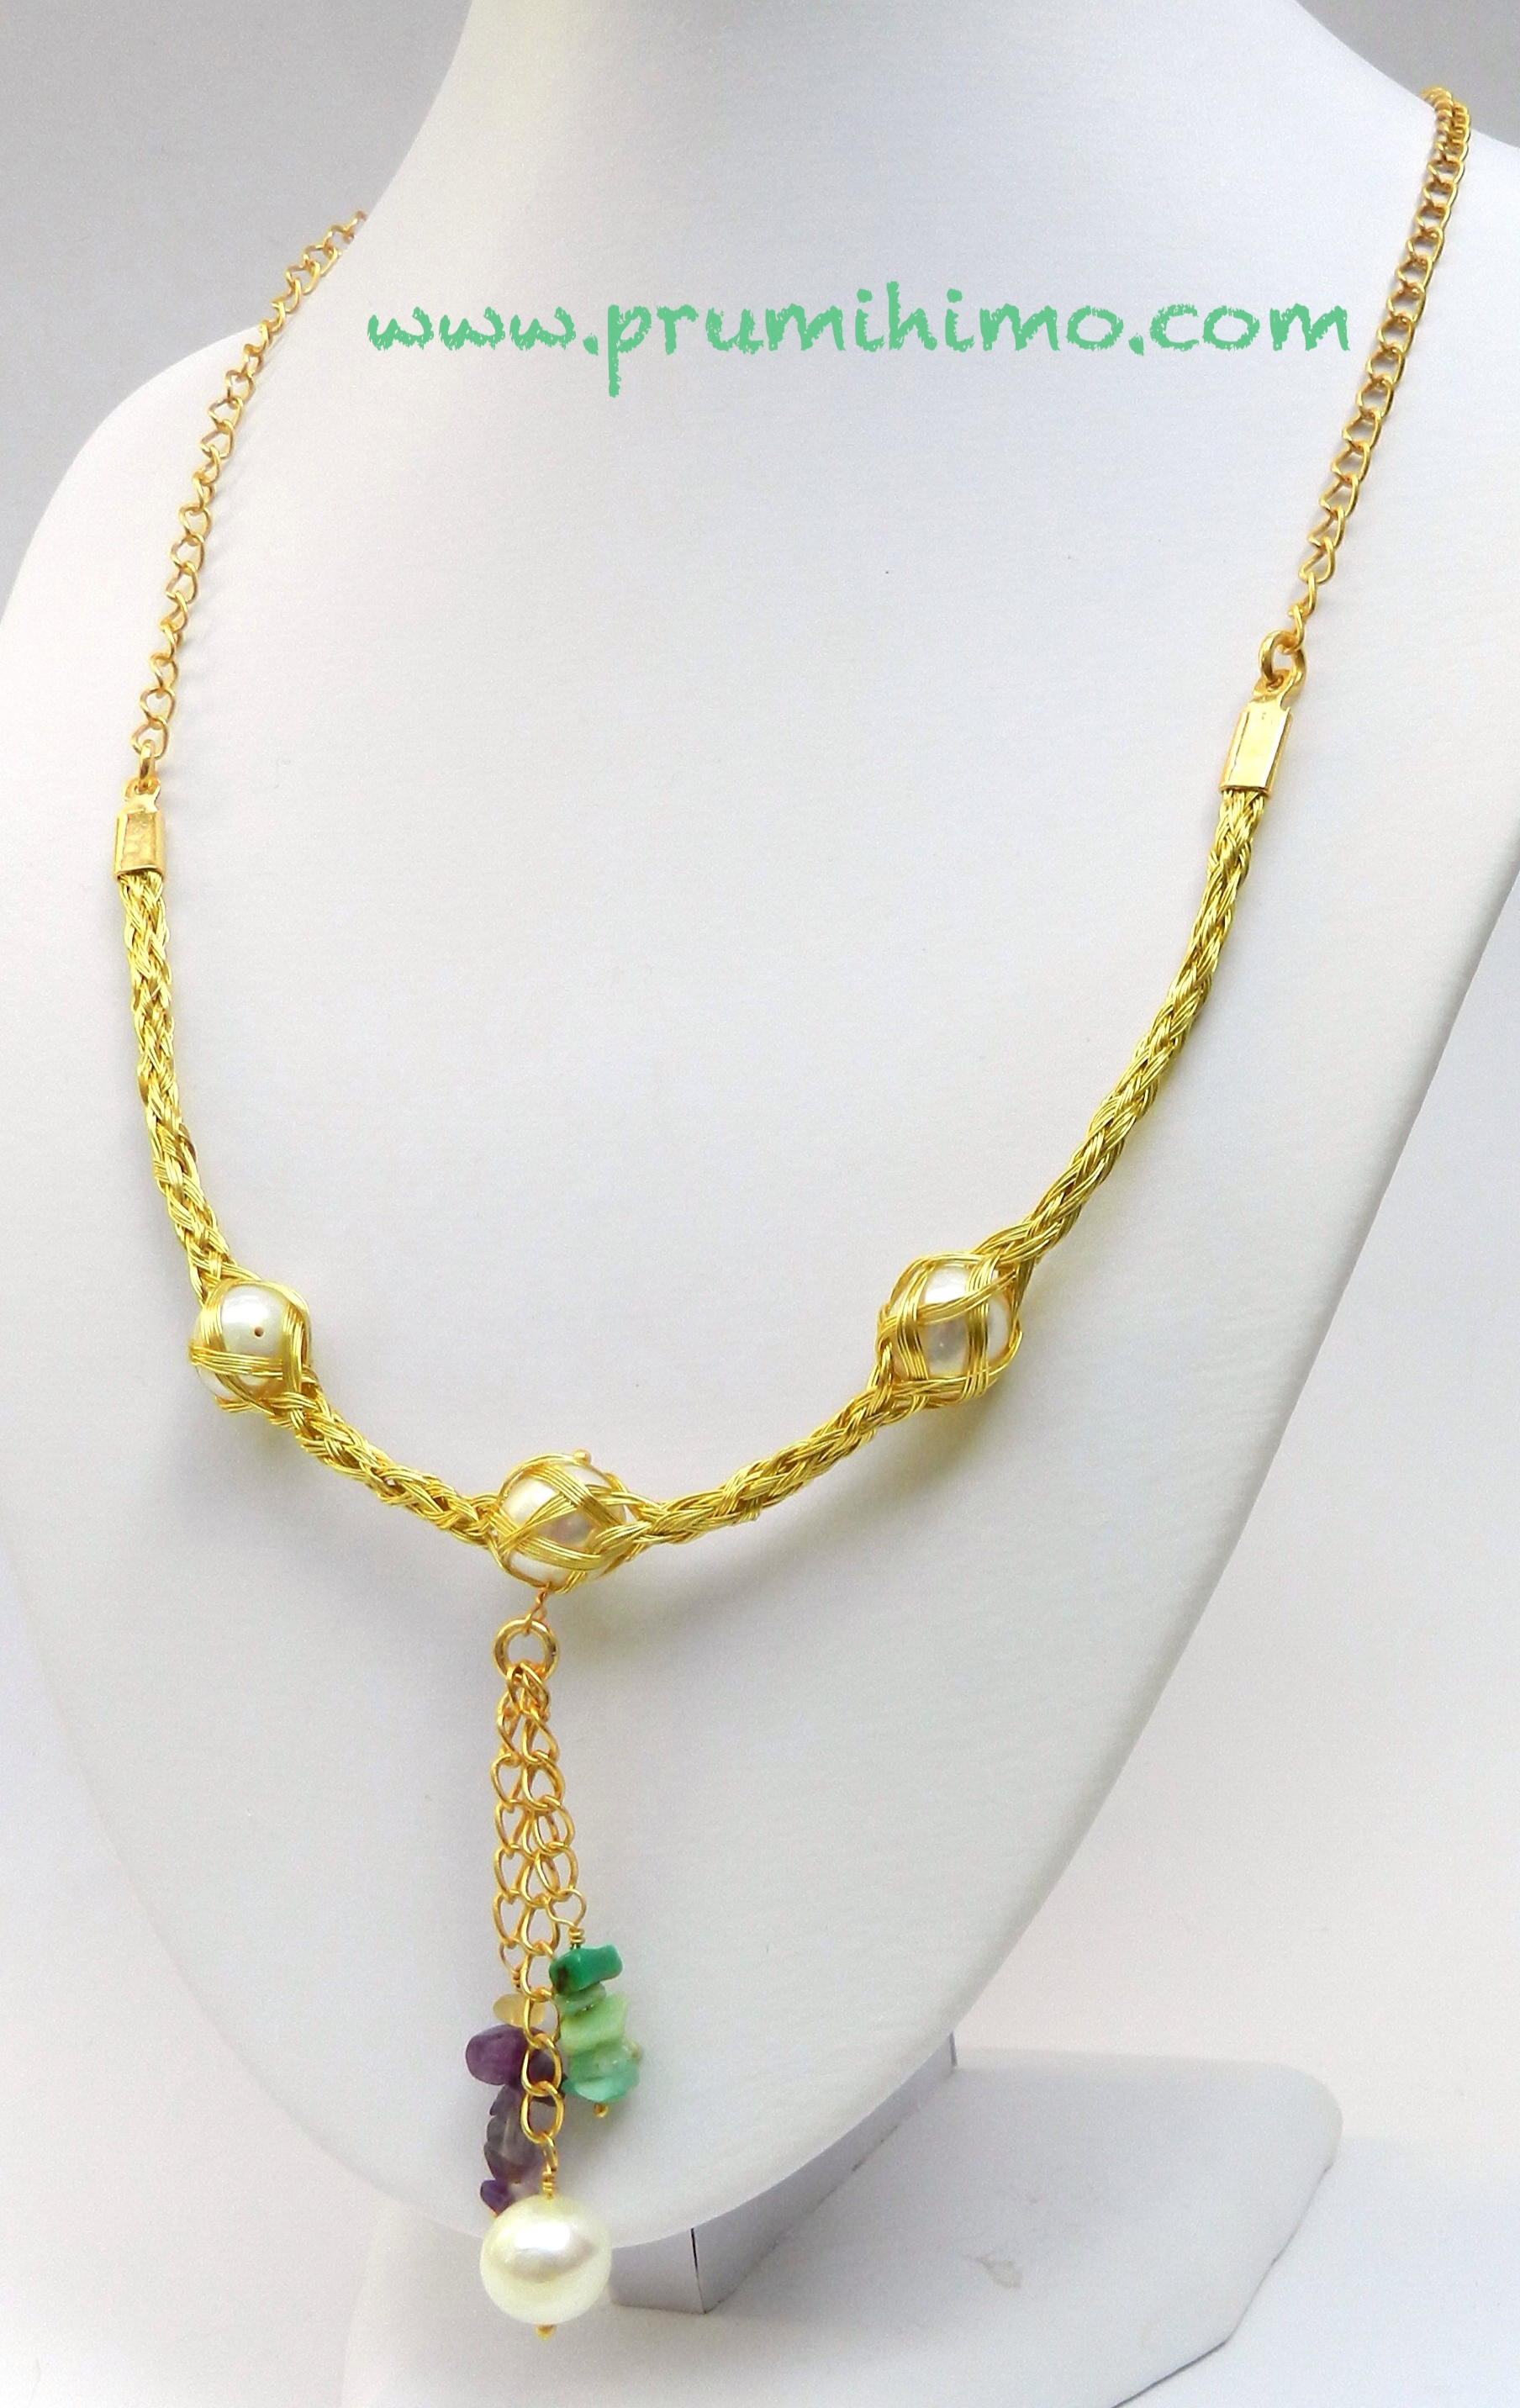
Wire and Pearl Necklace
This necklace and the matching earrings are made using bundles of thin wire. If you have not used this method before you may find it useful to purchase one of my wire tutorials, which are very detailed and have lots of step-by-step photos. They also include a lot of valuable advice on working with wire. Find the shop here.
1. Cut 6 lengths of 0.25 wire measuring 75cm and twist them together at one end. Repeat to create 8 bundles.
2. Position the bundles on the disk on either side of the dots.
3. Braid using Hollow Braid.
4. Once 5-6cm has been braided press a pearl into the point of braiding. Resume braiding to capture the pearl.
5. Braid for 3-4 cm and press a pearl into the point of braiding. Resume braiding to capture the pearl.
6. Repeat step 5, making sure the pearls are placed symetrically.
7. Braid without pearls to match the first side of the necklace.
8. Trim the ends of the braid and secure them with cord ends.
9. Find the hole in the central pearl and thread a headpin through it. Make a wrapped loop close to the pearl. Attach a selection of pearls and chips to chain and then to the wrapped loop.
10. Attach double lengths of chain to each side and finish off with a clasp.
Wire Earrings

1. Use the same method to make the braid as used for the necklace, using 50cm lengths of wire.
2. Cut the braid in half and use a small pot or container to shape it into a circle.
3. Use pliers to form a right angle 0.5cm from either end of the braid.
4. Make a short coil using 0.8 wire. Slip the coil over the two ends of the braid so that a circle is formed.
5. Take a long headpin, thread on a pearl and push the headpin through the coil, from the bottom. Add a spacer bead and another pearl and finish off with a wrapped loop. Attach an earring hook and repeat for the other earring.
I am working on a new range of wire kumihimo designs which will soon be available as tutorials. This will include very clear and detailled instructions with step-by-step photos to make earrings, bangles and necklaces. Watch this space!
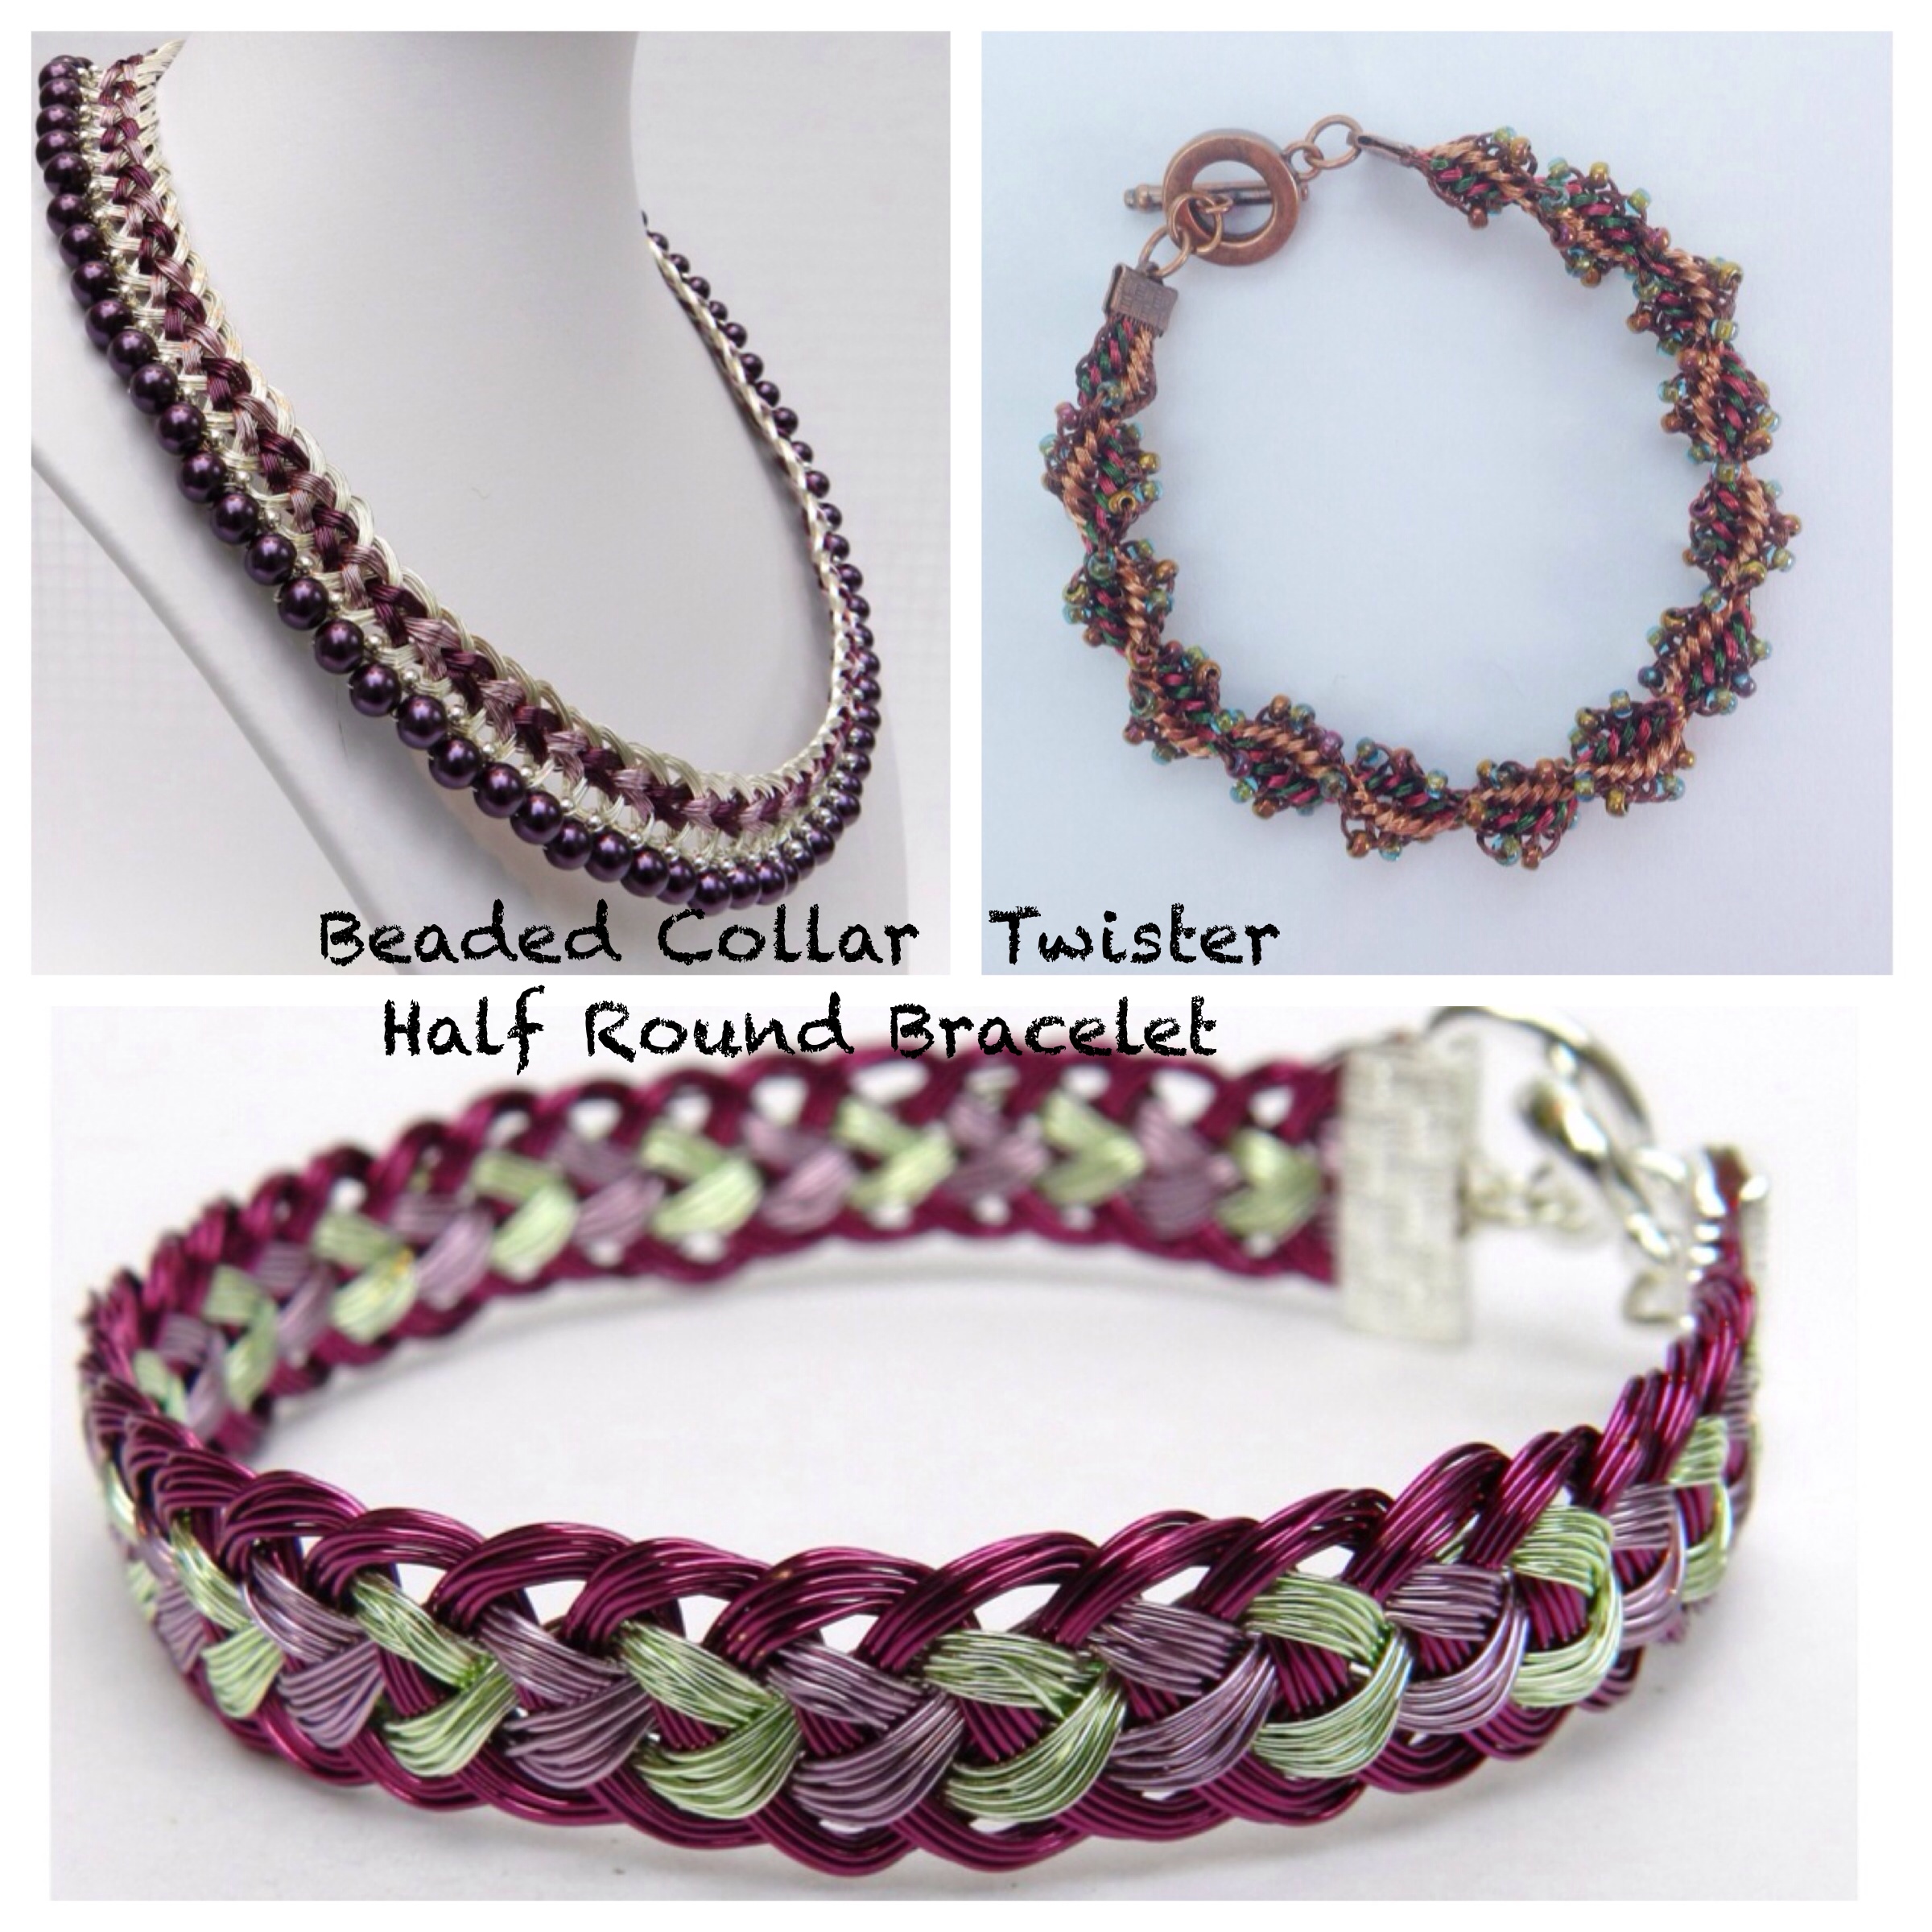
In the meantime, take a look at these tutorials by clicking on the name!
Beaded Collar, Twister, Half Round Bracelet.