
This is the start of the second Kumihimo by Prumihimo and Friends group braid-along. This group activity is all about learning to use beads on the Prumihimo disk and sharing what we make, so that we can learn from each other. For week 1 the task is to make a braid using the single beading method, which creates a single row of beads on one side of the braid. I have filmed a video to explain the technique and I recommend that this is watched first. Then the following bracelet instructions can be used to make a bracelet. If you prefer you can use more cord and beads to make a necklace. You will need to multiply the quantities by approximately 2-2.5 times. The fun comes when everyone shares their braids and we see how different the bracelets can look depending on the sizes, shapes and colours of beads used. I hope that people will get creative and hunt through their stash to find unusual beads. All I ask is that for this first week of the braid-along you stick to single beading, which is beads on just one side of the braid. When you have made your bracelet please post it in the dedicated post in the group. This keeps all the work together and forms a valuable resource for our group. Please be sure to read the comments and questions in the post before asking questions, so that we do not have duplication.
- Watch this video
- Gather your materials 4 x 60cm (24 inches) 2mm satin cord, 4 x 70cm (28 inches) beading cord 0.5mm/Tex210, 15-18 size 8 seed beads and 15-18 larger beads
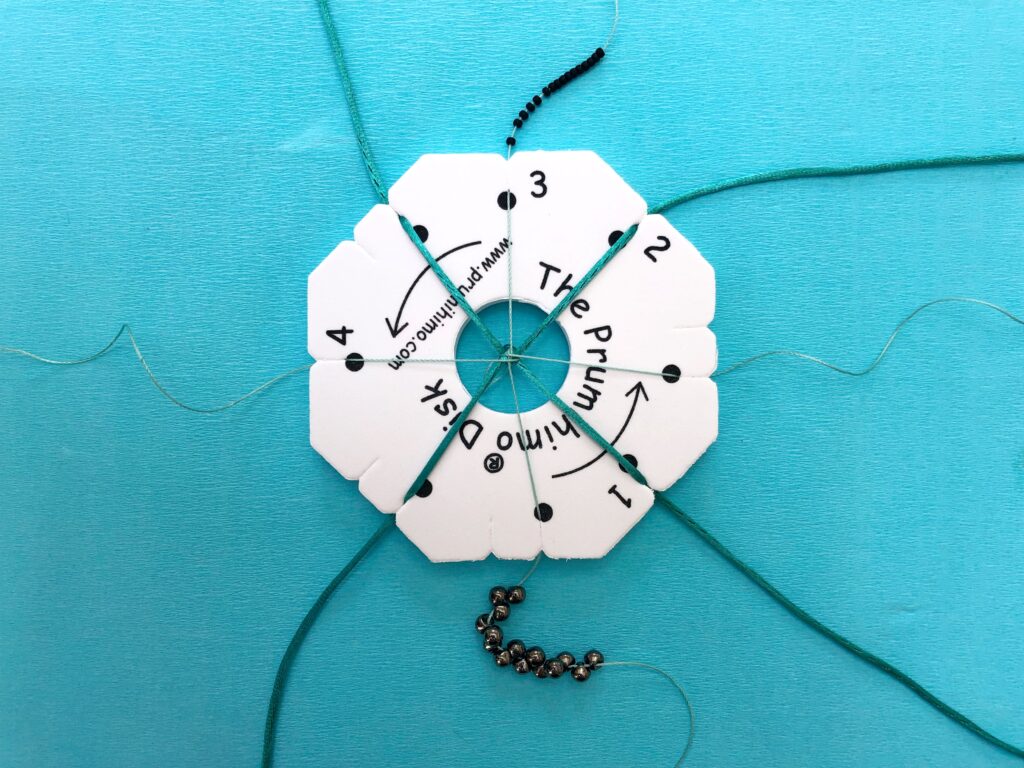
- Set up your disk. Tie all the cords together at one end and put the satin cord in the top and bottom slots with dots at numbers 1 and 2. Put the beading cord in the top and bottom slots with dots at numbers 3 and 4.
- Braid for approximately 2cm (1 inch)
- Thread 16-19 size 8 beads onto the top cord at 3. (You will start and end with a small bead, so one more than the large beads is required)
- Thread 15-18 larger beads onto the bottom cord at 3.
- Continue to braid, adding in a bead from the top cord at 3 in every sequence of moves.
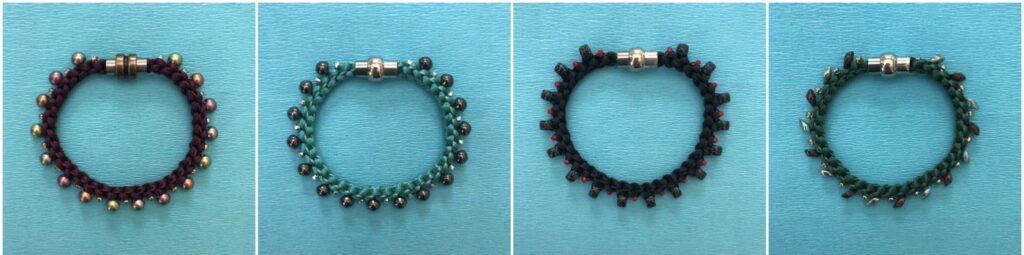
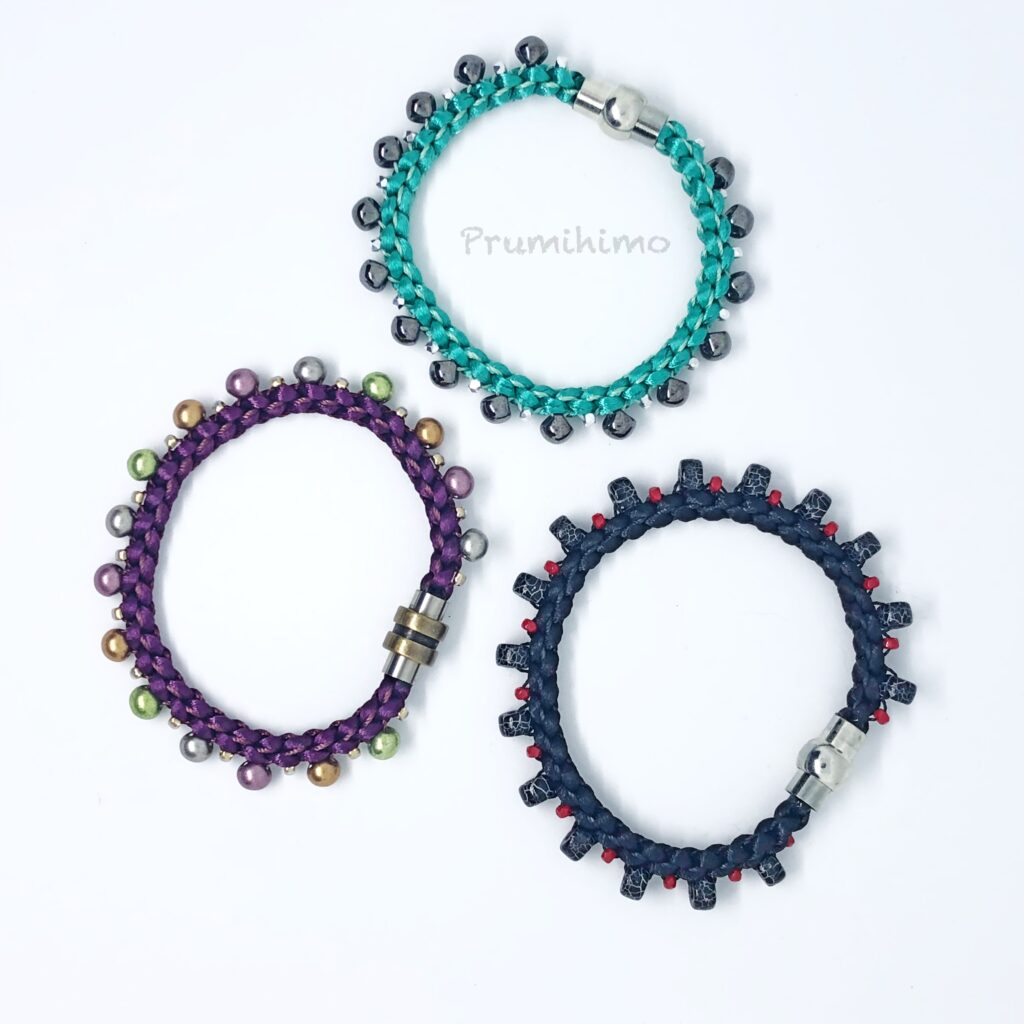
- Check your braid. The beads should be forming in a straight line along the braid, alternating between small and large beads.
- Continue to braid until the length is correct for you, taking into account the length of the clasp and how much of the braid will be inside the clasp. Make sure you finish with a small bead. Every braid and every wrist is different, so it is never possible to give instructions for exactly how many beads to use. This part is up to you!
- Remove your braid from the disk. Knot the braid to prevent unravelling
- If your braid is slightly twisted you can straighten it using the steaming method. Click here to find instructions.
- Attach your clasp. If you need help attaching your clasp please watch this video.
- POST YOUR WORK IN THE WEEK 1 POST IN THE GROUP.
- If you like what you have made, try making another one with different beads. If you were left with lots of unused cord you can adjust the cord lengths for the next one. The single beading method is particularly effective for necklaces, so perhaps you could try a matching necklace.
- Admire and learn from the work of other members.
Trouble shooting
If your braid is moderately twisted you can flatten it by steaming it.
If your braid is knobbly, lumpy or kinky you need to return to practising the braid without beads. Watch this video. Make sure you are following the instructions correctly and practise until you can braid accurately and confidently. Then try again.
If your braid is floppy it is probably the result of using cord that is too soft or of using a disk with stretched slots. Try again with a firmer cord. Try using weighted bobbins or tape a couple of coins to regular bobbins to increase the tension.
If the braid is too long or short make sure you learn from it because this first braid will be used to get the sizing right for the next bracelets.
Many people in the group are very proficient and creative braiders on the Prumihimo disk and this relatively simple task may not seem to be of interest to them, but I really hope they will join in too. There is more to the braid-along than just learning the skills. It is also about having fun and encouraging others, while strengthening our braiding community. The contribution from those at different stages in their kumihimo adventure is what will make this braid-along a success.