These videos are a little different because I have been set a challenge by Juliet at Spoilt Rotten Beads to make 4 different designs using a selection of 4mm mushroom beads. I have decided to use a different technique for each design and there will be a YouTube video for each one.
Mushroom beads are perfect for kumihimo because they are round beads with the hole to one side. This means that when they are braided the hole is pulled close to the braid, becoming invisible. They work equally well with a variety of other beads or on their own.
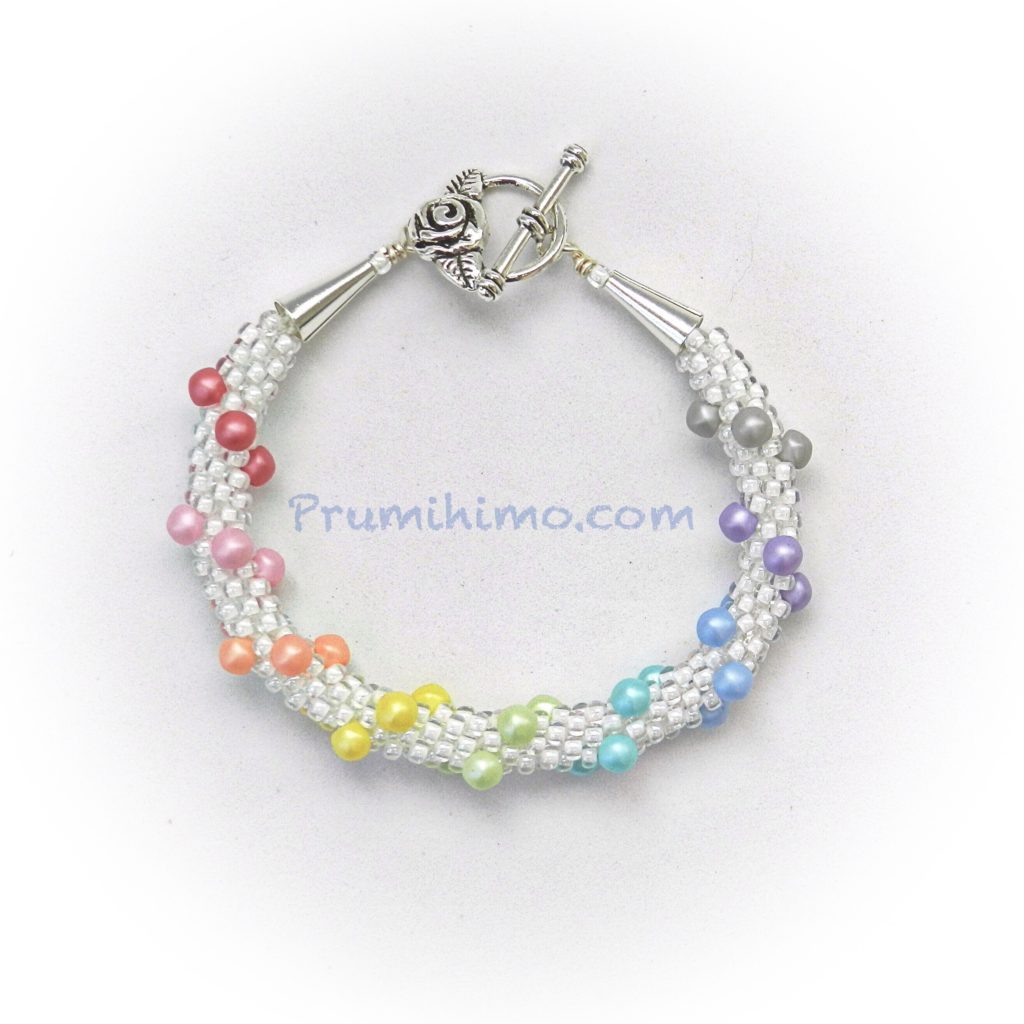
Day 1 – Rainbow Spiral Bracelet

Length – 5.05 minutes
Demo starts – 1.10 minutes
 I decided to start with the most popular braid structure, Round Braid on the regular round disk and I used size 8 seed beads with the 4mm mushroom beads to create a pretty and playful rainbow spiral bracelet.
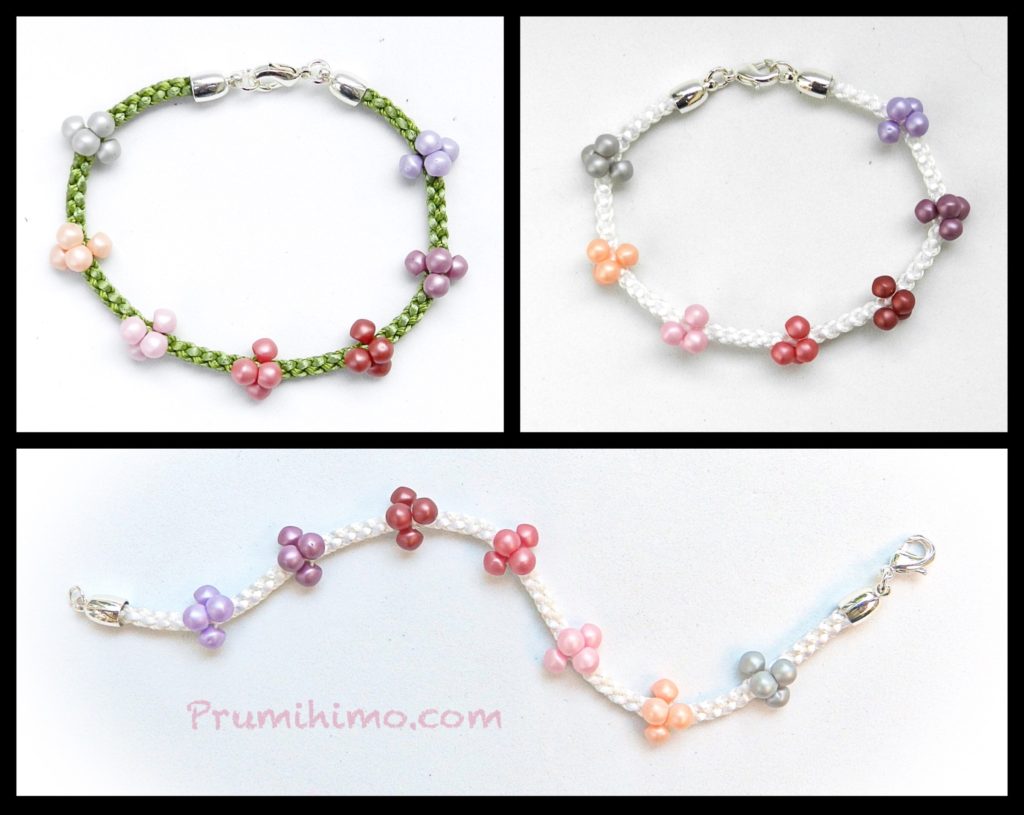
Day 2 – Berry Cluster Bracelet

Length – 5.09 minutes
Demo starts – 0.48 minutes
This bracelet is made on the Prumihimo disk, which means it is easy to position the beads exactly where you want them. I have loaded the cords so that the mushroom beads are clustered in a graduating colour sequence, with the inner side of the bracelet braided without beads, so that it sits neatly and comfortably against the wrist.
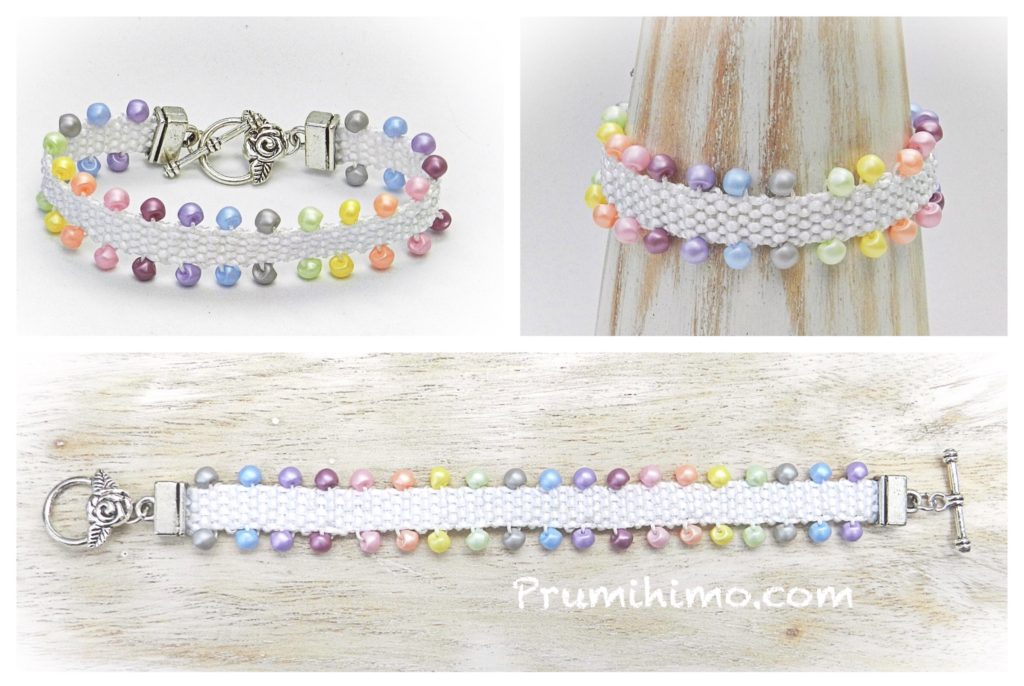
Day 3 – Beaded Flat Braid

Length – 5.37 minutes
Demo starts – 0.45 minutes
For the third day of the challenge I am using the square plate, which I always feel is an underused piece of equipment. I know that it can be difficult to get the tension right on certain braids, but I think this particular braid structure is relatively easy to get right and it is very suitable for beaded designs. This is not the braid you will find on the instructions provided with a square plate, but it is a really useful addition to your braiding skills. I suggest practising first, using the instructions on one of my previous videos,
How to braid on the square kumihimo plate #2
Once you have got the hang of the basic braid structure you are ready to start adding beads. The spacing of the beads is determined by how often beads are added in. The beads are added into the last 2 moves of each full sequence of moves. In this design I leave one complete sequence of moves without beads in between each beaded sequence.

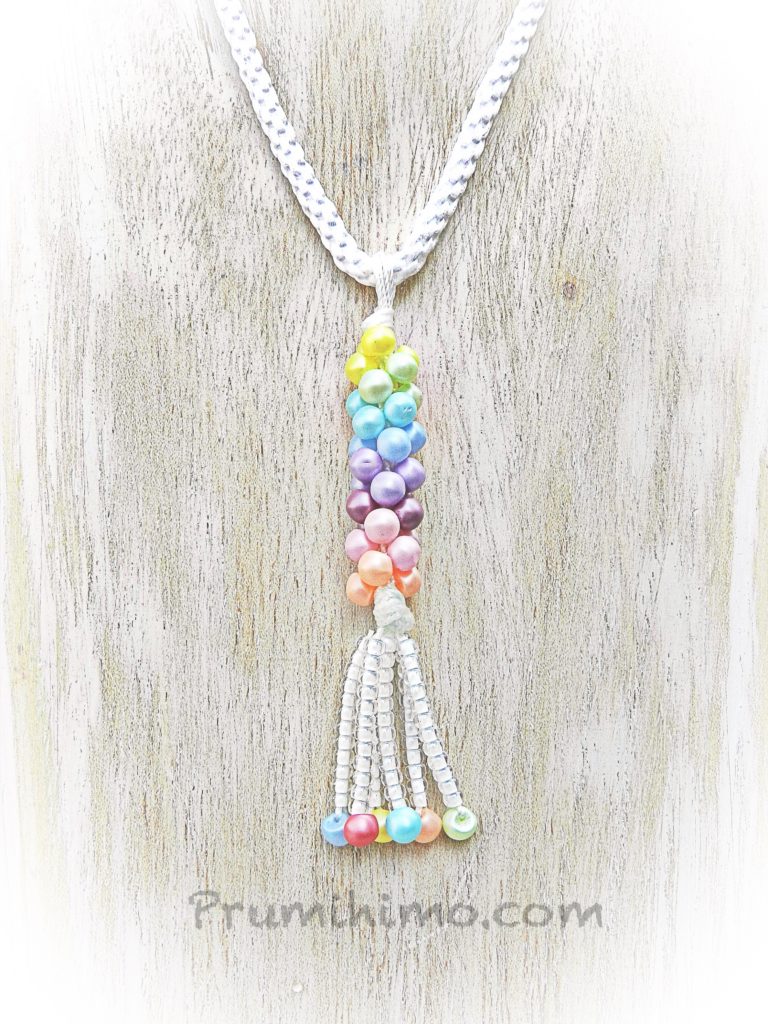
Length – 6.21 minutes
Demo starts – 1.03 minutes
In this video I show how to make an unusual beaded braided pendant. This is a very versatile technique which can be adapted for bracelet or necklace making because the braid has a wonderful flexibility.