
Sunset View is a collection of jewellery designs incorporating pyrite drops, orange quartz rondelles and rutilated quartz puffy coins. For the show I demonstrated a necklace necklace design. The collection includes another necklace, a bracelet and a pair of earrings. Find the demonstration on YouTube by clicking here. These designs were demonstrated in the first part of the show.
These designs will work well with all sorts of different beads. Look for dramatic drops or top drilled beads for the focal. Any sort of coin shape or round bead will be good for the bracelet or the charms and any small rondelles or rounds are perfect in place of the orange quartz.
Focal Necklace
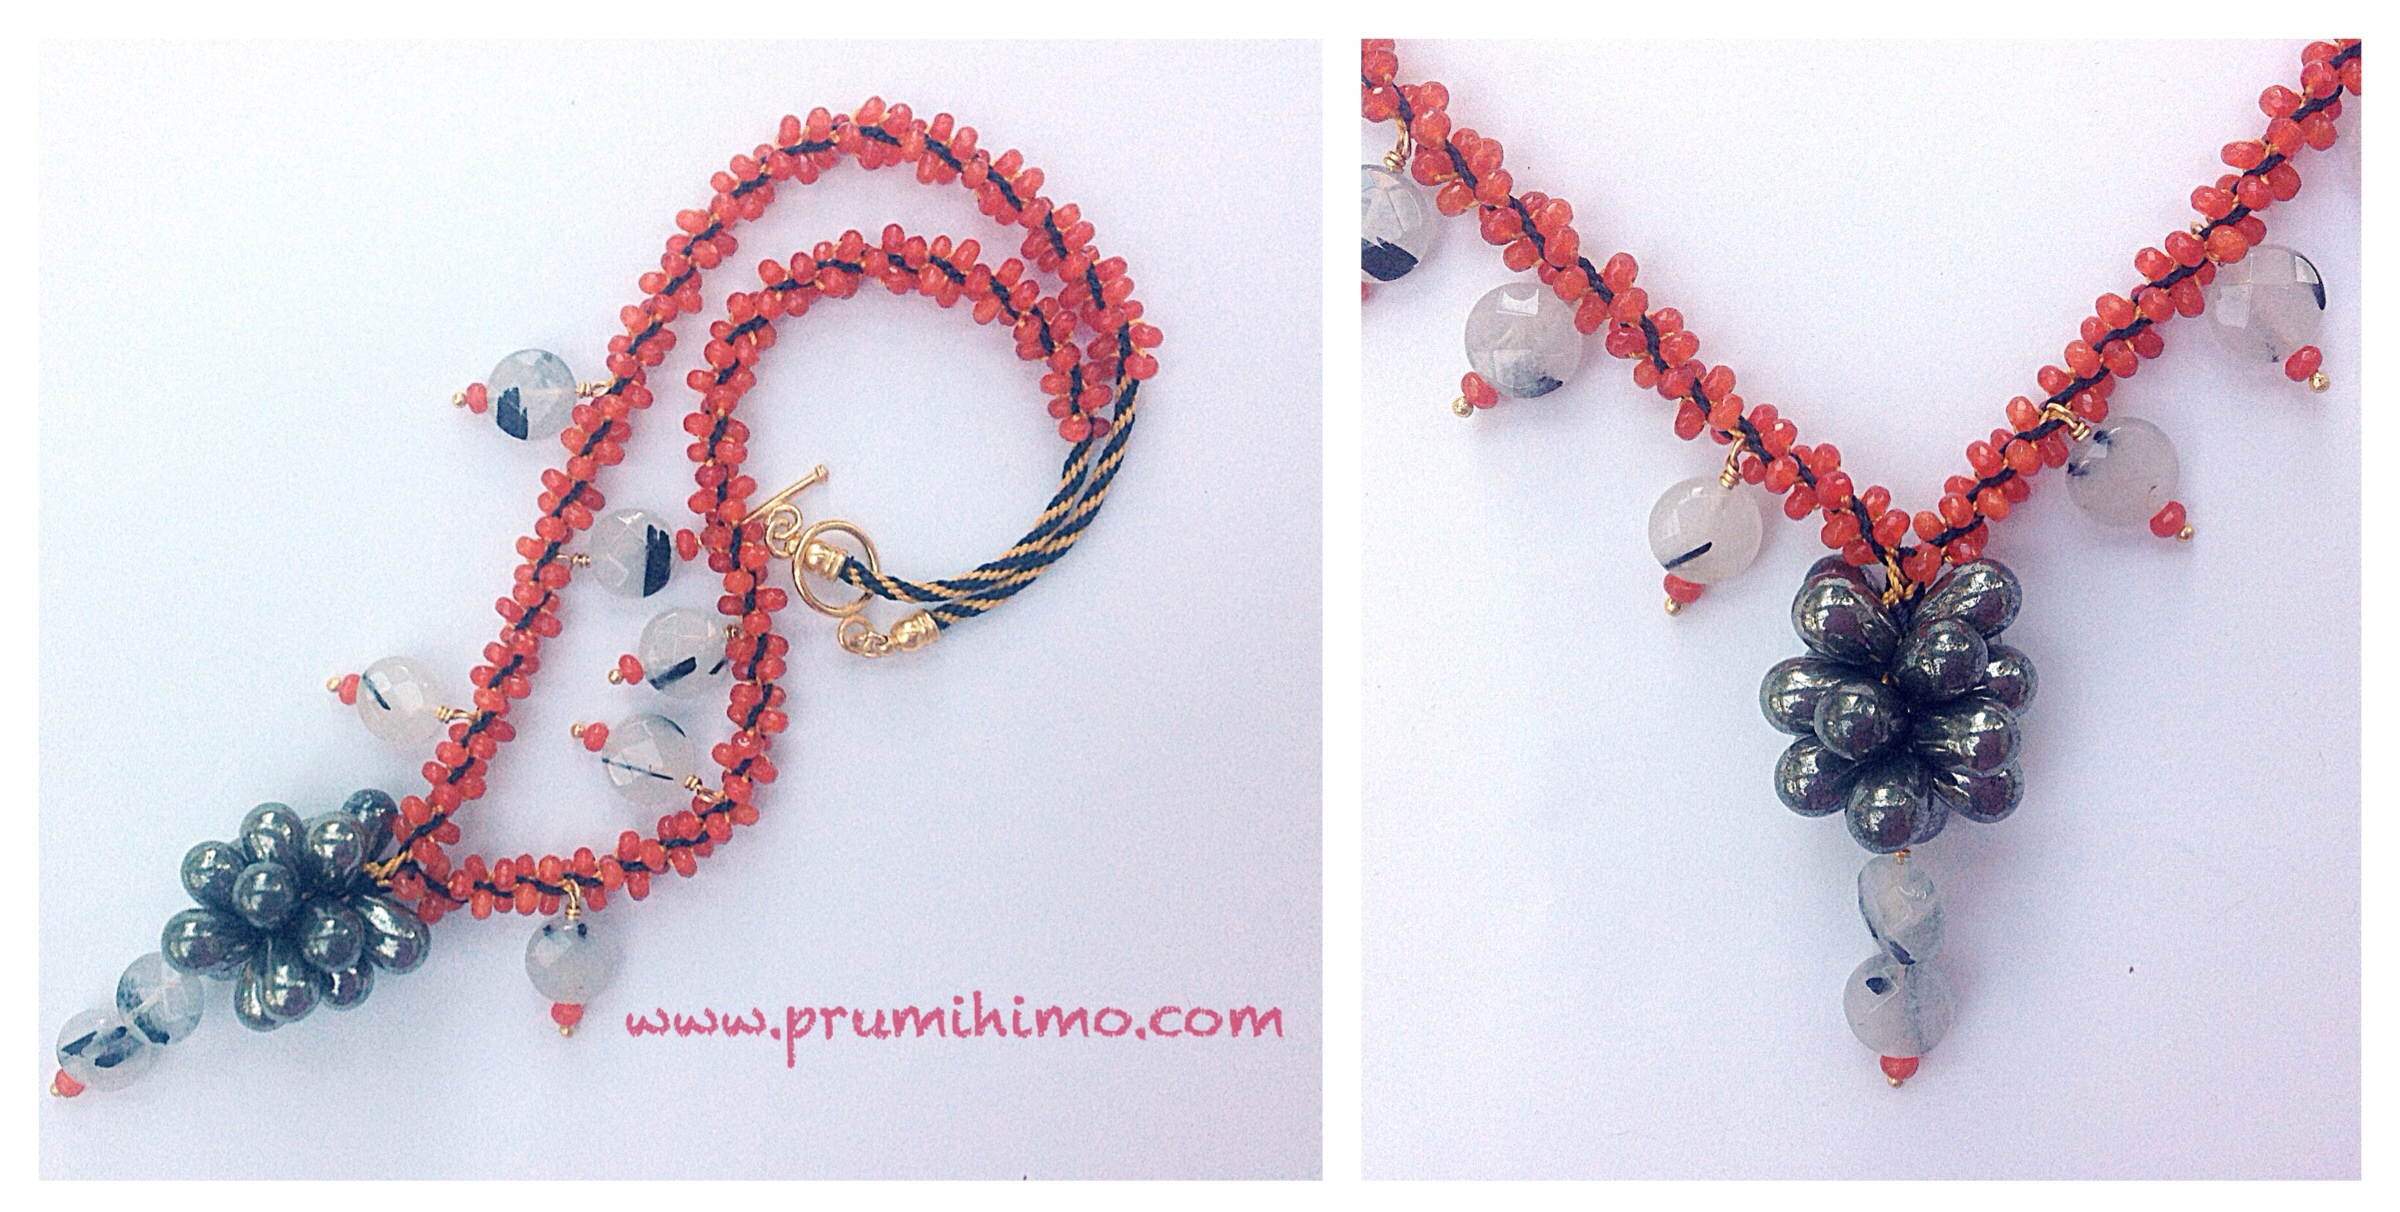
1. Thread a rondelle and 2 coins onto a headpin and form a wrapped loop with a medium sized loop, using the mid section of round nose pliers. Make 6 more using just one coin on each one.
2. Cut 4 x 2m gold cord and 4 x 2m black cord.
3. Thread all the cords through the loop of the 2-coin charm, centre them and position them on the disk with 2 cords in each of the 8 slots on either side of the dots. Put black in the north and south positions and gold in east and west positions.
4. Thread 2 pyrite drops onto both cords in each slot. If the holes are not large enough to accomodate both cords, then thread just one cord through the hole.
5. Braid for 8 moves then braid in the beads. Braid for another 8 moves.
6. Remove the black cords from the disk and tie them in a double knot. Replace just one black cord in each slot and pull the other 4 through to the other side of the disk. Remove one gold cord from each slot and pull them through to the other side of the disk.
7. Thread the following beads onto one of the gold cords. 7 rondelles-charm-7 rondelles-charm-7 rondelles-charm-35 rondelles
Thread 59 rondelles onto the diagonally opposite gold cord.
8. Braid using round braid for 8 moves and then start to add the beads. Continue to braid until all the beads are braided in and then braid on for approximately 3-5cm. Remove the braid from the disk and knot the end of the braid.
9. Position the second set of 8 cords on the disk and pull up firmly to make sure there are no loops. Repeat steps 7 and 8 to complete the second half of the necklace.
10. Bind the ends and glue on end caps. Leave to dry fully before adding a clasp with jump rings.
Multiple Braid Necklace
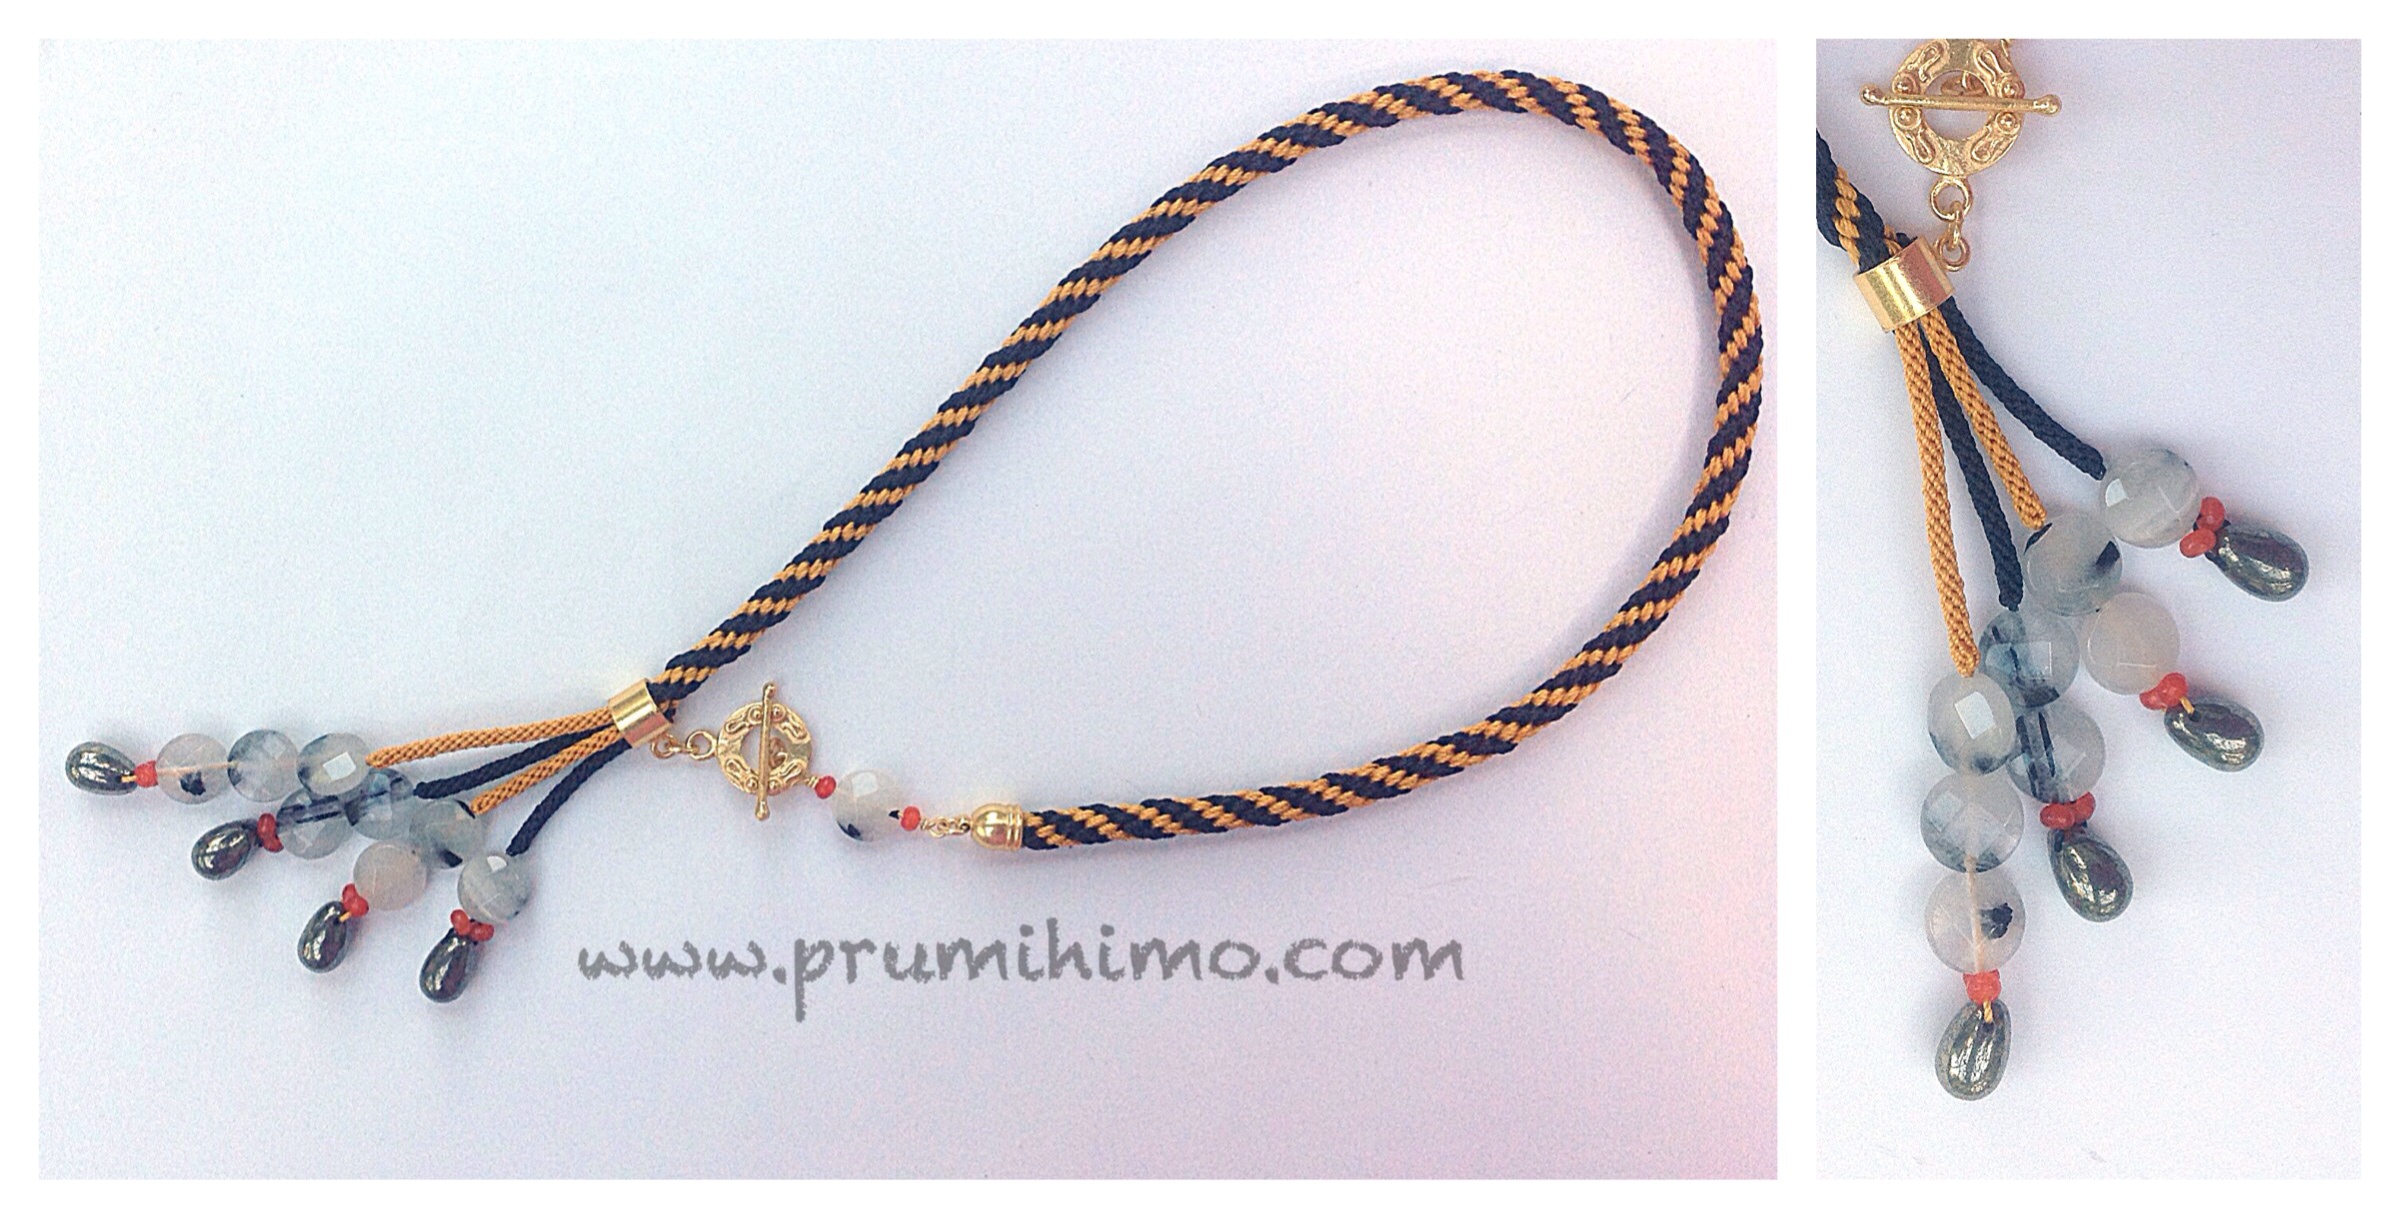
The best way to make this necklace is using 4 disks! Take this into account before starting.
1. Cut 4 lengths of cord measuring 3-4m, depending on whether you want a longer or shorter necklace.
2. Thread a drop bead onto the middle of one cord and thread on a selection of other beads to make an attactive end. Tie this cord around the mid point of the other 3 cords. There are now 8 cords, position all 8 onto a disk on either side of the dots. Braid for 3cm and put to one side, leaving it on the disk if possible.
3. Repeat steps 1 and 2, varying the colours and the length.
4. Position all the part completed braids on one disk, with multiple cords on the 8 slots on either side of the disk. Braid them all together using Round Braid.
5. Remove the braid from the disk. Bind and trim the end. Slide a bail attachment onto the cord and then glue the braid end into an end cap.
6. Attach half of a clasp onto the bail using a jump ring and the other half onto the end cap with a jump ring.
Earrings
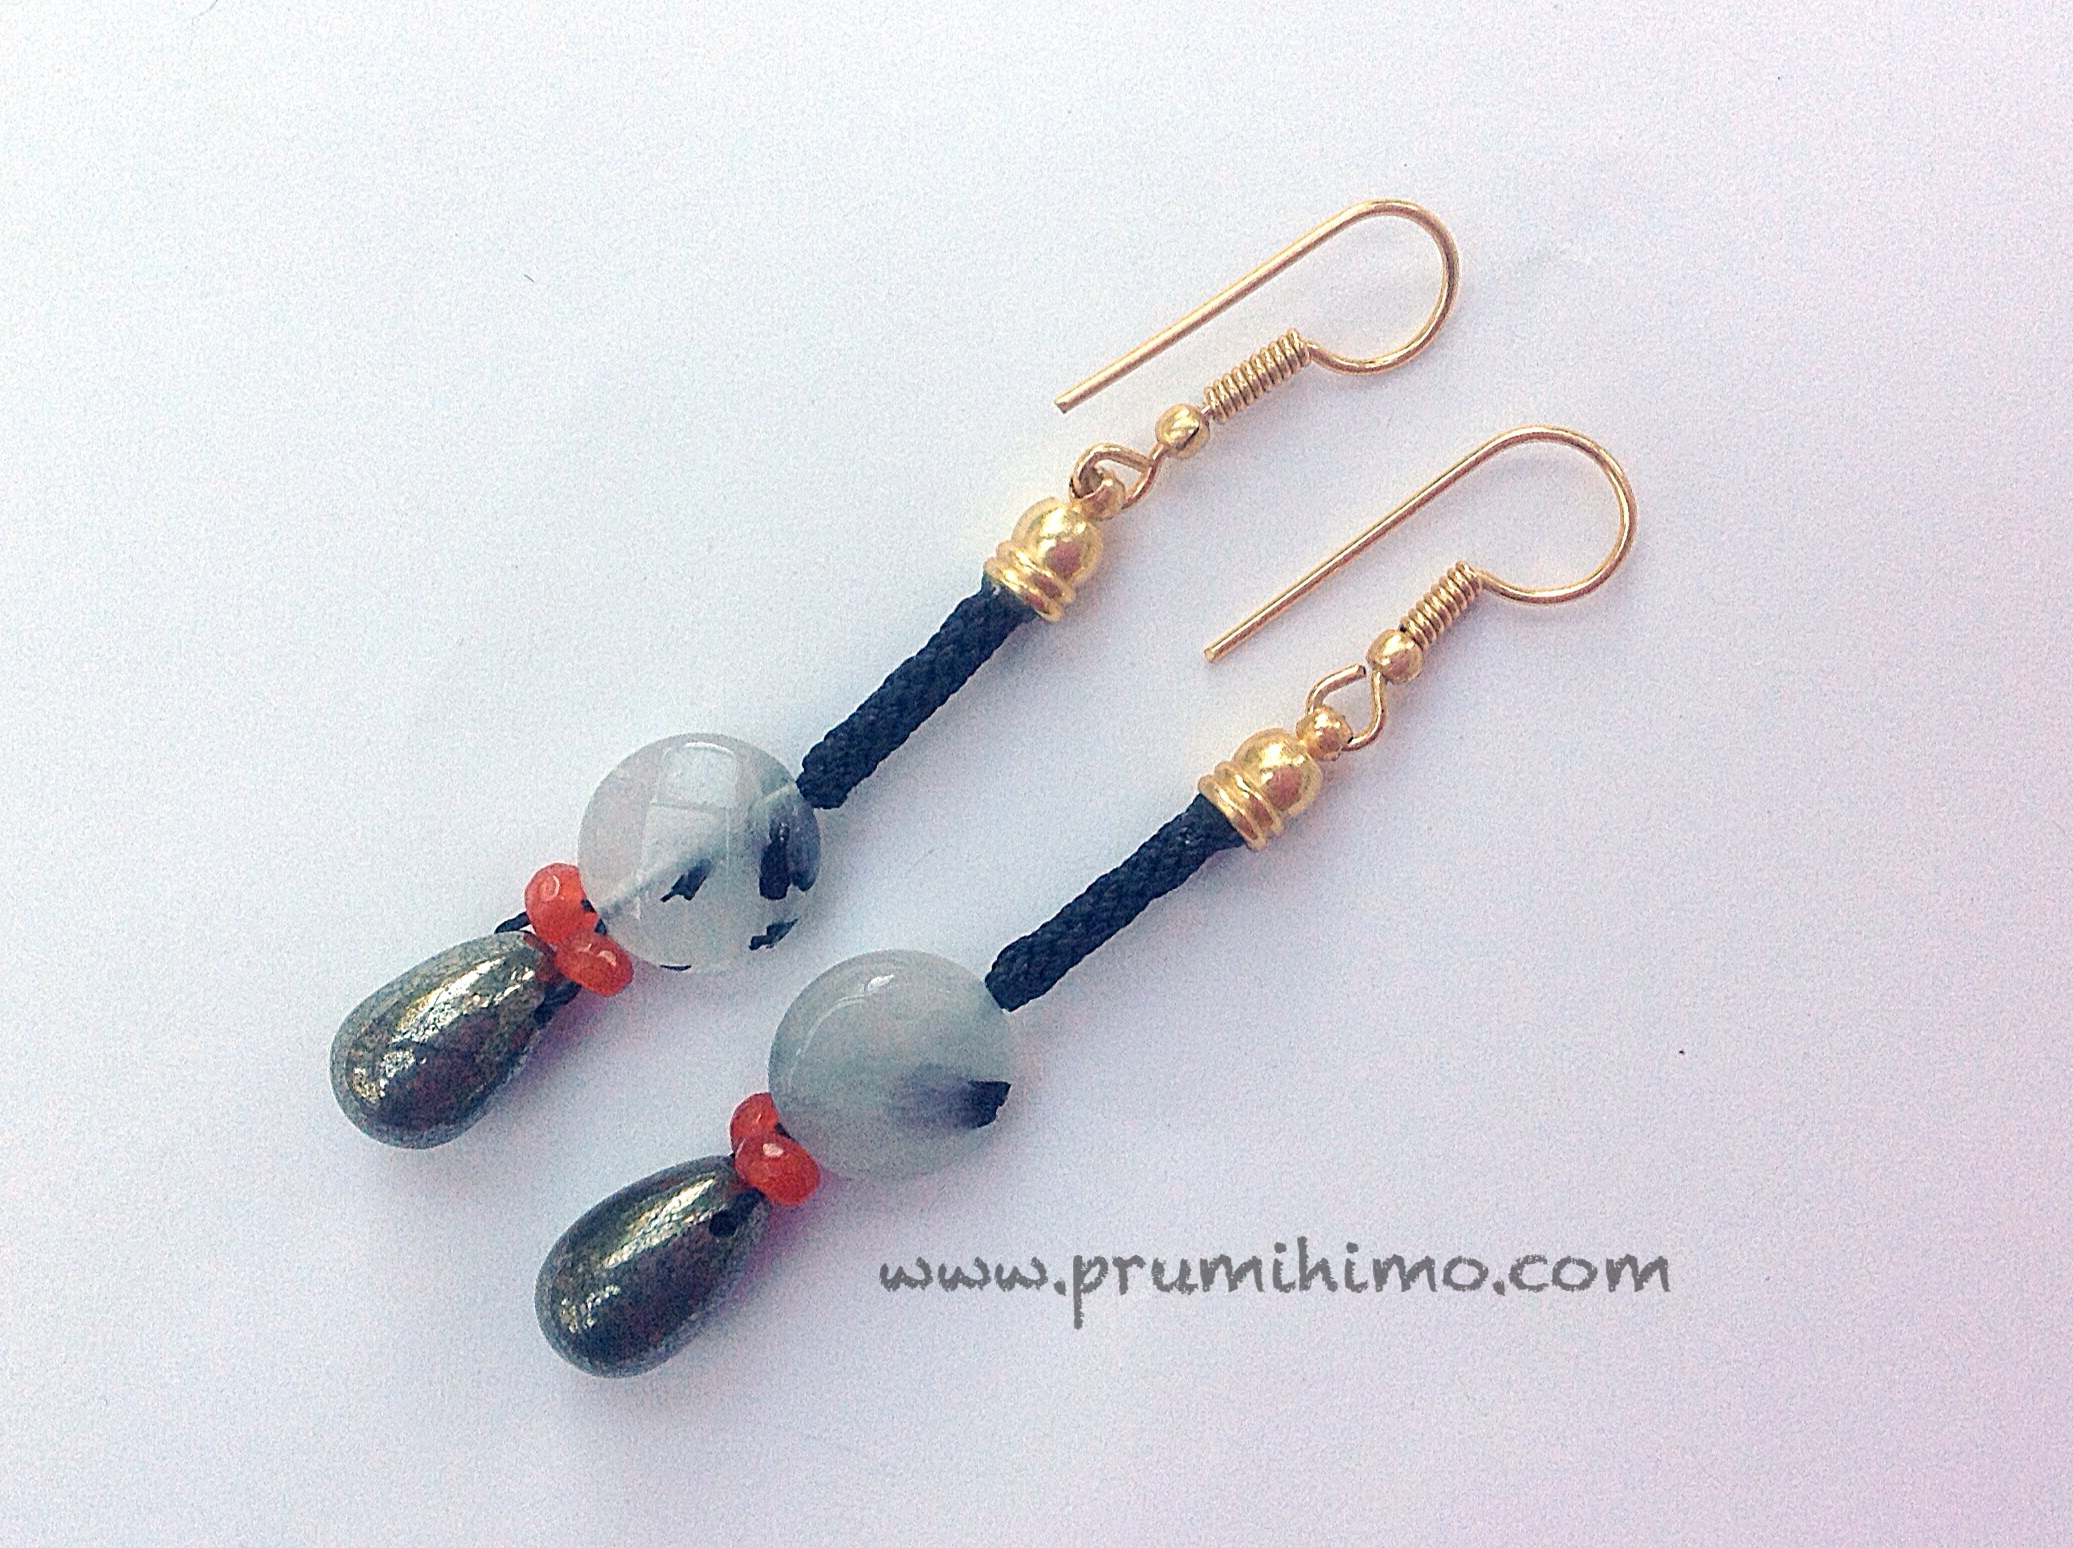
1. The method of starting off the braid is the same as in step 2 of the multi-braid necklace. Finish off with a glue-in end cap and attach earring hooks.
Wrap Bracelet
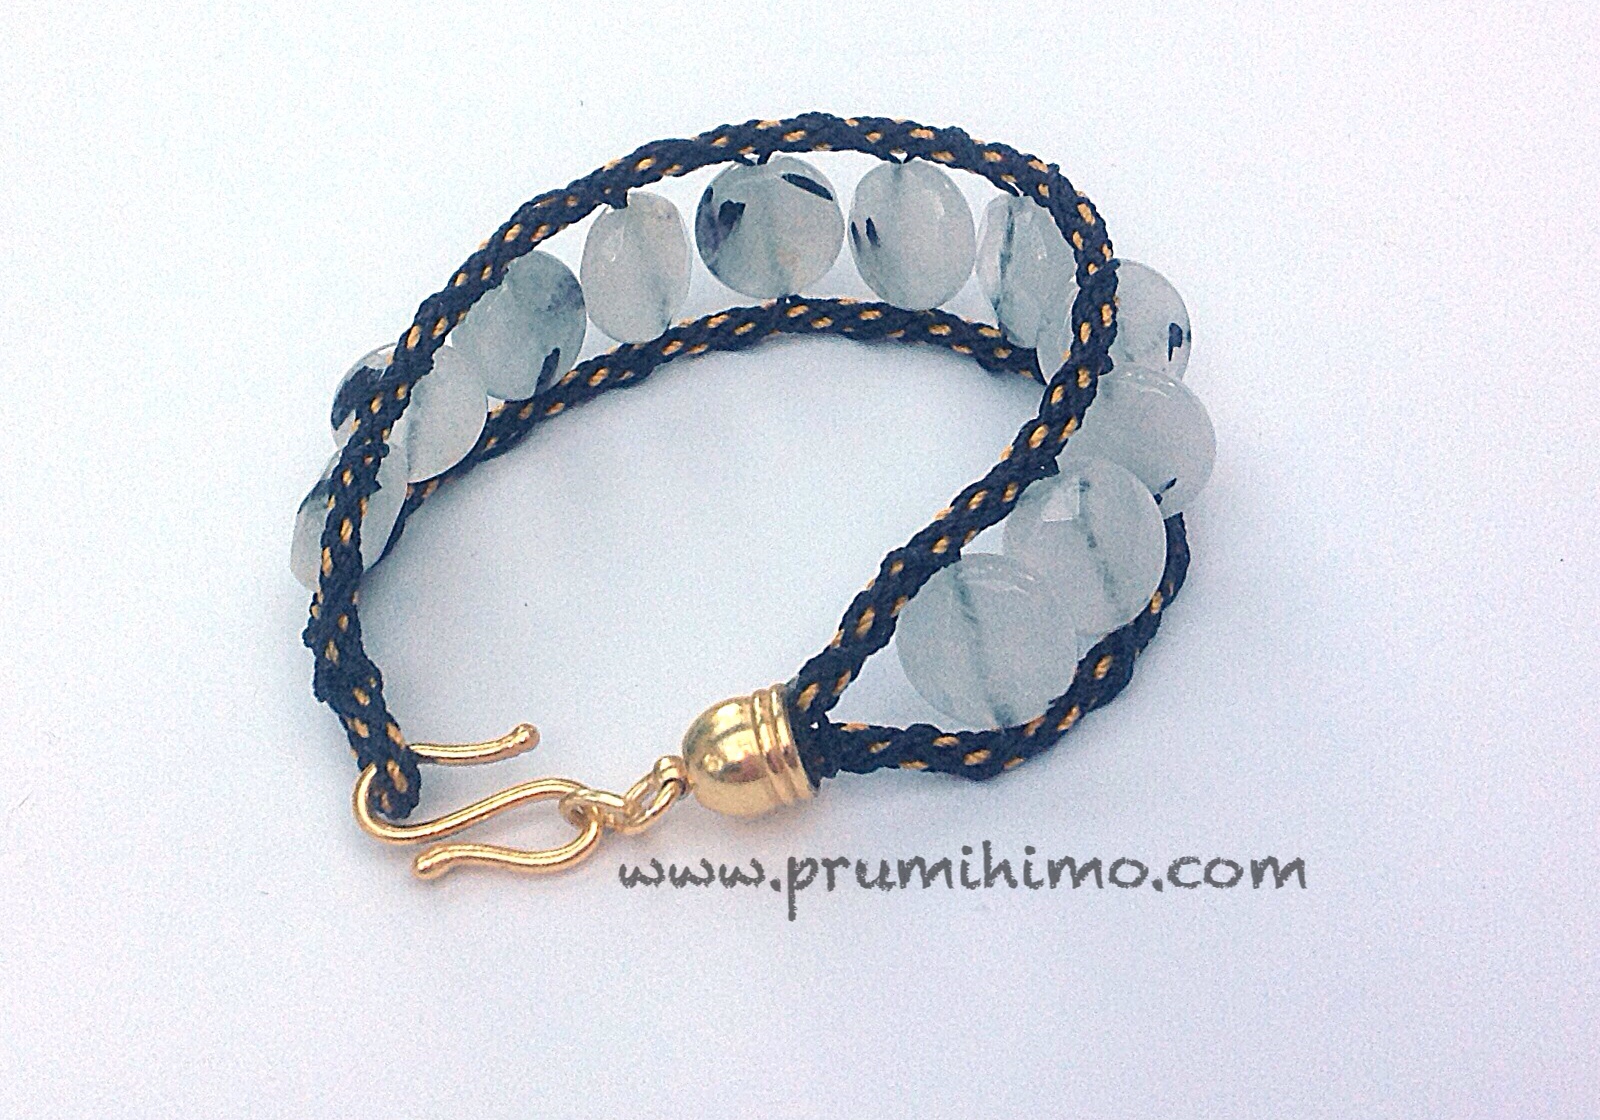
1. Make a thin braid measuring 40cm (8 x 1m)
2. Bend the braid in half and make a loop by binding the braid together 1cm from the bend using cord.
3. Wrap the cord once around the braid on either side. Thread a coin bead onto the cord from one side and then thread the bead through again with the other cord and from the other side. The cords cross in the middle of the bead.
4. Repeat step 3 as many times as necessary to reach the desired length for the bracelet. With heavy beads it may be necessary to wrap the cord around the braid an extra time between beads.
5. Tie the two braid ends together and bind them tightly. Trim and glue into an end cap. Attach a hook with a jump ring.