
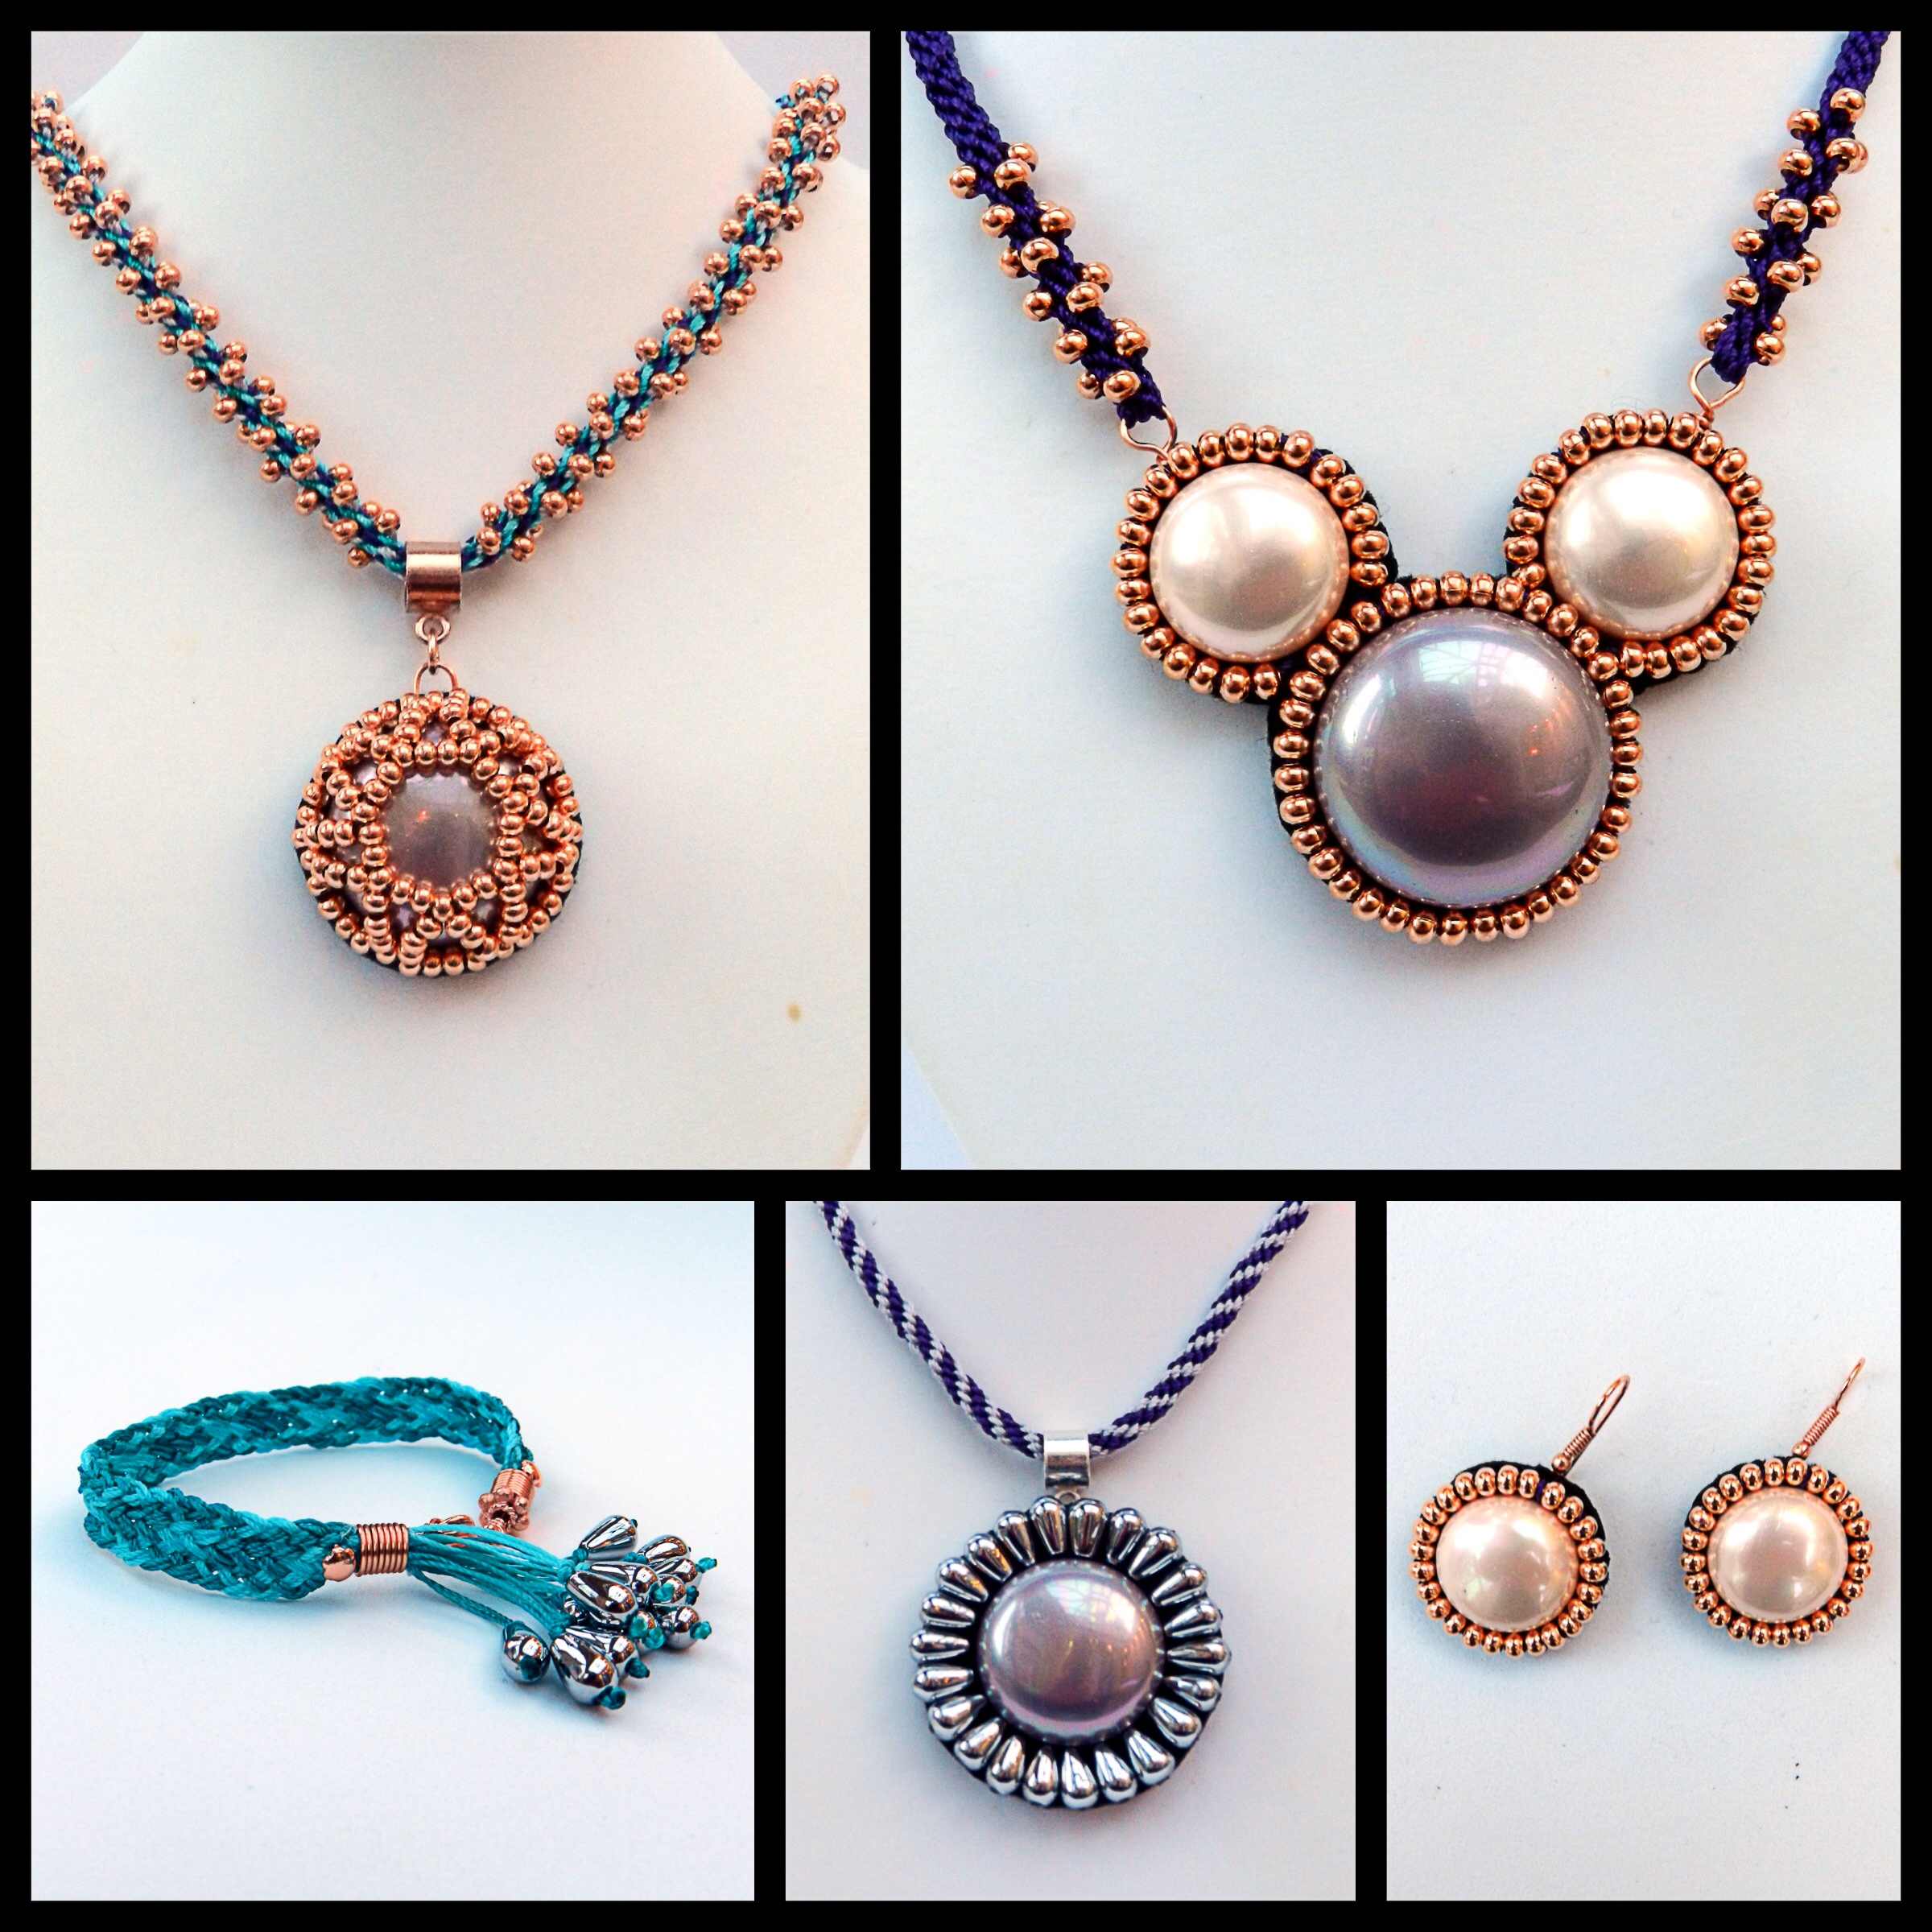
This kit included delightful shell pearl cabochons in two sizes and two colours, as well as some agate drops, S-Lon cord and size 6/4mm copper seed beads. The combination of materials provided the perfect opportunity to explore some bead embroidery and bead weaving techniques. These techniques are very visual, so I recommend using these instructions together with the YouTube recording of the show, which can be viewed by clicking here.
Cabochons
The starting point for the cabochons is the same for all the designs. Glue the cab to a piece of backing fabric (eg Beading Foundation or Lacey’s Stiff Stuff) allowing for enough fabric around the cab to accommodate the beads to be used. If the cab is going to be held in place by the glue alone it is very important to use a strong glue, such as E6000 and to allow it to dry and cure fully before proceeding. Check the manufacturers recommendations. If additional rows of beading will also hold the cab in place the choice of glue is less important. Clear all-purpose glue, such as UHU, works well and dries quickly.
Earrings and Triple Cabochon Design
Sew a row of seed beads around the cabochon with S-Lon using backstitch. Other threads can be used, but the cord will fill the large holes on the beads well and produce a neat effect. Keep the stitches within the footprint of the cab and the beads. When all the beads are in place sew through all the beads (just the beads, not the backing fabric) once or twice. This will fill up the holes in the beads and neaten up the row.
Sunflower Design
For this design make sure enough backing fabric is allowed around the cab for the drop beads. The drop beads are sewn on using a strong beading thread such as Wildfire. Sew through the drops 2 or 3 times from the wider end to the narrower end. To make sure the design is symmetrical it is best to start sewing on the drops in the north, south, east and west positions and then filling in the rest.
Netted Design
When sewing the beads around the cab make sure that exactly 35 beads are used. Sew through the beads just once after they are all in position around the cab. Pick up 7 beads and count 5 beads around the edge. Sew through this 5th bead. A petal shaped loop of beads will have been formed. Pick up 7 and sew through the next 5th bead again. Repeat until the circle has been completed. Pass the needle up through the first 4 beads of the first petal. Pick up 2 beads and sew through just the 4th bead of the second petal. As you pull up on the cord the petals will be pulled up and over the side of the cab. Continue to pick up 2 and pass through the 4th bead of each petal until the circle has been completed. The cab is now encased by the beads. Pass through all the beads in the top circle again to tighten up the design.
Finishing off the Cabochons
Trim away the excess backing fabric.
Use 0.8 wire to make a loop for the cab. Spiral the ends to give the glue something to grip onto. Stick this onto the back of the cab and stick on a piece of Ultrasuede. Allow the glue to dry and trim off the excess Ultrasuede. Sew the two fabrics together with tiny stitches. Neither fabric will fray, so the stitches can be very close to the edge.
Instead of a wire loop, the cab can be sewn onto a closed jumpring. Earring hooks can also be sewn into position.
Kumihimo Braids
Netted Cab
1. Cut 120cm x 4 x 4 colours = 16 cords, 2 in each slot on either side of the dots. Purple and light turquoise in north and south. Grey and dark turquoise in east and west. Braid for 15-20cm. Thread 30 seed beads onto both cords in slots 1 and 17. Continue braiding and add these beads into the braid. Braid for 1cm without beads. Thread on a bail, by removing each pair of cords from the disk individually and threading on the bail. Replace the cords and move onto the next pair. This will maintain the tension of the braid. Thread on 30 beads to the same two cords and continue to braid so that the second side of the necklace is the same as the first side. Attach the cab to the bail with a jump ring.
Triple Cab Design
For this design sew a closed jump ring on either side of the cab section.
1.2m x 8 x purple, thread all 8 through one of the jump rings. There are now 16 cords. Position the cords on the disk with 2 in each slot on either side of the dots. Braid for 8 individual moves. Thread 10 beads onto both of the cords in slots 1 and 17. Braid in the beads and then braid to the end of the cords. Repeat for the other side of the necklace and finish off with end caps and a clasp.
Bracelet
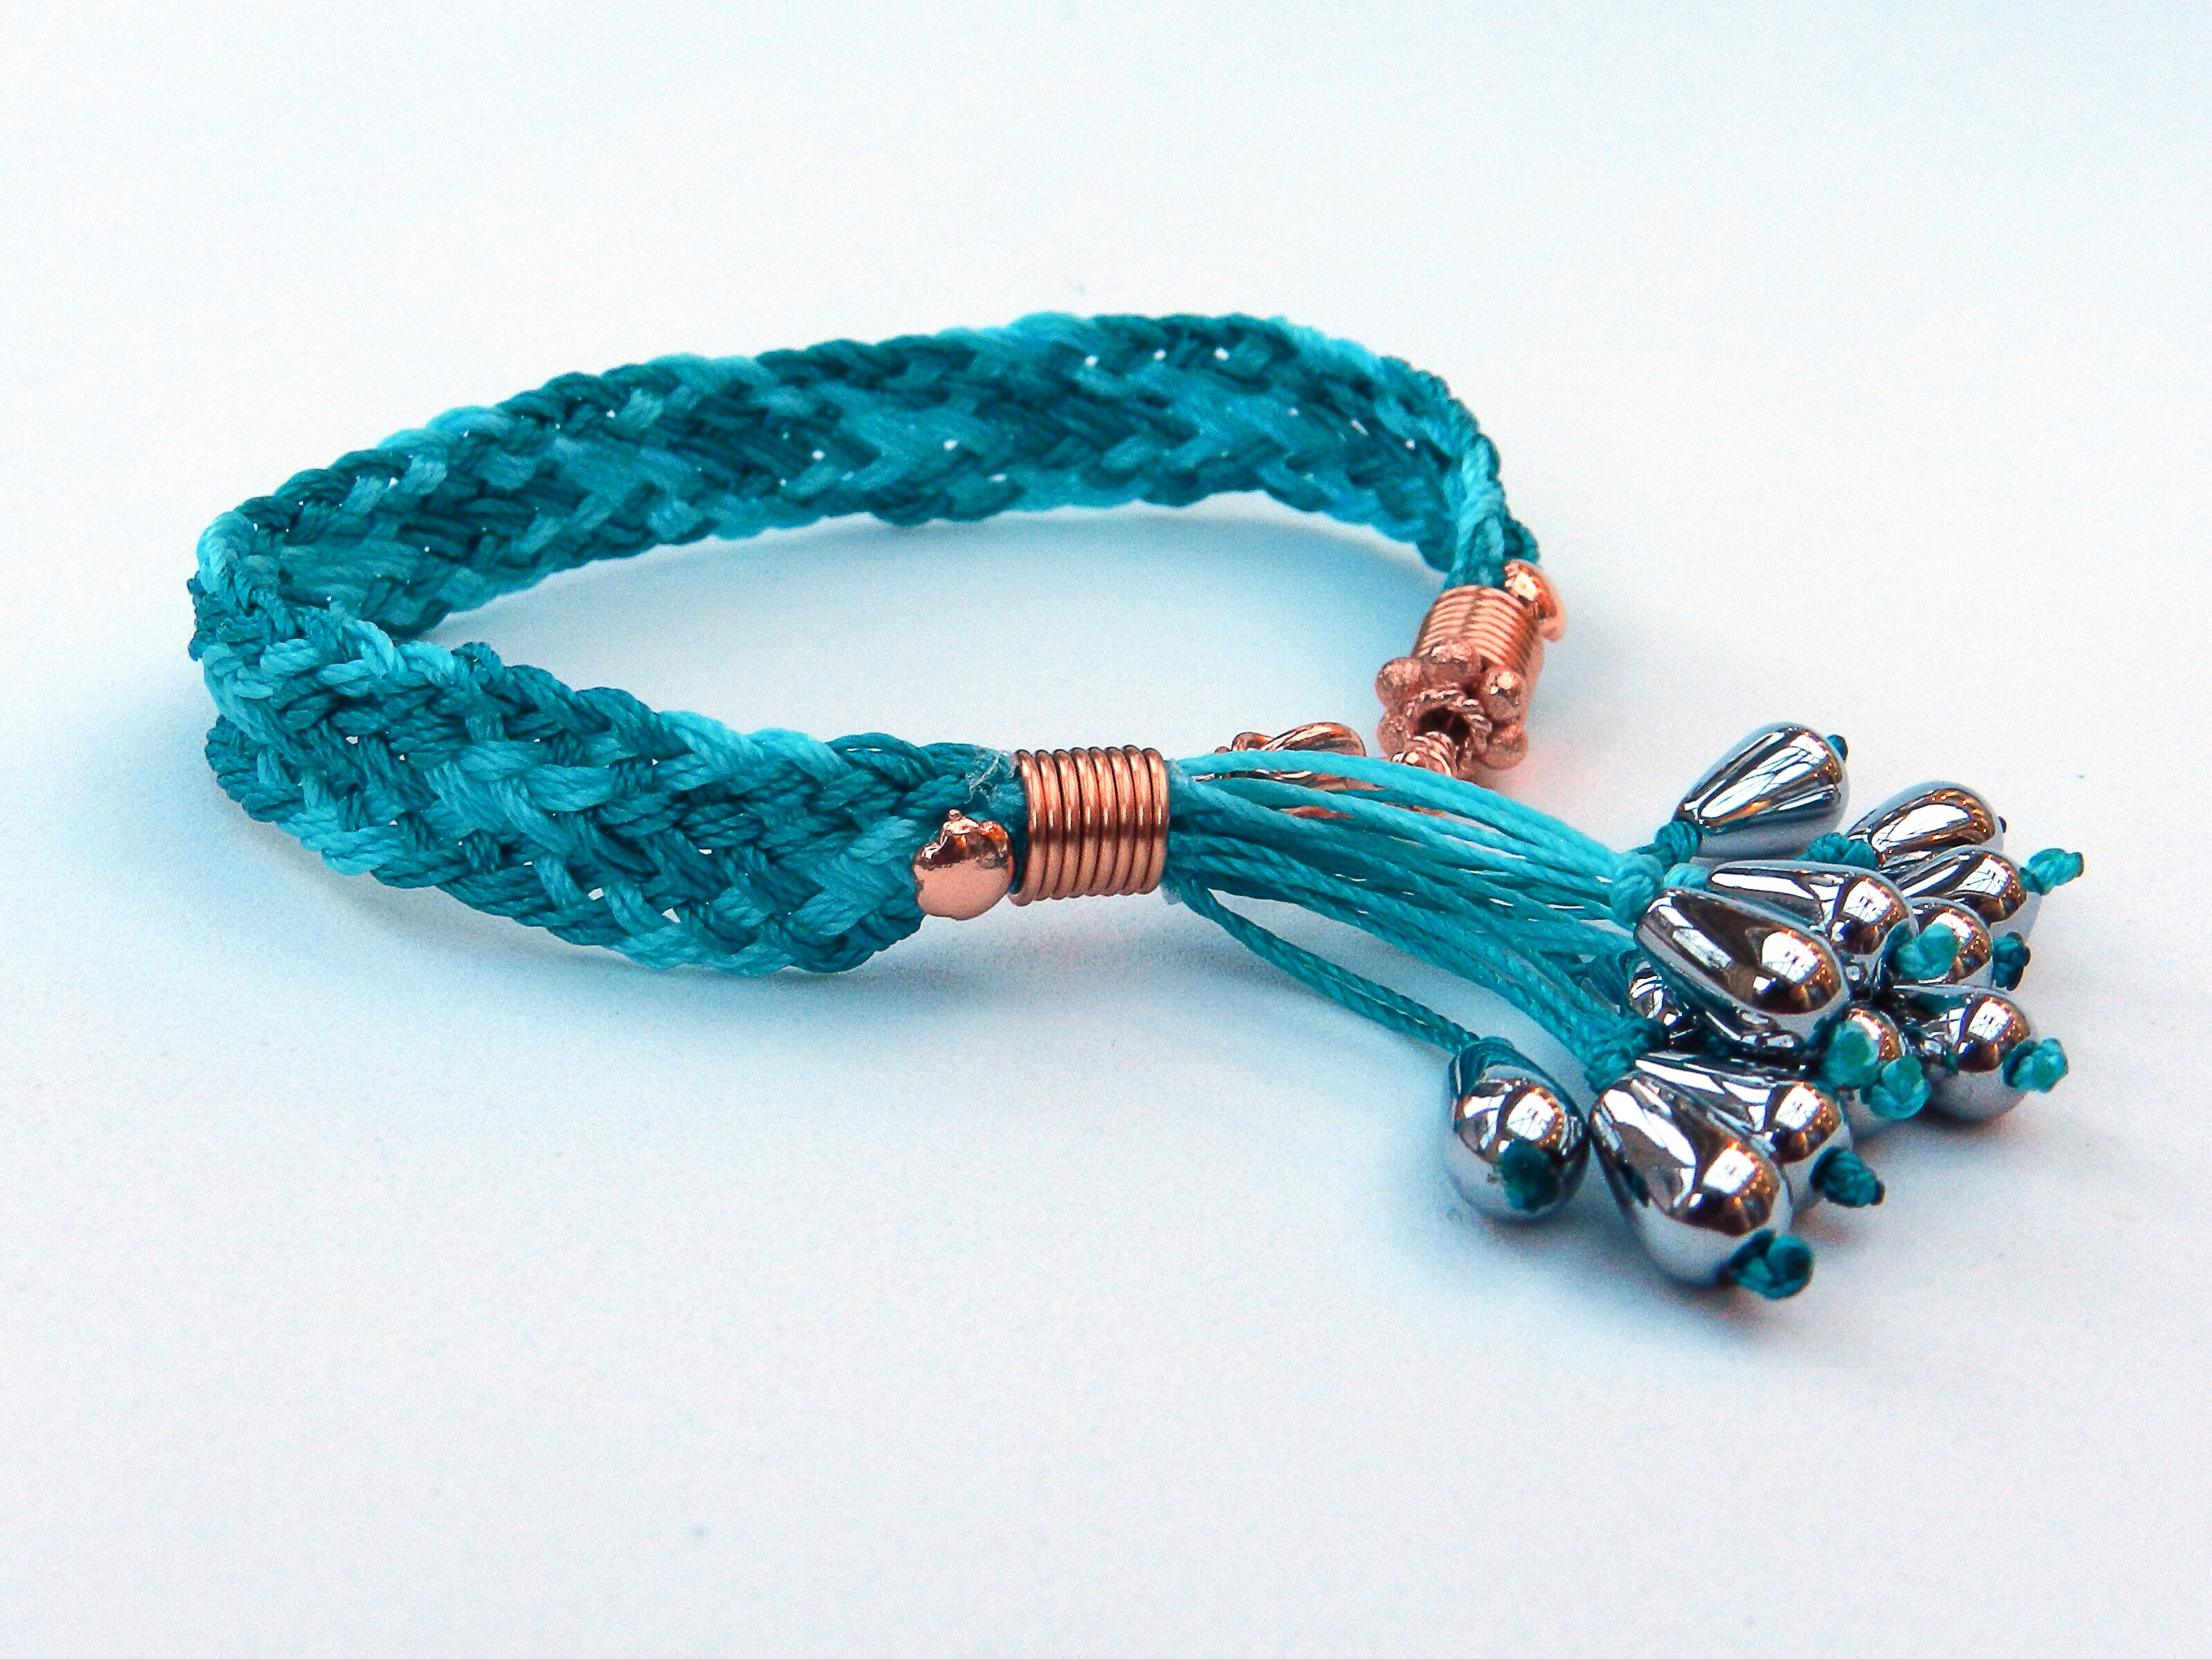
60cm x 12 x light turquoise, 60cm x 18 x dark turquoise. On the square plate position 3 cords in each of 6 slots on the top and 4 slots on the bottom. Braid using the 10 cord flat braid instructions. When finishing off the ends, only trim one end and leave the other end as a tassel. The best ending method to use is the one I demonstrated using a decorative headpin. Bind and glue the ends. Pierce the braid with the headpin, thread on a coil and finish with a wrapped loop.For the side with the tassel, pull the cords through the coil, Take 2 cords, tie an overhand knot 2cm from the braid, thread a drop bead onto both cords. Separate the cords and tie a double knot. Trim the ends and seal with a naked flame. Repeat for the other cords.