
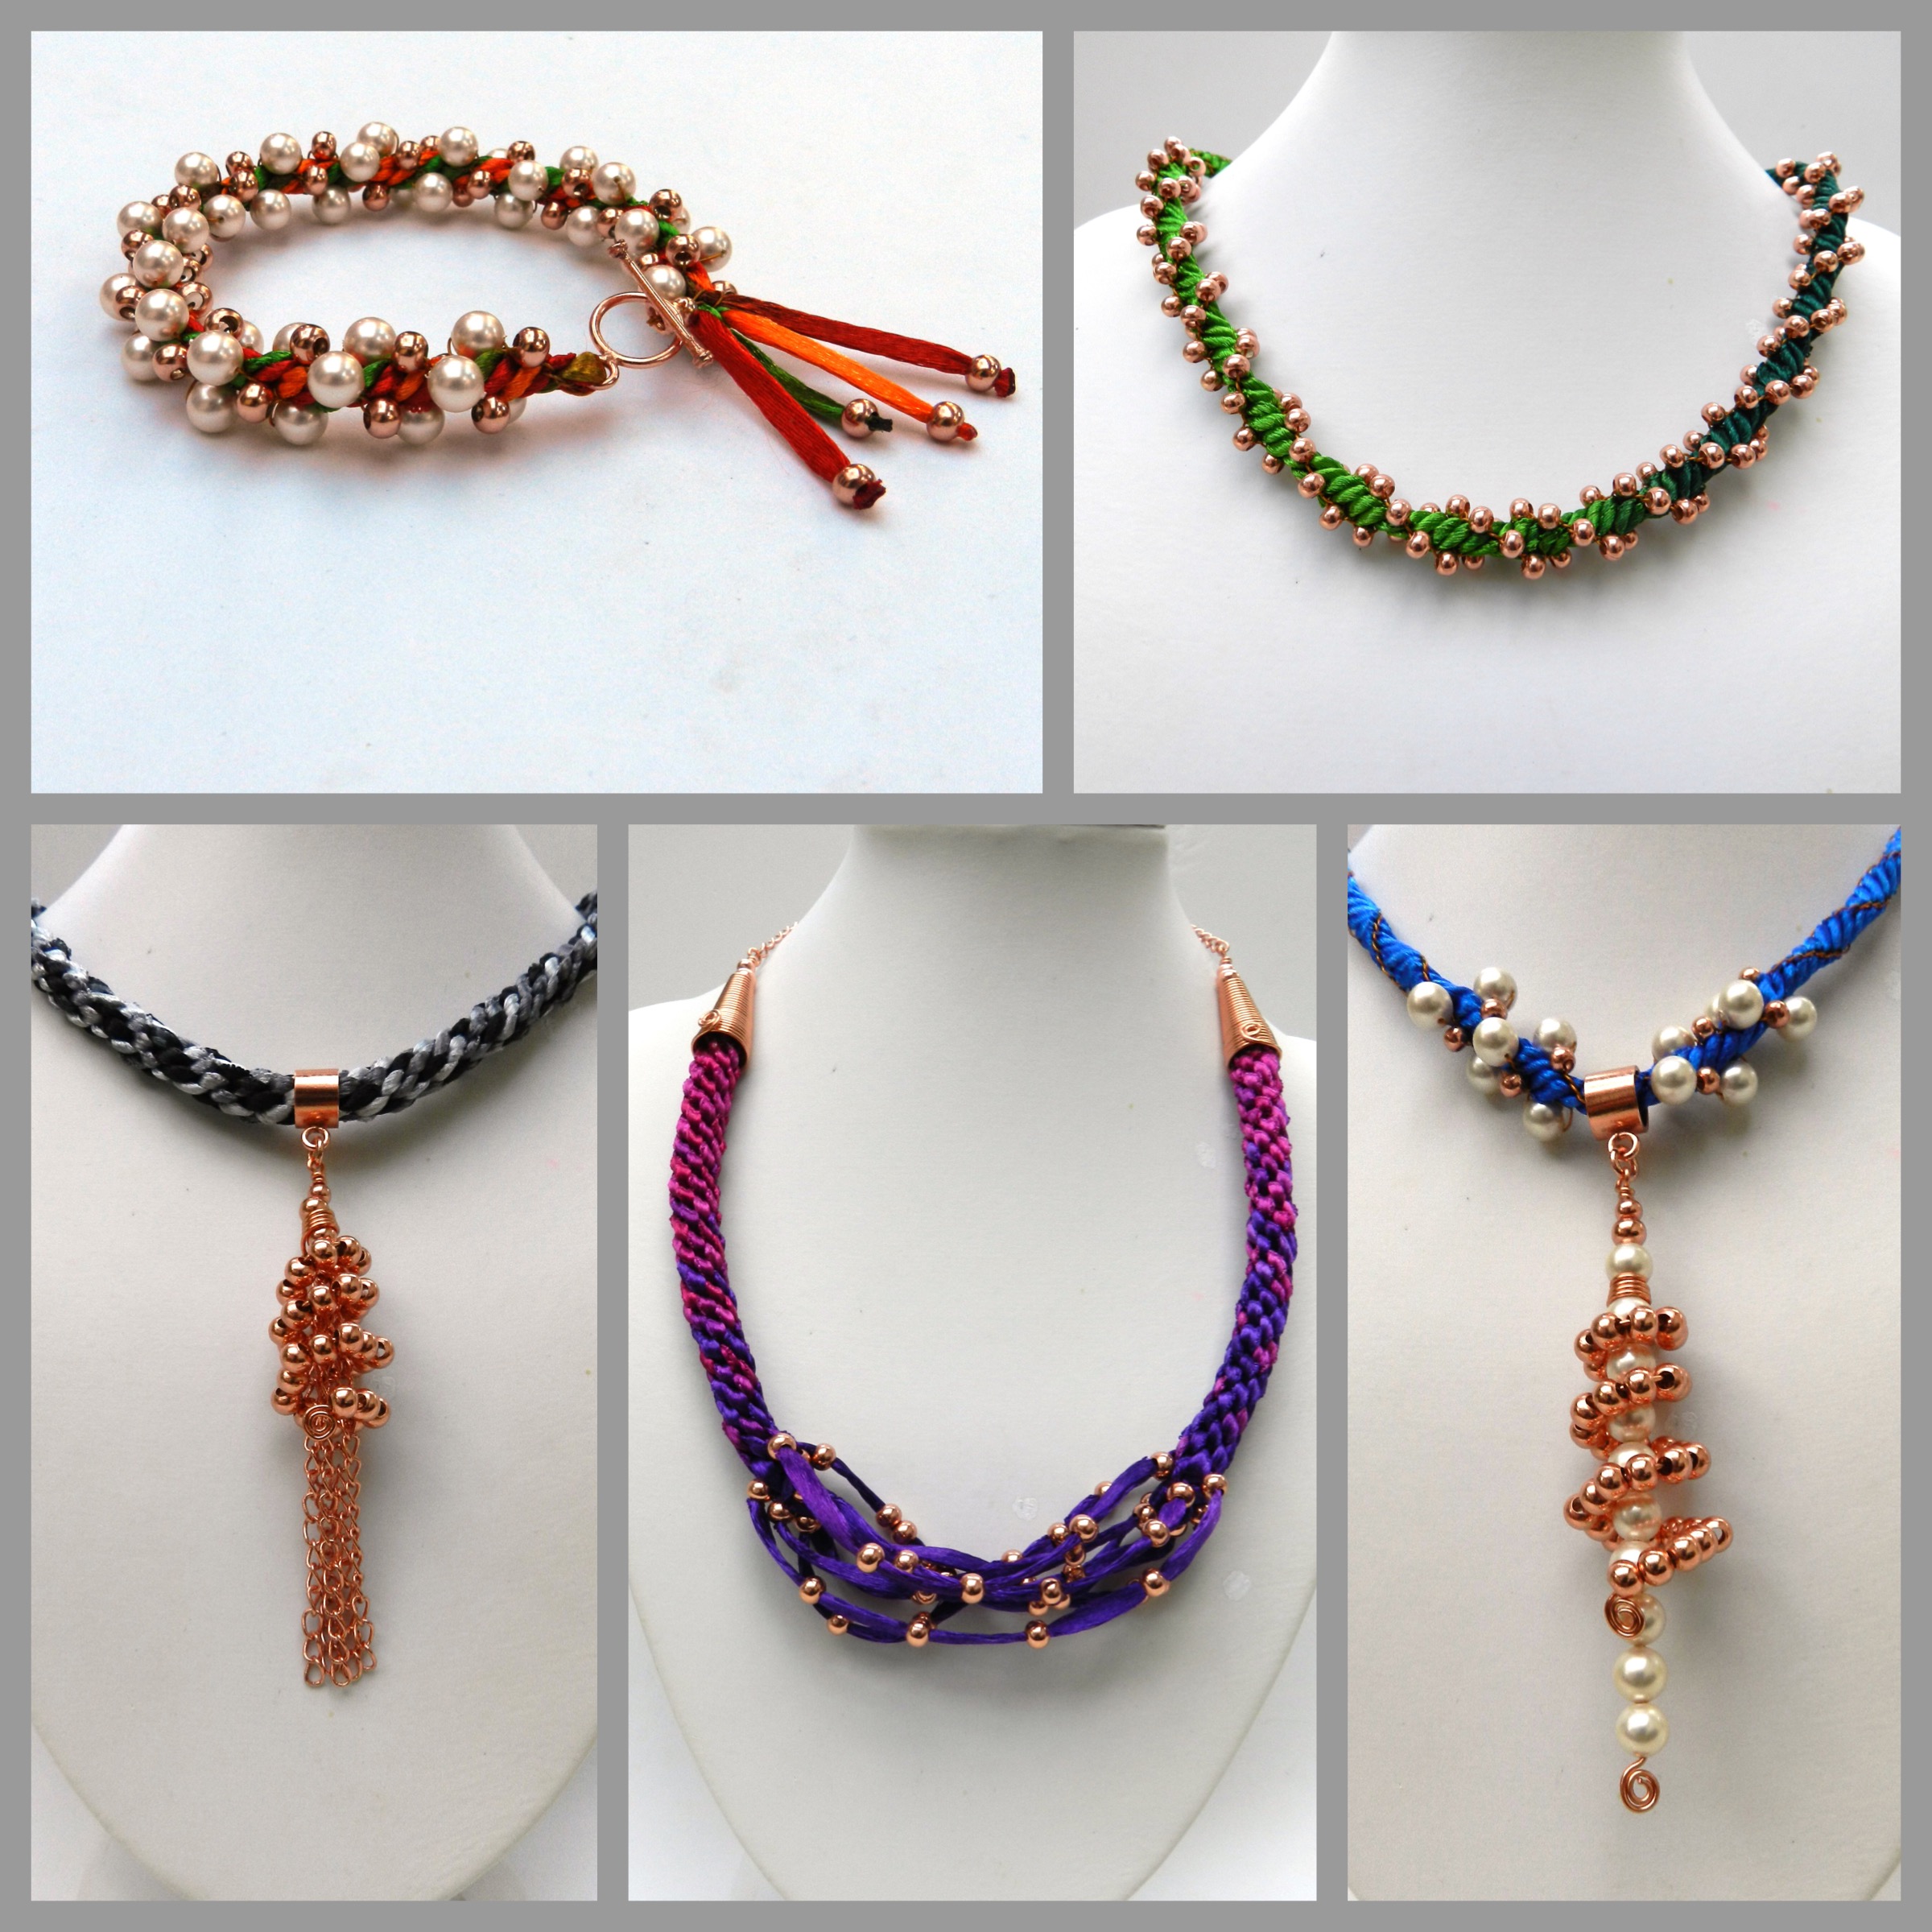
On 6th January I demonstrated how to use the new satin ribbon in kumihimo. This is a brilliant product, which is somewhere between a cord and a flat ribbon, and I really enjoyed exploring its potential. The kit included 5 reels of 15m of varigated satin ribbon in a variety of lovely colours. I was also given some 6mm shell pearls and metal seed beads 4mm and 5mm.
The ribbon is varigated or shaded along its length. It can be used randomly or the colours can be lined up to create a flow of colour along the braid. The braids will stretch initially, so make sure you stretch them before making a final decision about the required length.
Some of these designs are braided with a combination of satin ribbon and beading thread. More beading thread is needed than satin ribbon but individual tension can make it difficult to estimate exactly how much is needed. This is made more difficult when beads of different sizes are added into the mix because larger beads will require exta . I have tried to over-estimate, but I can give no guarantees!
I had fun creating pendants to hang from these lovely braids, using a Wags Wicone with beads and stretching out the cone before adding pearls or chains.
The show can be watched by clicking here.
Multicolour bracelt
This is the bracelet demonstrated on the show.
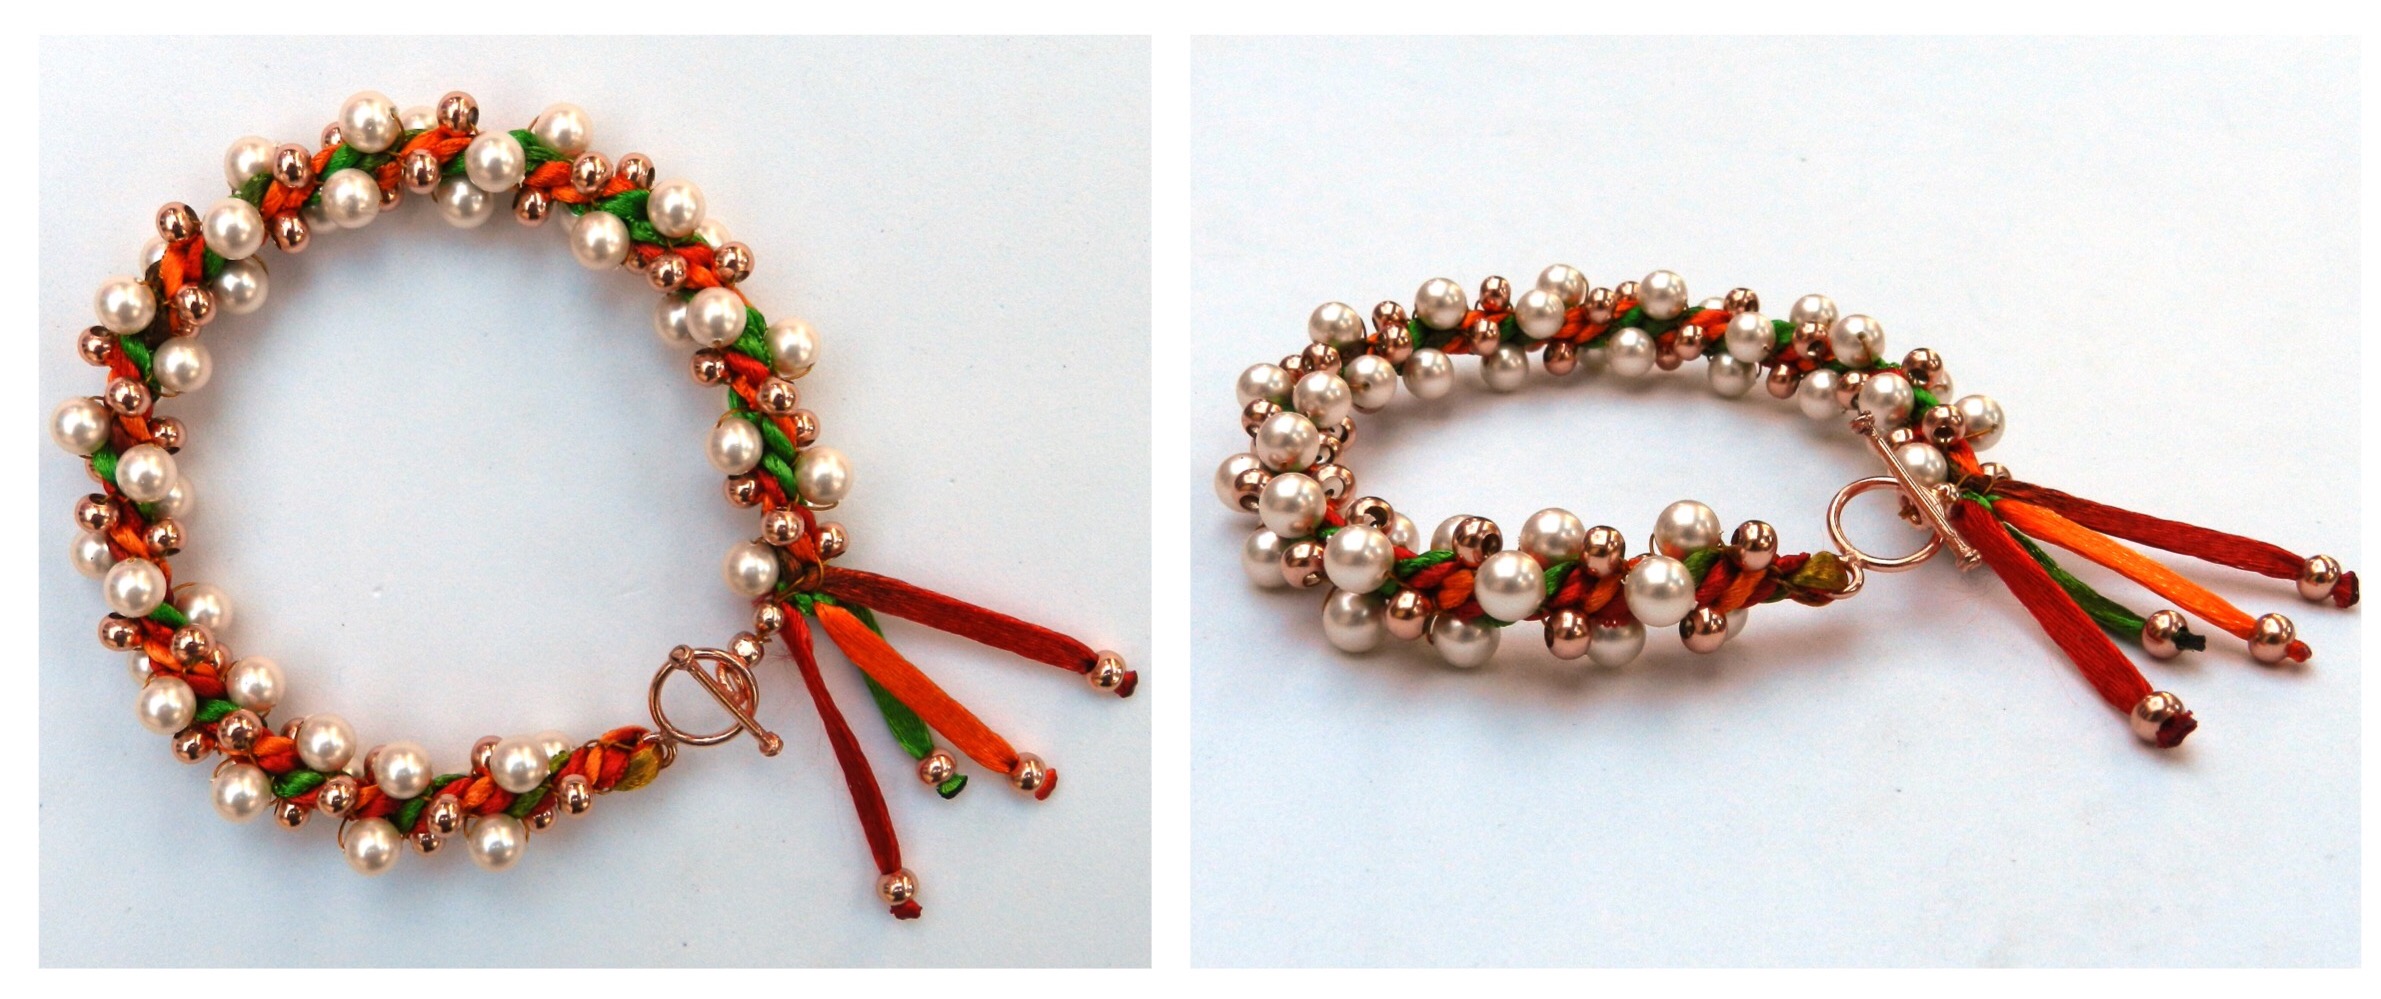
This design is made with satin ribbon and flexible beading wire, which is called beading thread by JM and is also sold as Tiger Tail.
- Cut 2 x 1m satin ribbon, 1 x 1.5m beading thread and 1 x 2.5m beading thread. Thread the ribbon throught the loop on the round section of a toggle clasp and centre it. Fold the beading thread in half and attach it to the loop with a lark’s head knot. Repeat for the other length of beading thread.
- Position the ribbon on either side of the dots at north and south and the beading thread on either side of the dots at east and west, making sure that the 2 longer lengths are diagonally opposite.
- Tread 40 pearls onto one of the longer beading threads and 40 5mm seed beads onto the other longer beading thread. Wrap the excess beading thread onto a bobbin. Weighted bobbins are best and they can be made by taping 2 x 50p to the flat side of the bobbin. Attach a weight to the knot, 100g is ideal.
- The braid structure is Round Braid. Braid for 1cm making sure that when the satin ribbon is braided it is kept flat at the point of braiding and not twisted. Braid in all the beads. Stretch and check the length of the bracelet.
- Tie the satin ribbon in pairs in a single knot across the disk.
- Thread all the beading threads through a crimp and flatten the crimp. Add a bead cover and trim off 2 threads.
- Thread the remaining beading cords through a crimp, the loop on the toggle and back through the crimp. Flatten the crimp and add a bead cover.
- Stiffen the ribbon ends with glue or nail varnish and thread a 5mm bead onto all 4. Trim the ribbon to the desired length and melt the ends with a naked flame to melt the end of the ribbon and keep the bead in place.
Purple Necklace

The colour repeat is approximately 70 cm. This necklace is made with 8 x 70cm lengths, with the colours lined up.
- The braid structure is Round Braid. Braid for approximately 15cm. Stiffen the ribbon ends with glue and roll them to compress them. Thread 6-9 beads (5mm) onto each ribbon. Tie 2 opposite ribbons together in a double knot across the disk. Tie another 2 opposite ribbons together. Remove the braid from the disk and push one bead on each ribbon up close to the point of braiding to keep the end of the braid secure.
- Tie 2 ribbons together 15 cm from the braid end. Repeat for another 2 ribbons. Position the last bead on each of the remaining ribbons at the 15cm mark. Position the ribbons on the disk and braid to the end.
- The ends were finished off with wire cones and chain.
Blue Pendant Necklace
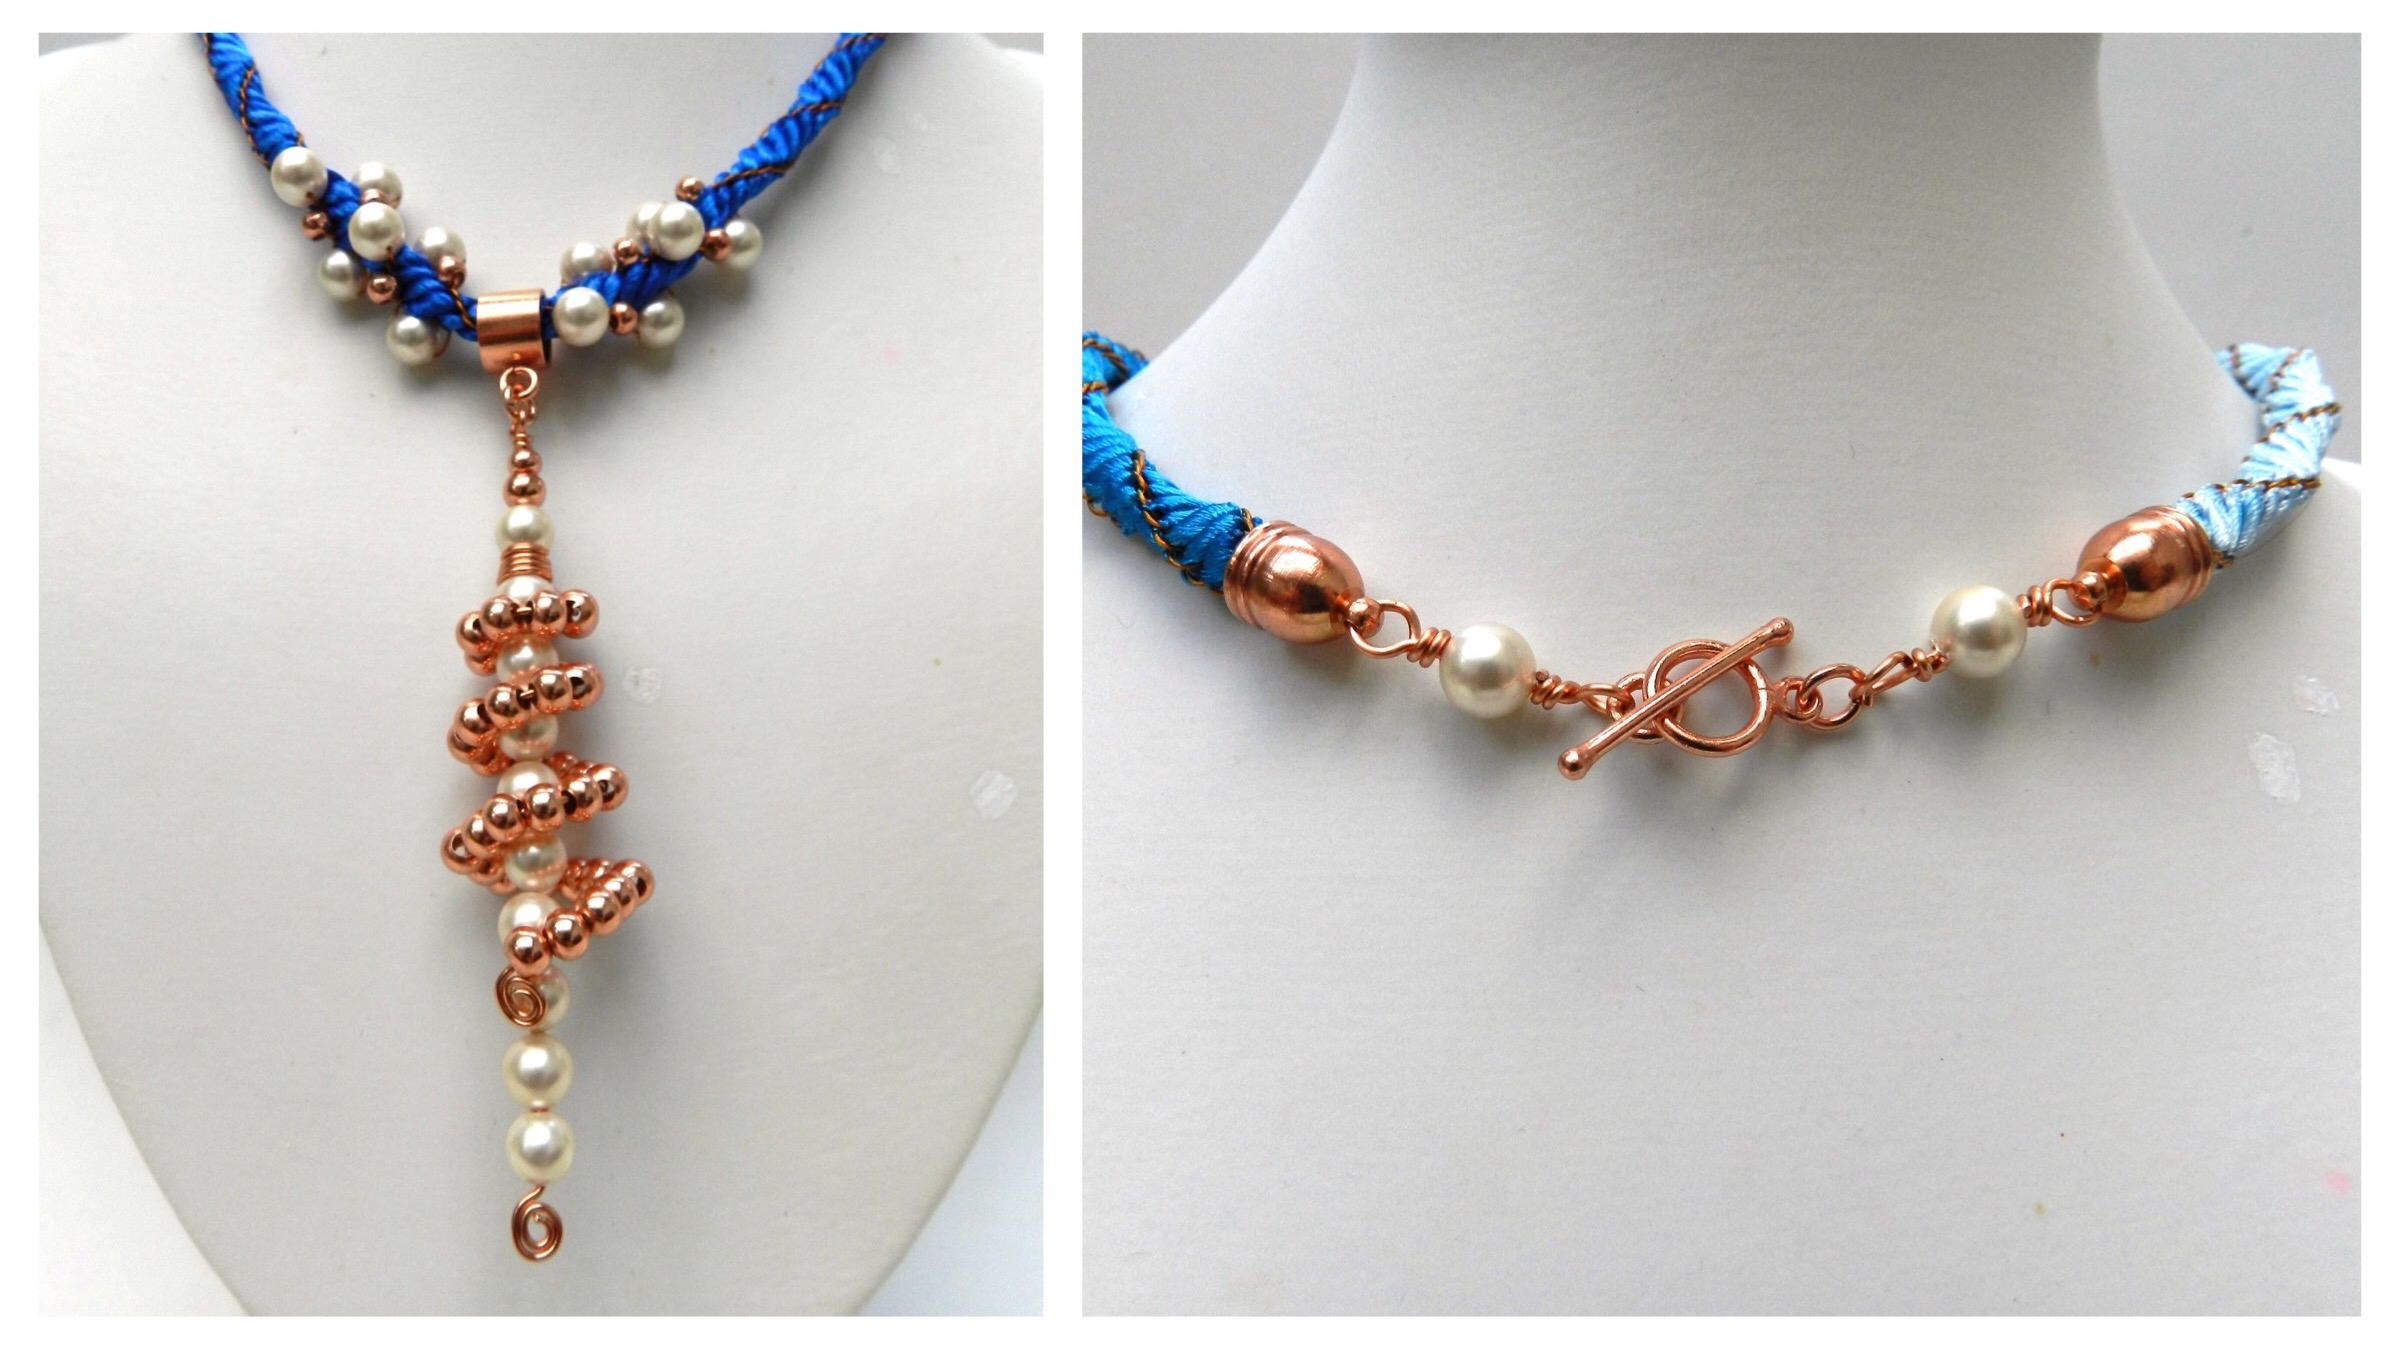
- The braid structure is Round Braid and the ribbons are lined up. Cut 4 x 1m satin ribbon and 2 x 1.5m beading thread and 2 x 2m beading thread.
- Thread 6 pearls onto one of the longer beading threads and 6 4mm beads onto the other longer beading thread. Use weighted bobbins as before. Braid for approximately 20cm and then add in the beads.
- Braid for 1cm without beads and thread on a bail, lifting one ribbon at a time. Thread 6 pearls and 6 x 4mm beads onto the two longer beading threads. Braid in the beads and then braid without beads until the sides of the necklace are the same length.

- Line up the shades on the ribbon and cut 4 x 70cm. Cut 4 x 175cm beading thread. Thread 4mm metal beads onto 2 diagonally opposite beading threads. Use weighted bobbins on the beading thread. The braid structure is Round Braid. Drop in a bead each time a beading thread with beads is moved. Finish off the braid with a row of beads to bring the braid to the desired length.
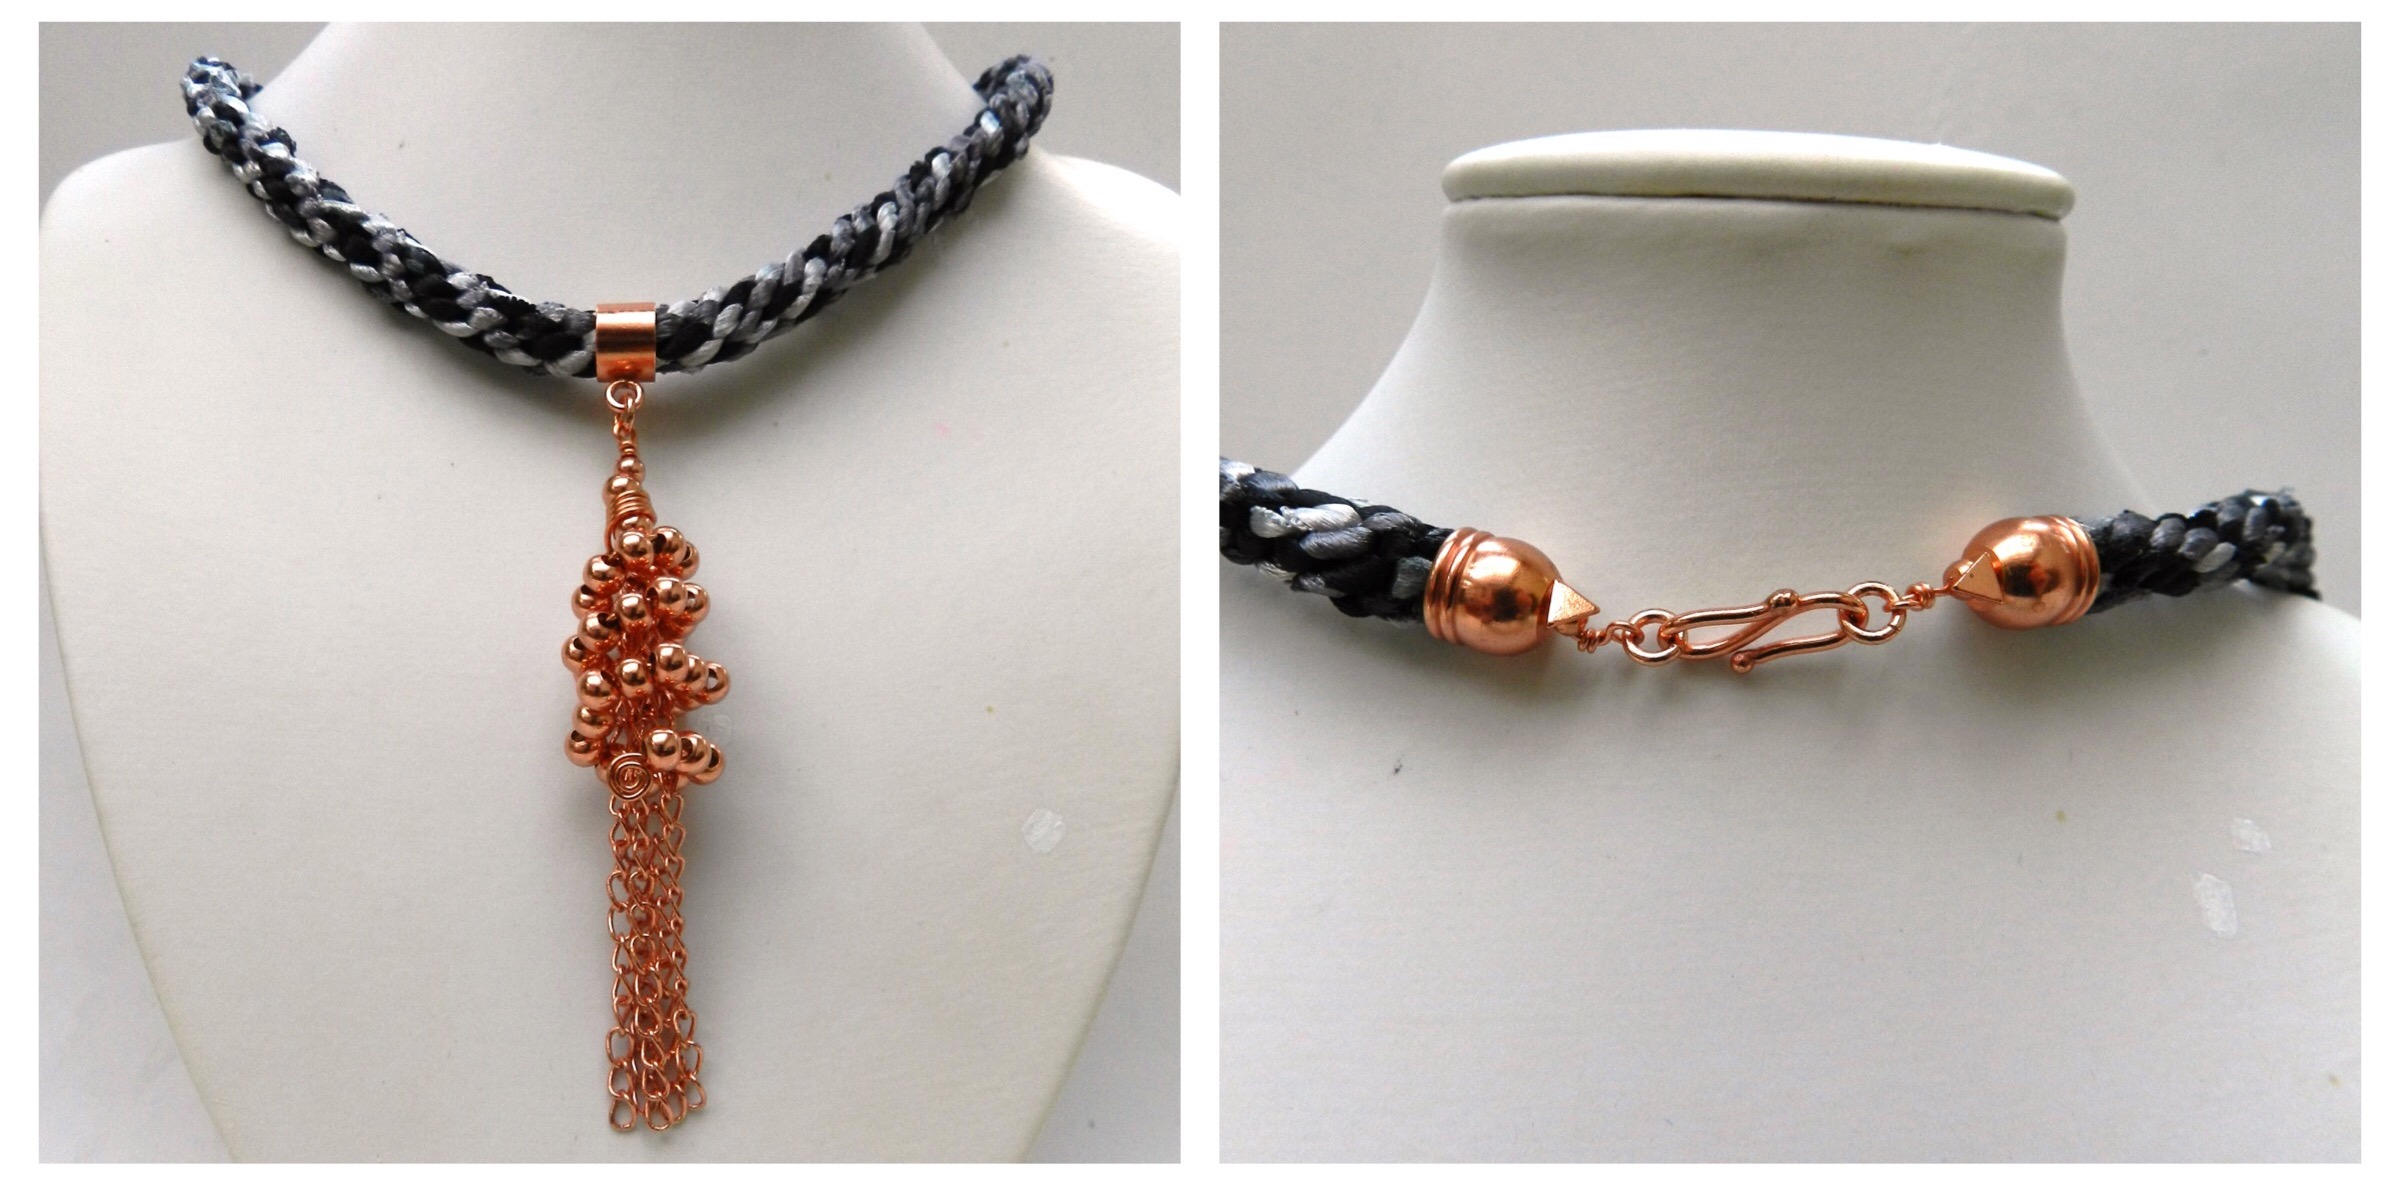
- This necklace is made with random ribbon. Cut 1m x 8. The braid structure is Round Braid.