
This kit contained S-Lon cord in three widths, gold seed beads size 3mm and 4mm as well as some lovely amethyst 5mm bicones, aquamarine rondelles and some black pearls. All the designs shown here would work well with other stones or pearls of roughly similar sizes.
Pearl and Gold 7 Cord Bracelet

1. Cut 7 x 60cm of S-Lon 0.4mm.
Follow the instructions for the 7 cord braid at the bottom of the page.
2. Thread 22-26 gold 4mm seed beads onto 6 cords and the same amount of 4mm black pearls onto the other cord. Braid in the beads and finish with 2cm of un-beaded braid.
3. Complete the bracelet as shown on the show with a headpin/coil ending or with a glue-in end.
Aquarmarine Necklace

1. The aquamarine is threaded onto matching beading thread/wire. This enhances the colour of the stone, so use it in the necklace. Remove some stones from each end of the strand, making sure that what is left is symetrical in graduation. Use crimps to form a loop at either end. The loop needs to be large enough to accommodate 16 strands of 0.3mm cord.
2. Cut 16 x 1m of cord. Thread it through the loop on one side and position the cords on either side of the dots with 4 cords in each slot. Braid to the end of the cord. Finish off the braid with a glue-in end cap. Repeat for the other side.
3. Thread 3 stones onto headpins. Pass them through the loop of beading thread/wire on one side and wrap the headpins around the loop. Adjust the stones so that the loop is covered. Repeat for the other side.
Springtime Bracelet

Never waste offcuts!
This bracelet was made using the excess cord from the aquamarine necklace. A selection of beads and beads on headpins is threaded onto a 20cm length of 0.8mm wire and a wrapped loop is formed at both ends. Stick the offcuts into end caps and join the bracelet with jumprings.
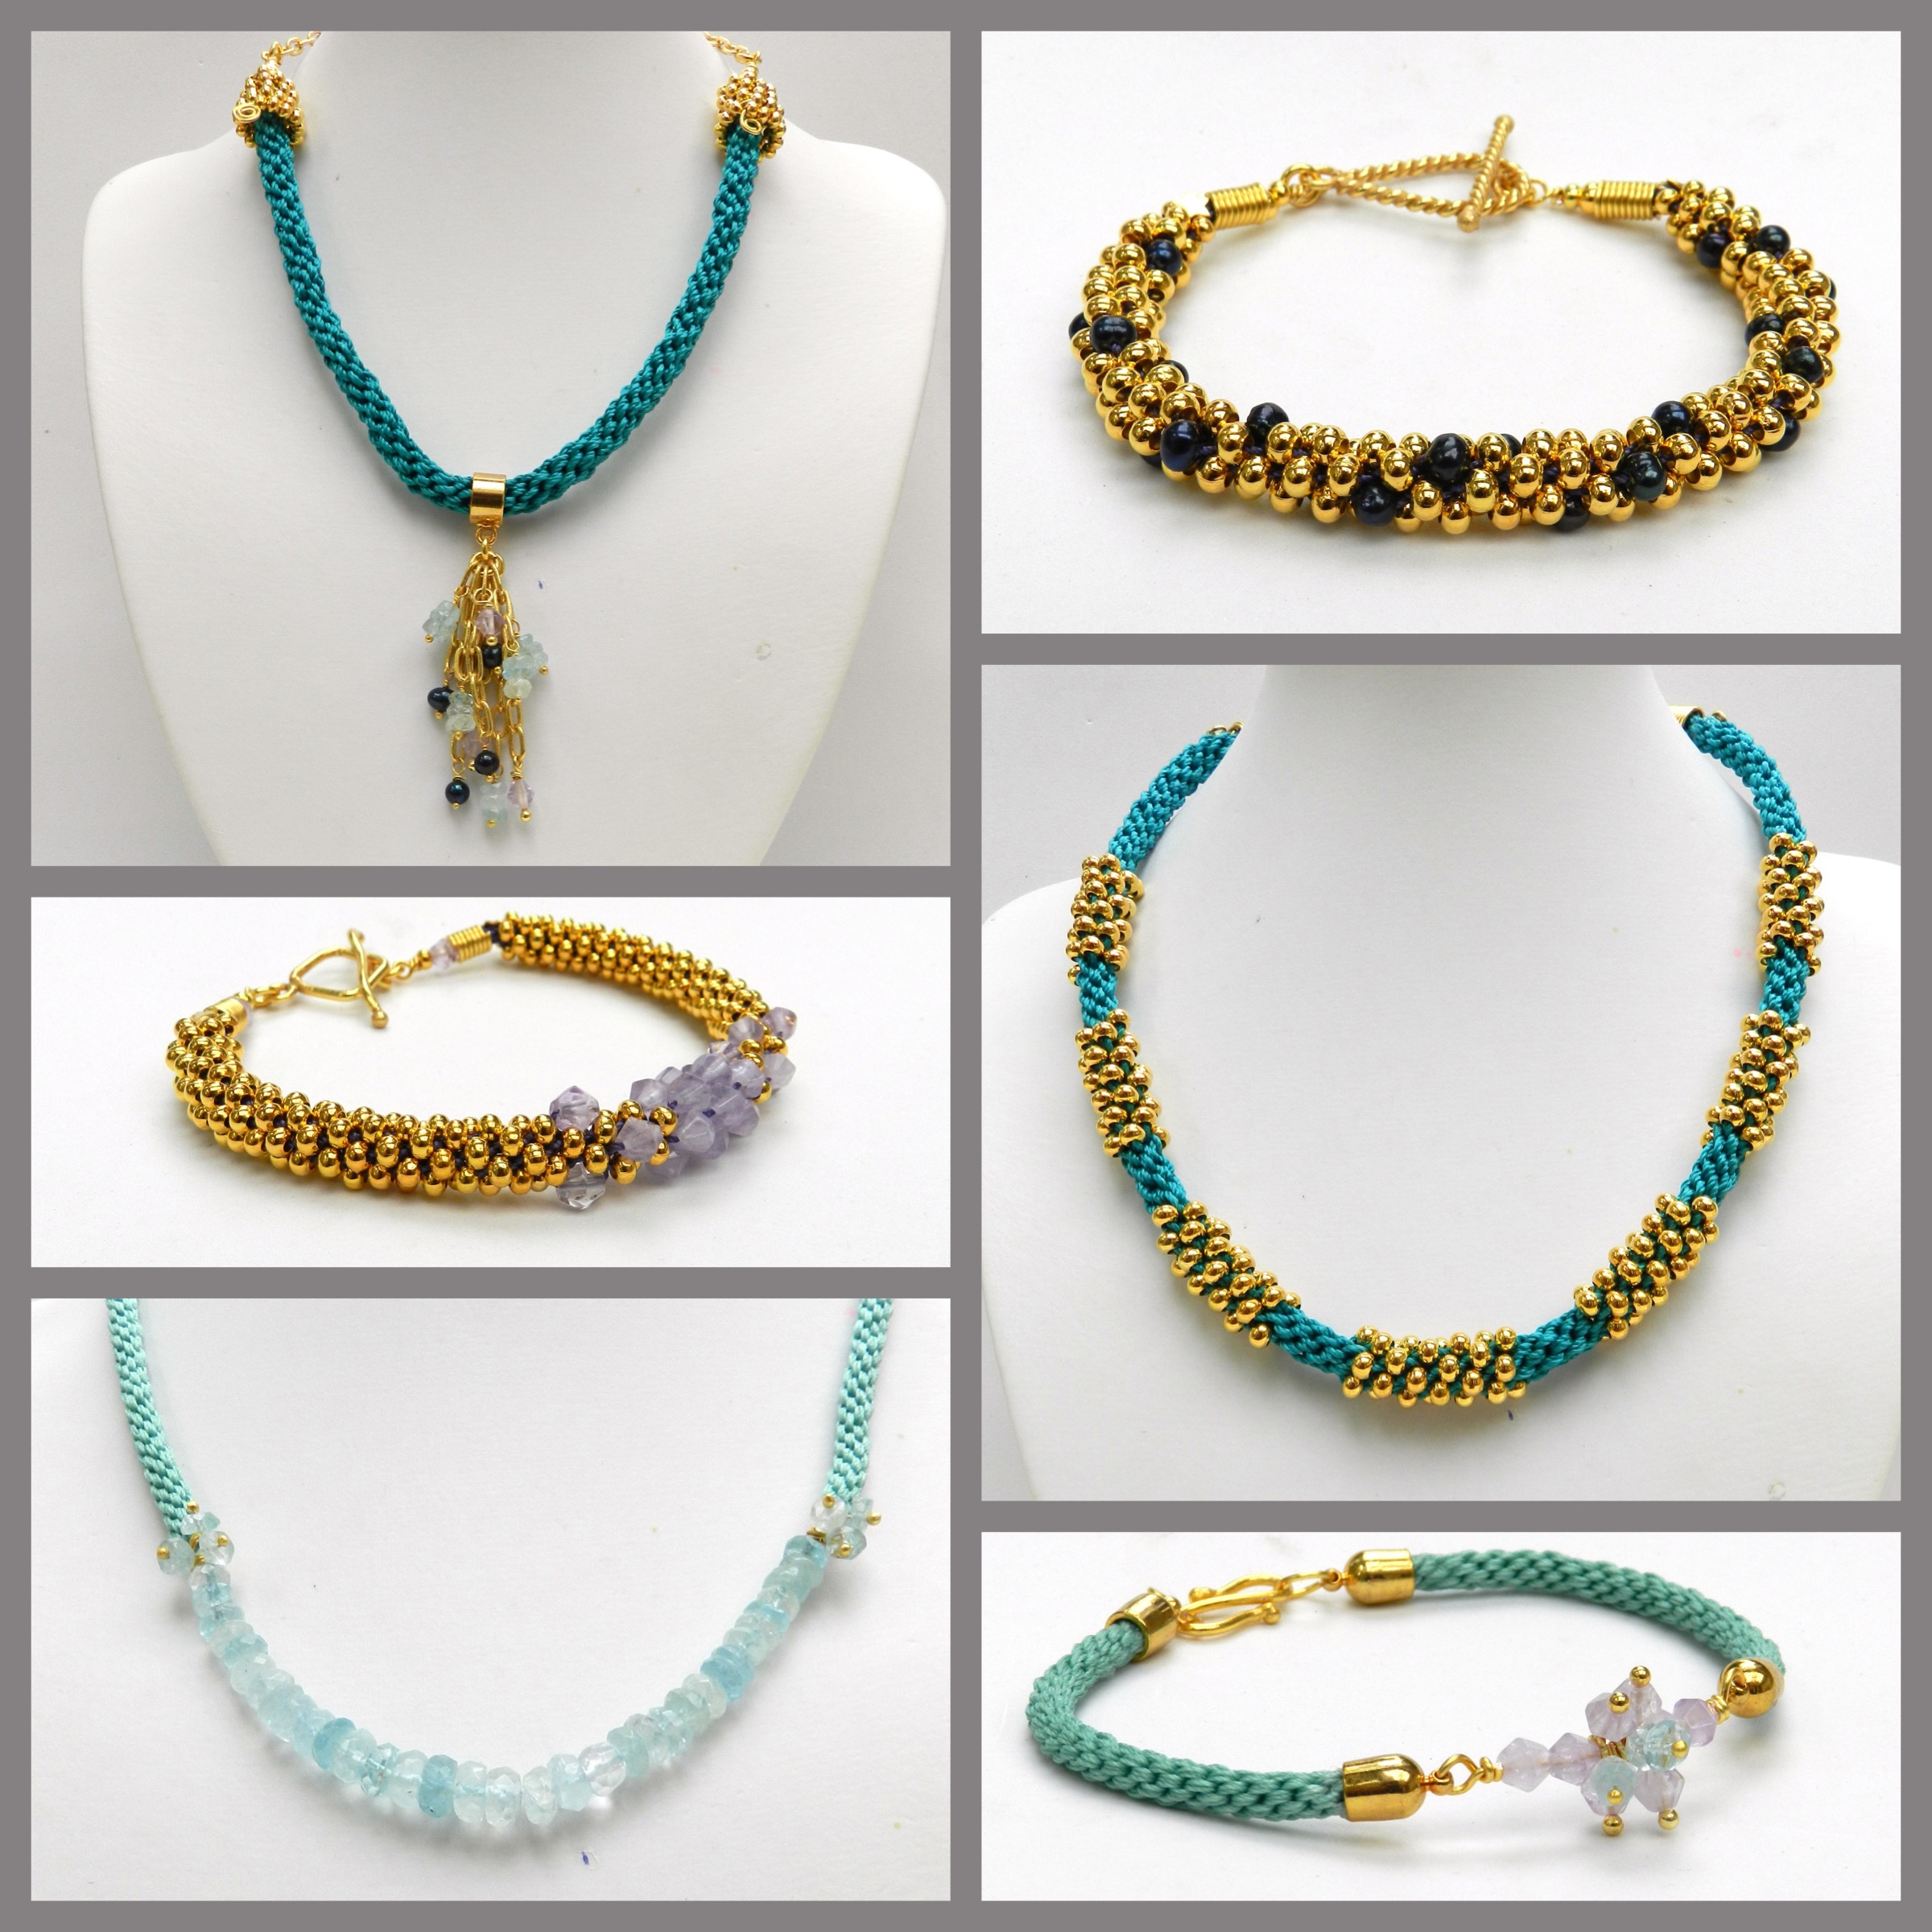
Beady Bead Necklace
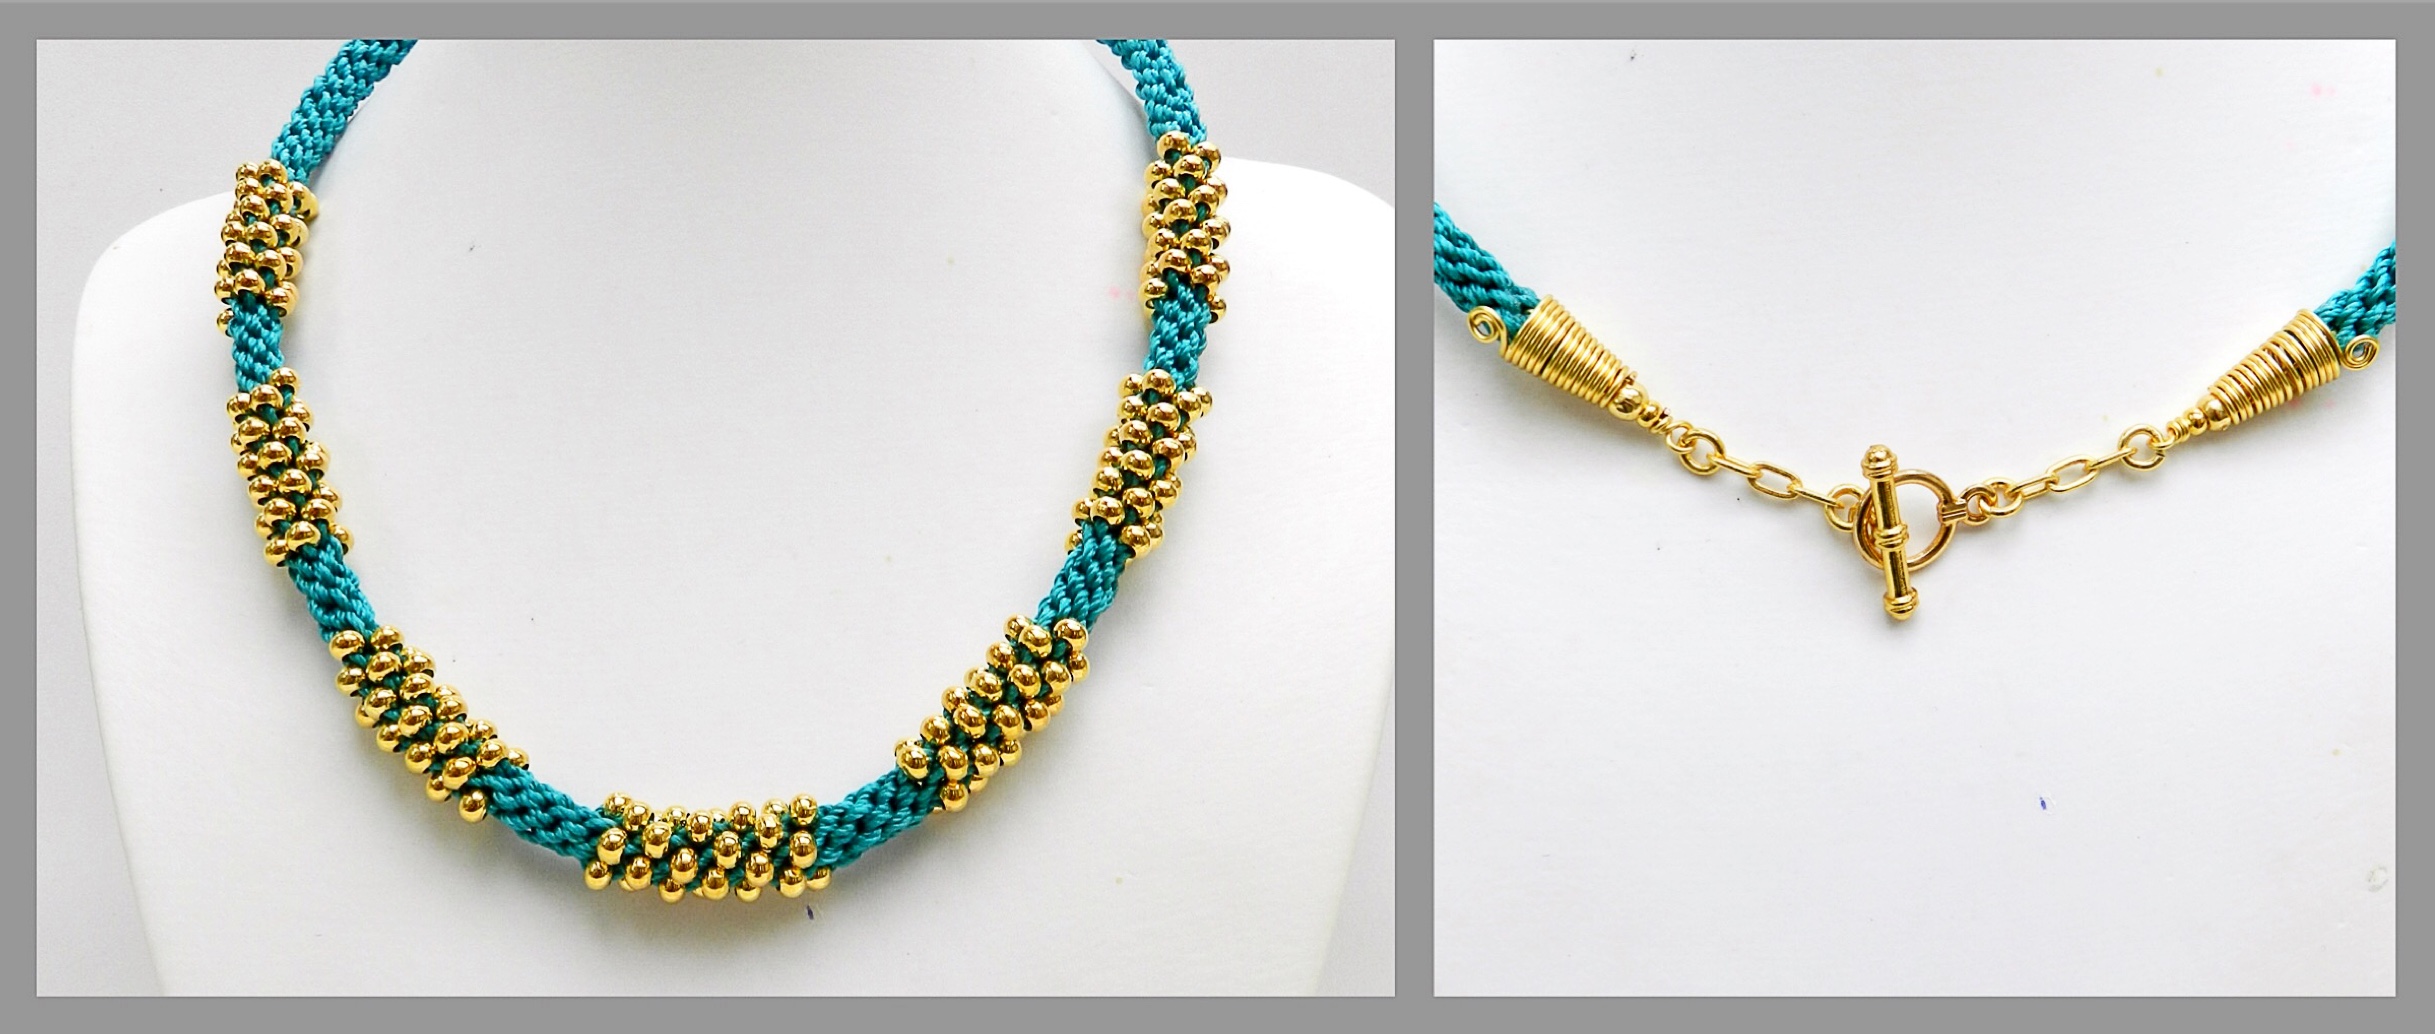
This necklace is made in Round Braid with 2 x 0.9mm S-Lon in each slot. The beaded sections can be made with 2, 3 or 4 0.4mm beads on each pair of cords. Vary the number of beads for different effects.
Amethyst Bicone Bracelet

This bracelet was made using 8 cord Round Braid.
Thread the following beads onto 2 diagonally oppposite cords,
13 x 3mm gold seed beads – 8 amethyst bicones – 13 x 3mm gold seed beads
Thread the following beads onto the other 6 cords,
16 x 3mm gold seed beads – 2 amethyst bicones – 16 x 3mm gold seed beads
7 Cord Braid
The 7 cord braid does not originate from Japanese kumihimo, but it is a very popular disk braid. It is quick to master, quick to work up and excellent for beads of different shapes and sizes.
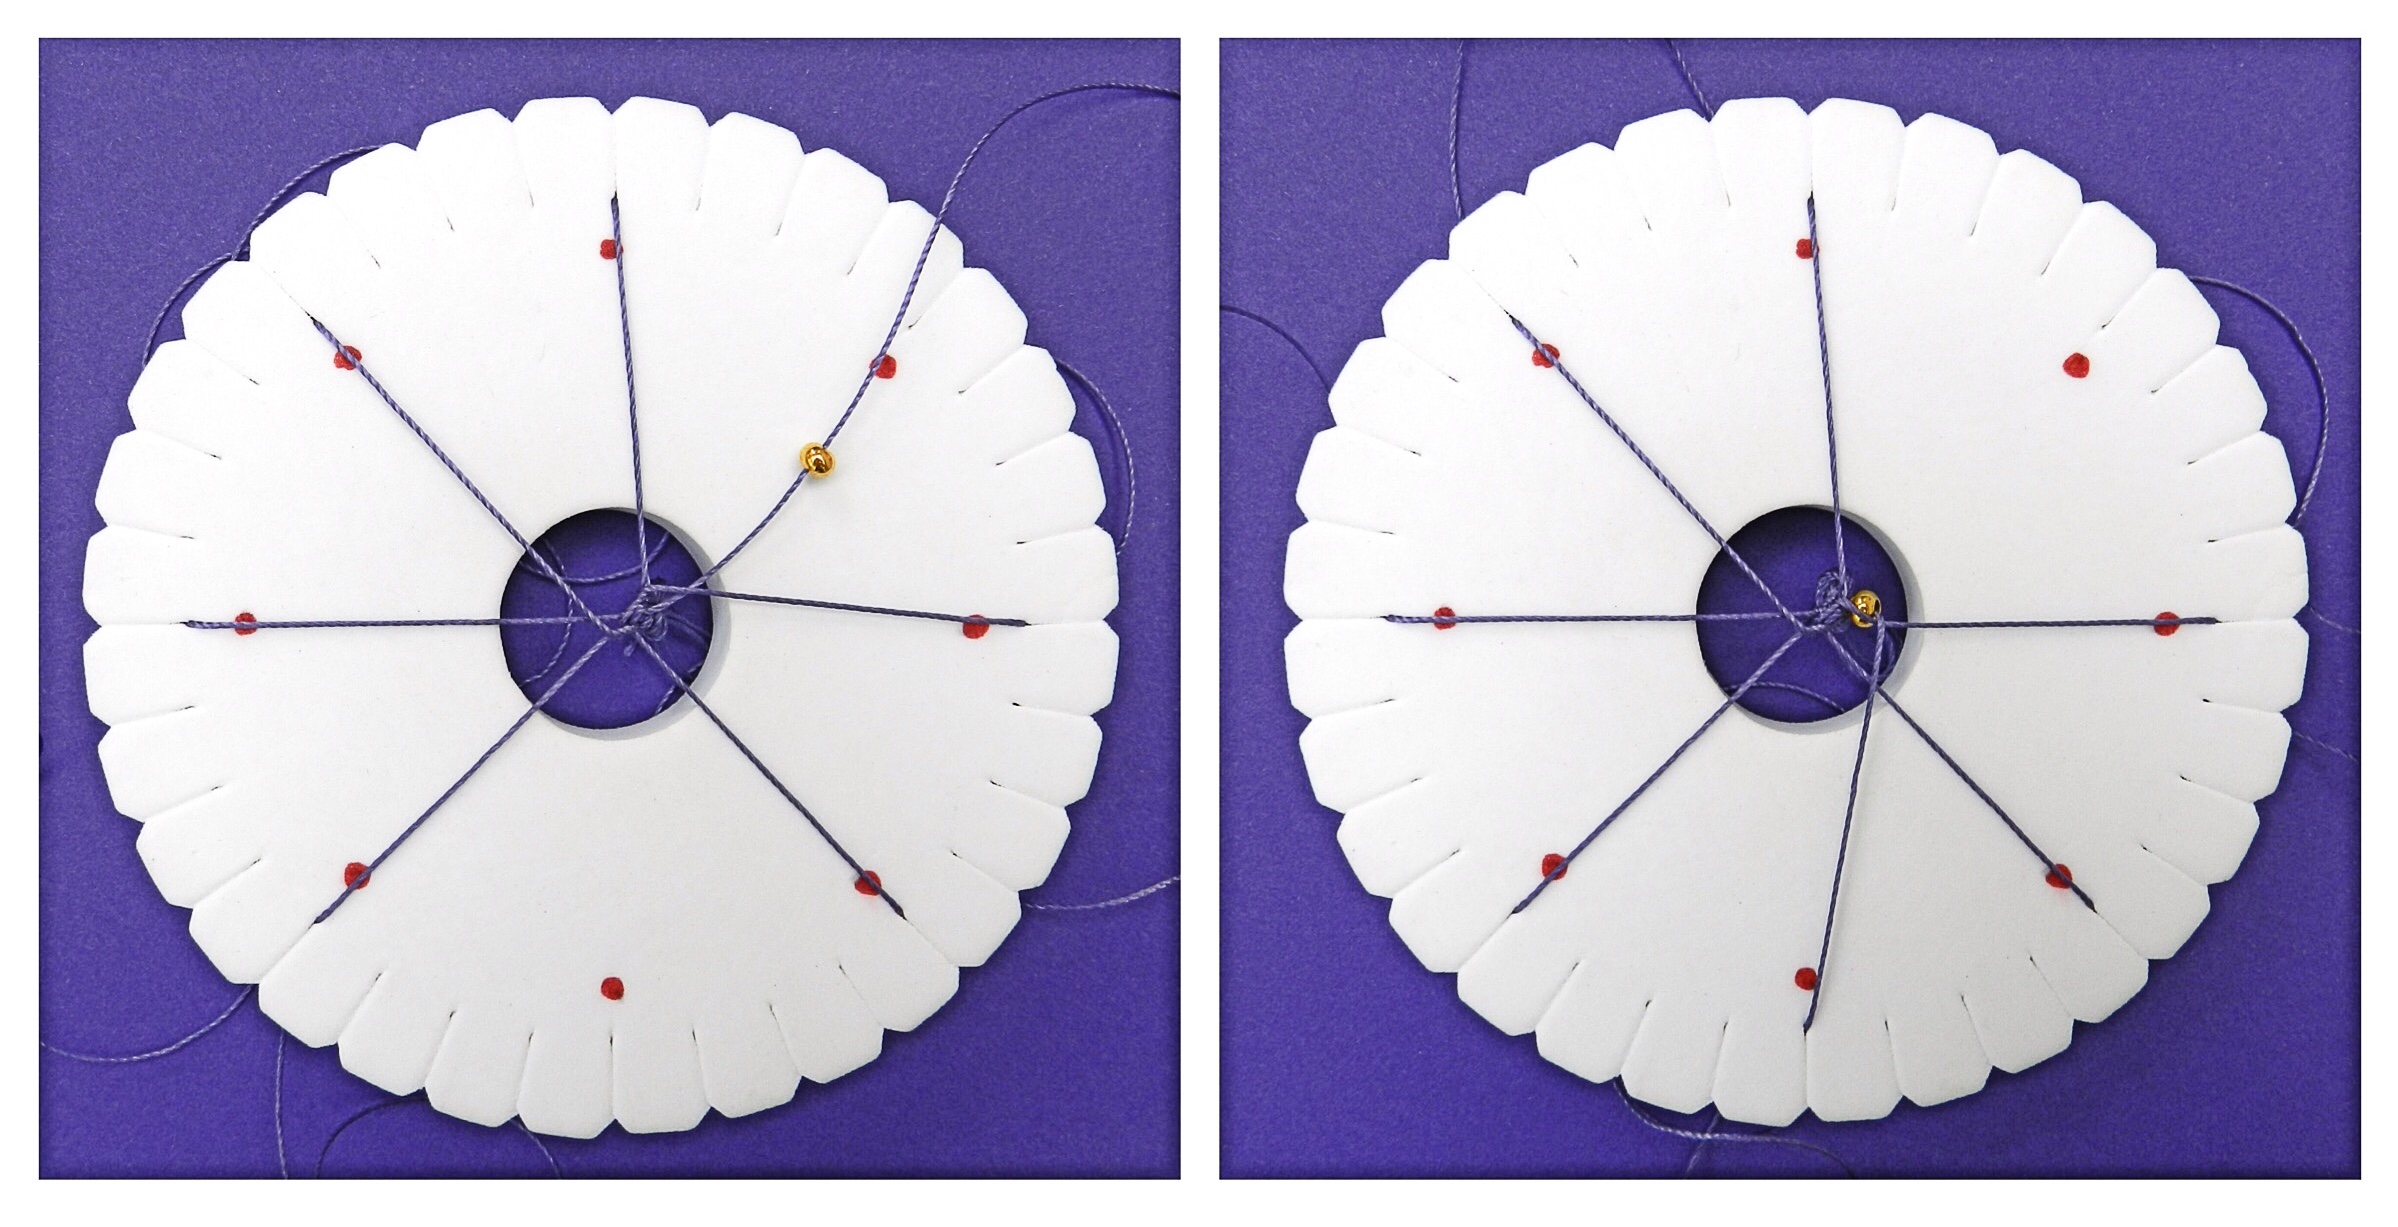
First of all mark up the reverse of the disk with eight equally spaced dots. This means that there should be a dot under every 4th slot.

Position 7 cords in the slots leaving one gap. Hold the disk so that the gap is at the bottom. Count to the third cord on the right. In order to get into the rhythm of the braid it may help to tap the disk on dot one and dot two, then pick up the third cord. Put the cord into the gap at the bottom. (This braid is sometimes known as ‘Fill the Gap’) Rotate the disk so that the gap is once more at the bottom and again count to the right, picking up the third cord and placing it in the gap. Just repeat these movements until the braid is the correct length.
It is easy to find your place with this cord if you need to put down your disk. Just position the gap at the bottom again and count to the third cord on the right.
To watch a video of me demonstrating this braid click here and fast forward to 1.32

Adding beads is really easy. When the cord is moved just slide a bead down to the point where the braid forms and tuck the bead under the cord being crossed, before placing the cord in the gap.
Beads can be used on all cords or just some of them.