
These designs were shown on the morning show on 10.2.15. The kit included S-Lon in lovely natural colours, teamed up with some 4-5mm pearls, top drilled smokey quartz and a tube of 3mm/size 8 metal seed beads. There were also findings and a threading pack in the kit. The morning show gives designers a 10 minute slot for each of the three kits and it can be seen by clicking here.
Beading Wire/Thread – Jewellery Maker use the term Beading Thread for the flexible coated beading wire, which is known elsewhere at Beading wire or Tiger Tail. For these instructions I will refer to it as Beading Thread.
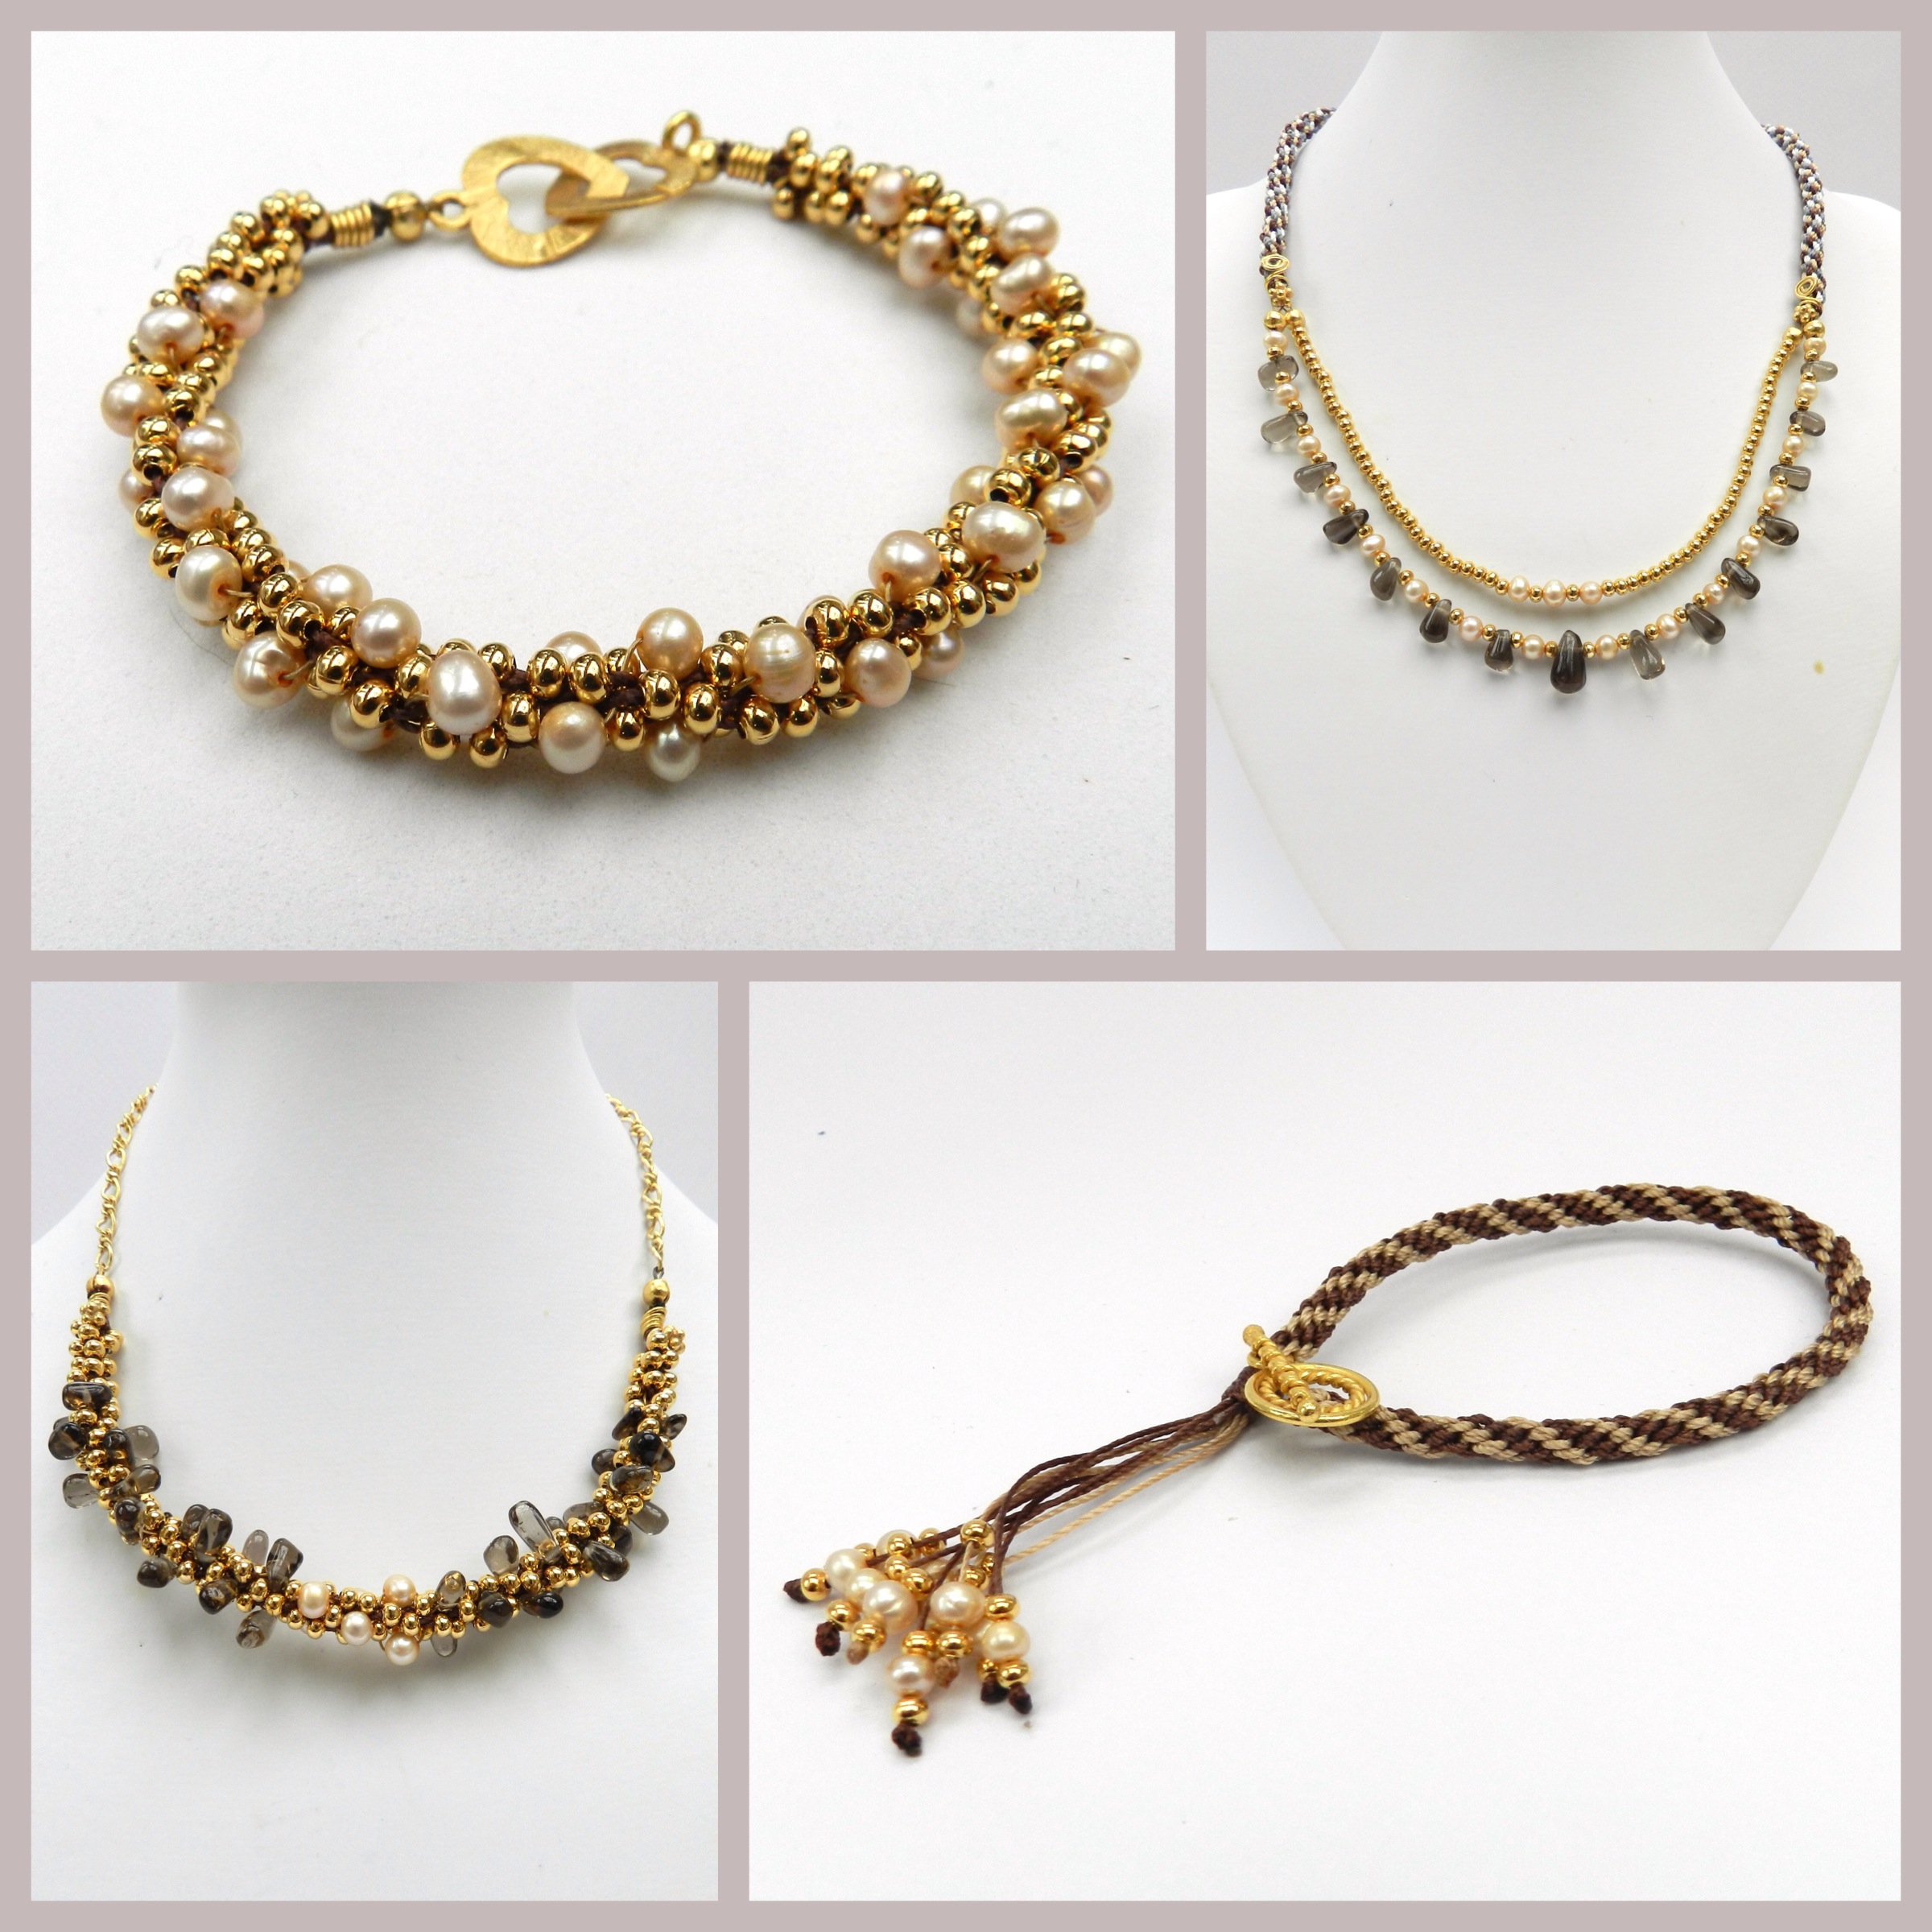
Pearl Bracelet
I demonstrated how to make this bracelet on the show. Pearls generally have small drill holes, so in this design beading thread is used for the pearls. S-Lon is used for the metal seed beads.
1. Cut 6 x 60cm brown S-Lon and 2 x 60cm beading thread
2. Braid for 1-2 cm
3. Thread 25 seed beads onto all 6 S-Lon and 25 pearls onto the beading thread
4. Braid in all the beads and then braid on for a further 1-2cm
Any ending can be used, such as glue-in end caps, glue-in integrated clasp, foldover ends etc.
This is the ending method I demonstrated.
1. Bind and glue the end of the braid, close to the beads. Pierce the braid with a decorative headpin, between the beads and the binding. Wrap the end of the headpin around the braid to cover the binding. Trim away the cord, but leave the beading thread. Use the beading thread to attach the clasp with a crimp, close to the coiled headpin. Cover the crimp with a crimp cover. Use a lighter or thread burner to burn away any stray whiskers of cord. Take care!
Cord and Tassel Bracelet
1. Cut 1m x 4 brown S-Lon and cut 1m x beige S-Lon
2. Thread all 8 cords through the loop on a toggle from a toggle clasp, centre the toggle on the cords and position the cords on the disk, with two cords in each slot. Braid until the bracelet is the required length.
3. Thread the other part of the clasp onto 4 cords, one by one and continue to braid for 16 moves.
4. Add a drop of glue to the middle of the braid, while it is still on the disk. Allow the glue to dry until it is tacky. Remove the braid and roll the glued section between finger and thumb to make a neat finish.
5. Tie the loose ends in an overhand knot right on the glued section. Alternatively bind the glued section with matching thread.
6. Thread a selection of beads onto a cord (the pearls may need to be reamed) and secure them with a knot. Trim the knot and burn off the excess carefully with a thread burner or a lighter.
Double Strand Necklace
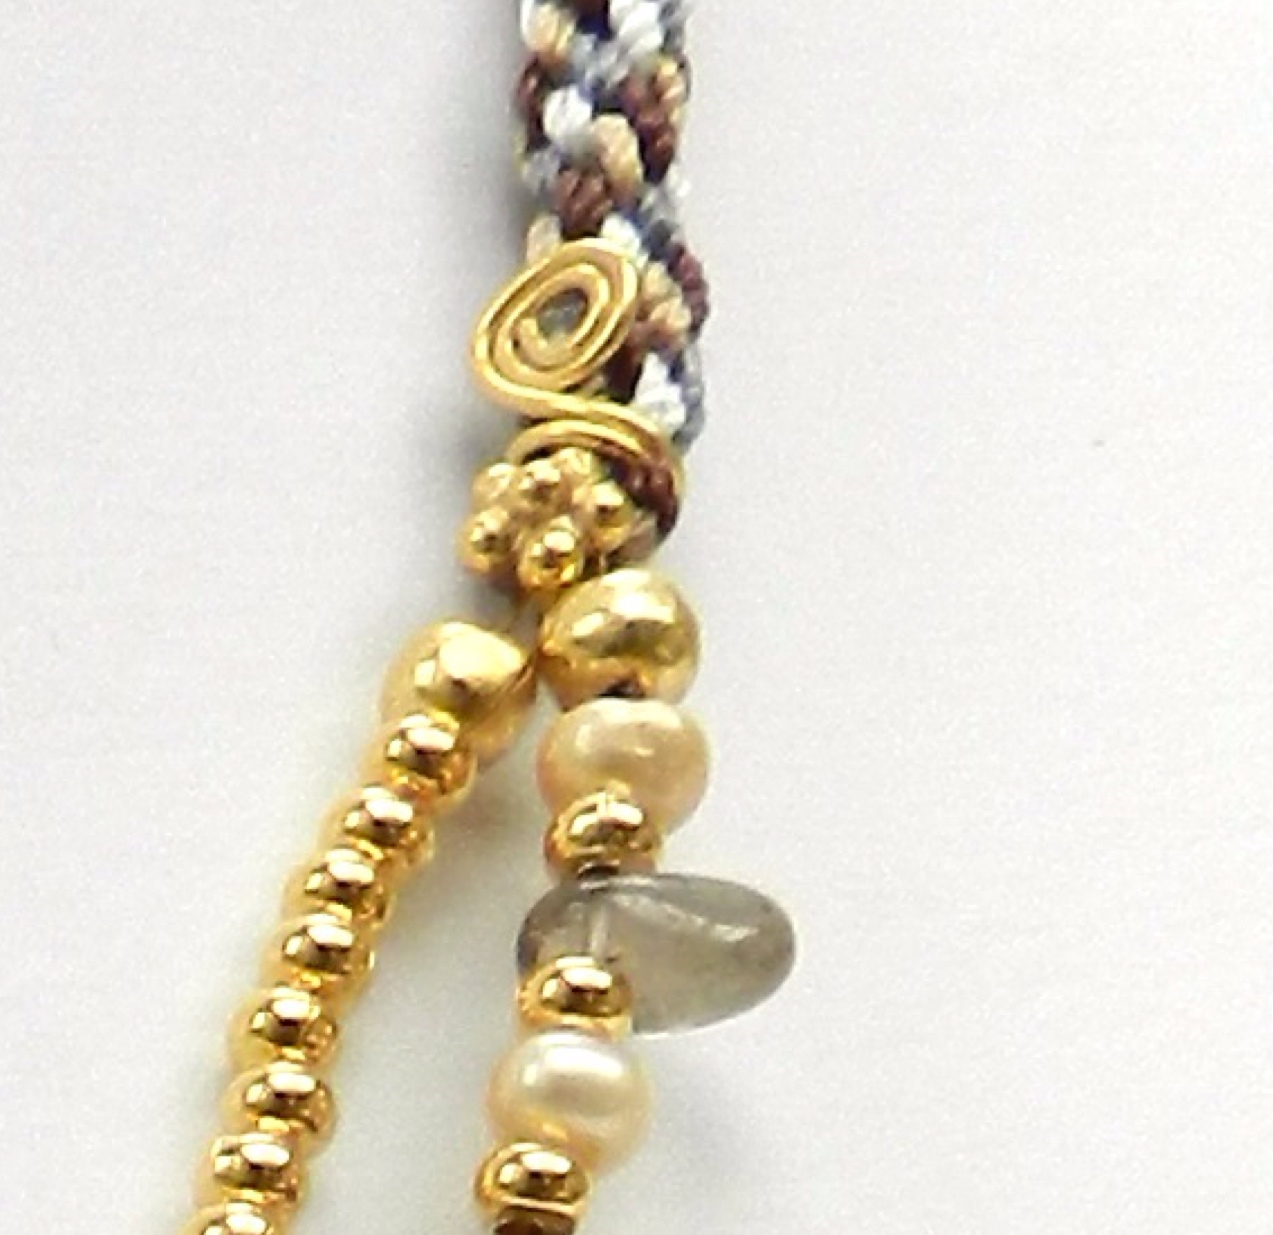
This necklace is made by threading a selection of beads and gemstones onto beading thread and crimping loops at either end. These loops can then be used as the starting point for kumihimo side sections. The necklace pictured has two strands of beads, but you can have as many or as few as you want. Just make sure that the loops are big enough to accommodate the cords.
The kumihimo at the sides was made with 1m x 2 x 4 colours. These 8 cords are doubled so that 16 cords are positioned on the disk, with 2 in each slot. The ends were finished with fold over clasps and a decorative headpin was coiled around the connection between the braid and the beading thread.
Beaded Braid Necklace
The beaded section of this necklace is made with 60cm x 6 S-Lon and 60cm x 2 beading thread. Thread 25 seed beads onto all 6 cords and thread 11 top drilled gemstones, 3 pearls and 11 top drilled gemstones onto the beading thread. The ends are finished in the same way as in the Pearl Bracelet and chain is added to complete the design.