

On 11.11.15 I put on protective gloves and got messy! To watch the show click here and fast forward to 1 hour into the show for the start of the demo hour.
The kits I used included Vintaj patina paints in 9 different colours, metal seed beads in rose gold and yellow gold in 4 different sizes and S-Lon in 3 different sizes. My aim was to show how you can achieve all sorts of customised effects by using patina paint on fairly standard materials.
Make sure the instructions are read before starting work. Here are a few tips from me.
- Protect all surfaces and wear disposeable gloves
- The paint dries quickly, so work fast
- Use small random strokes of a pointed paintbrush
- Less is more!
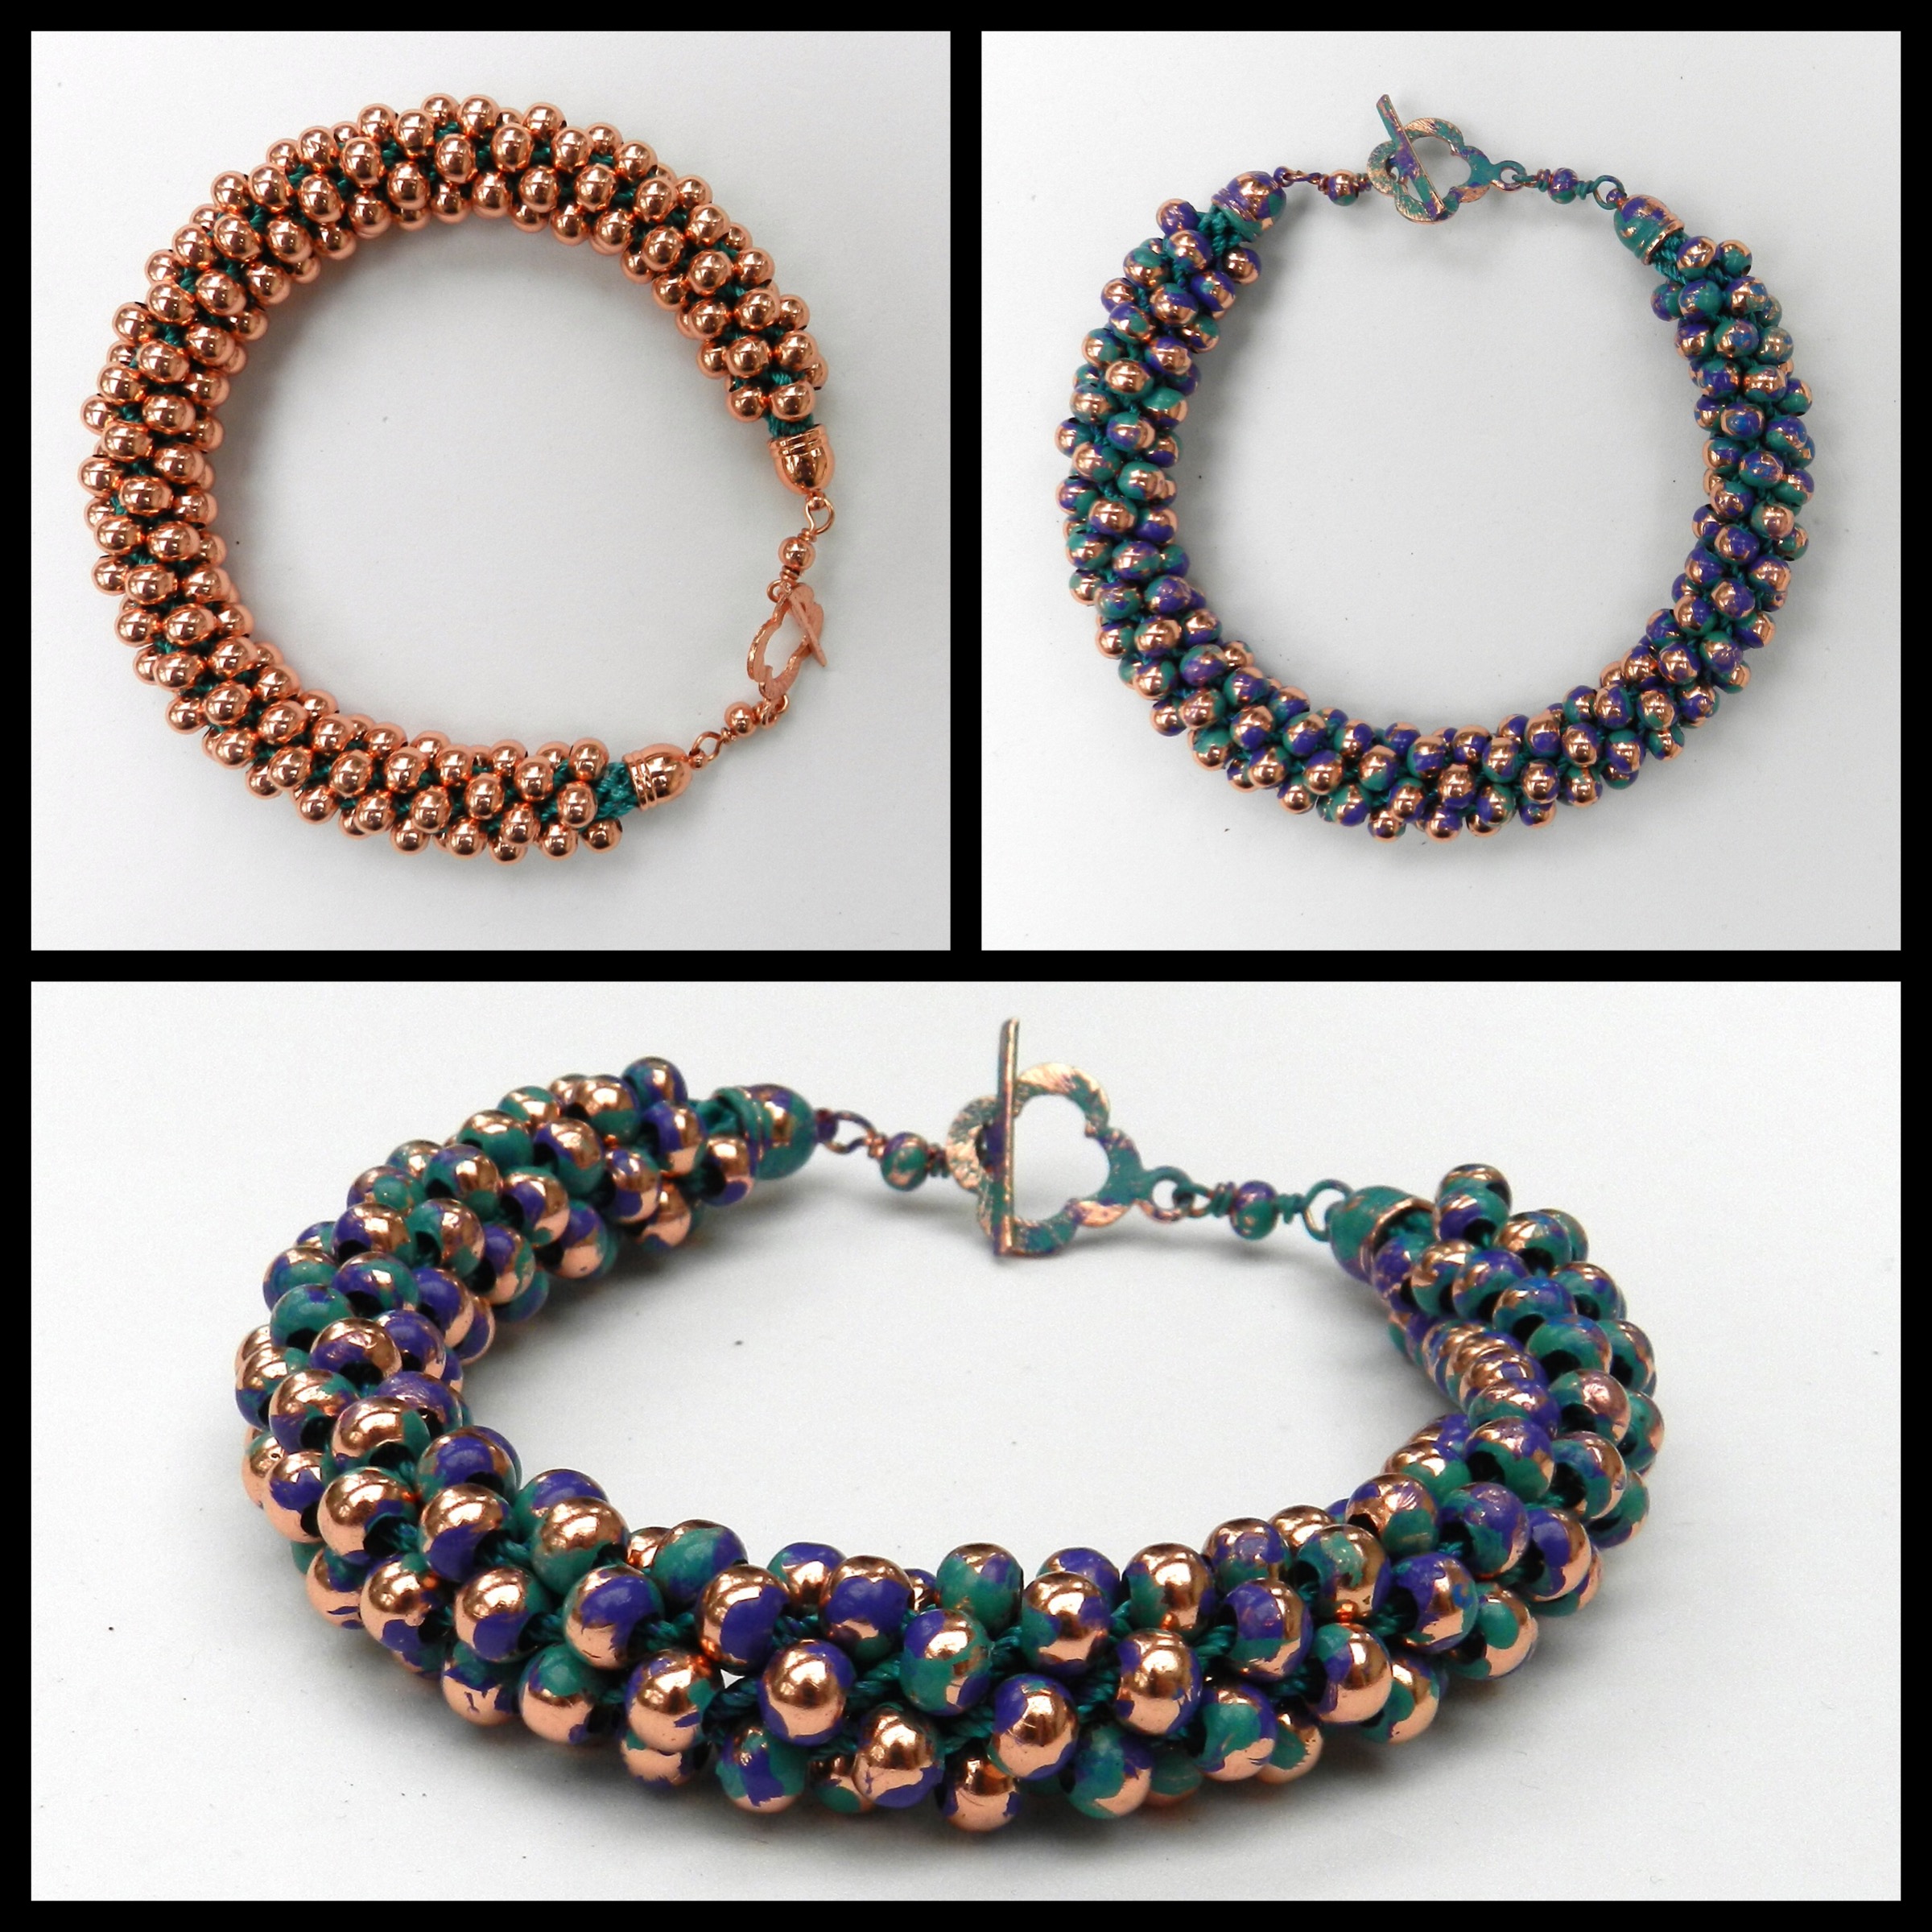
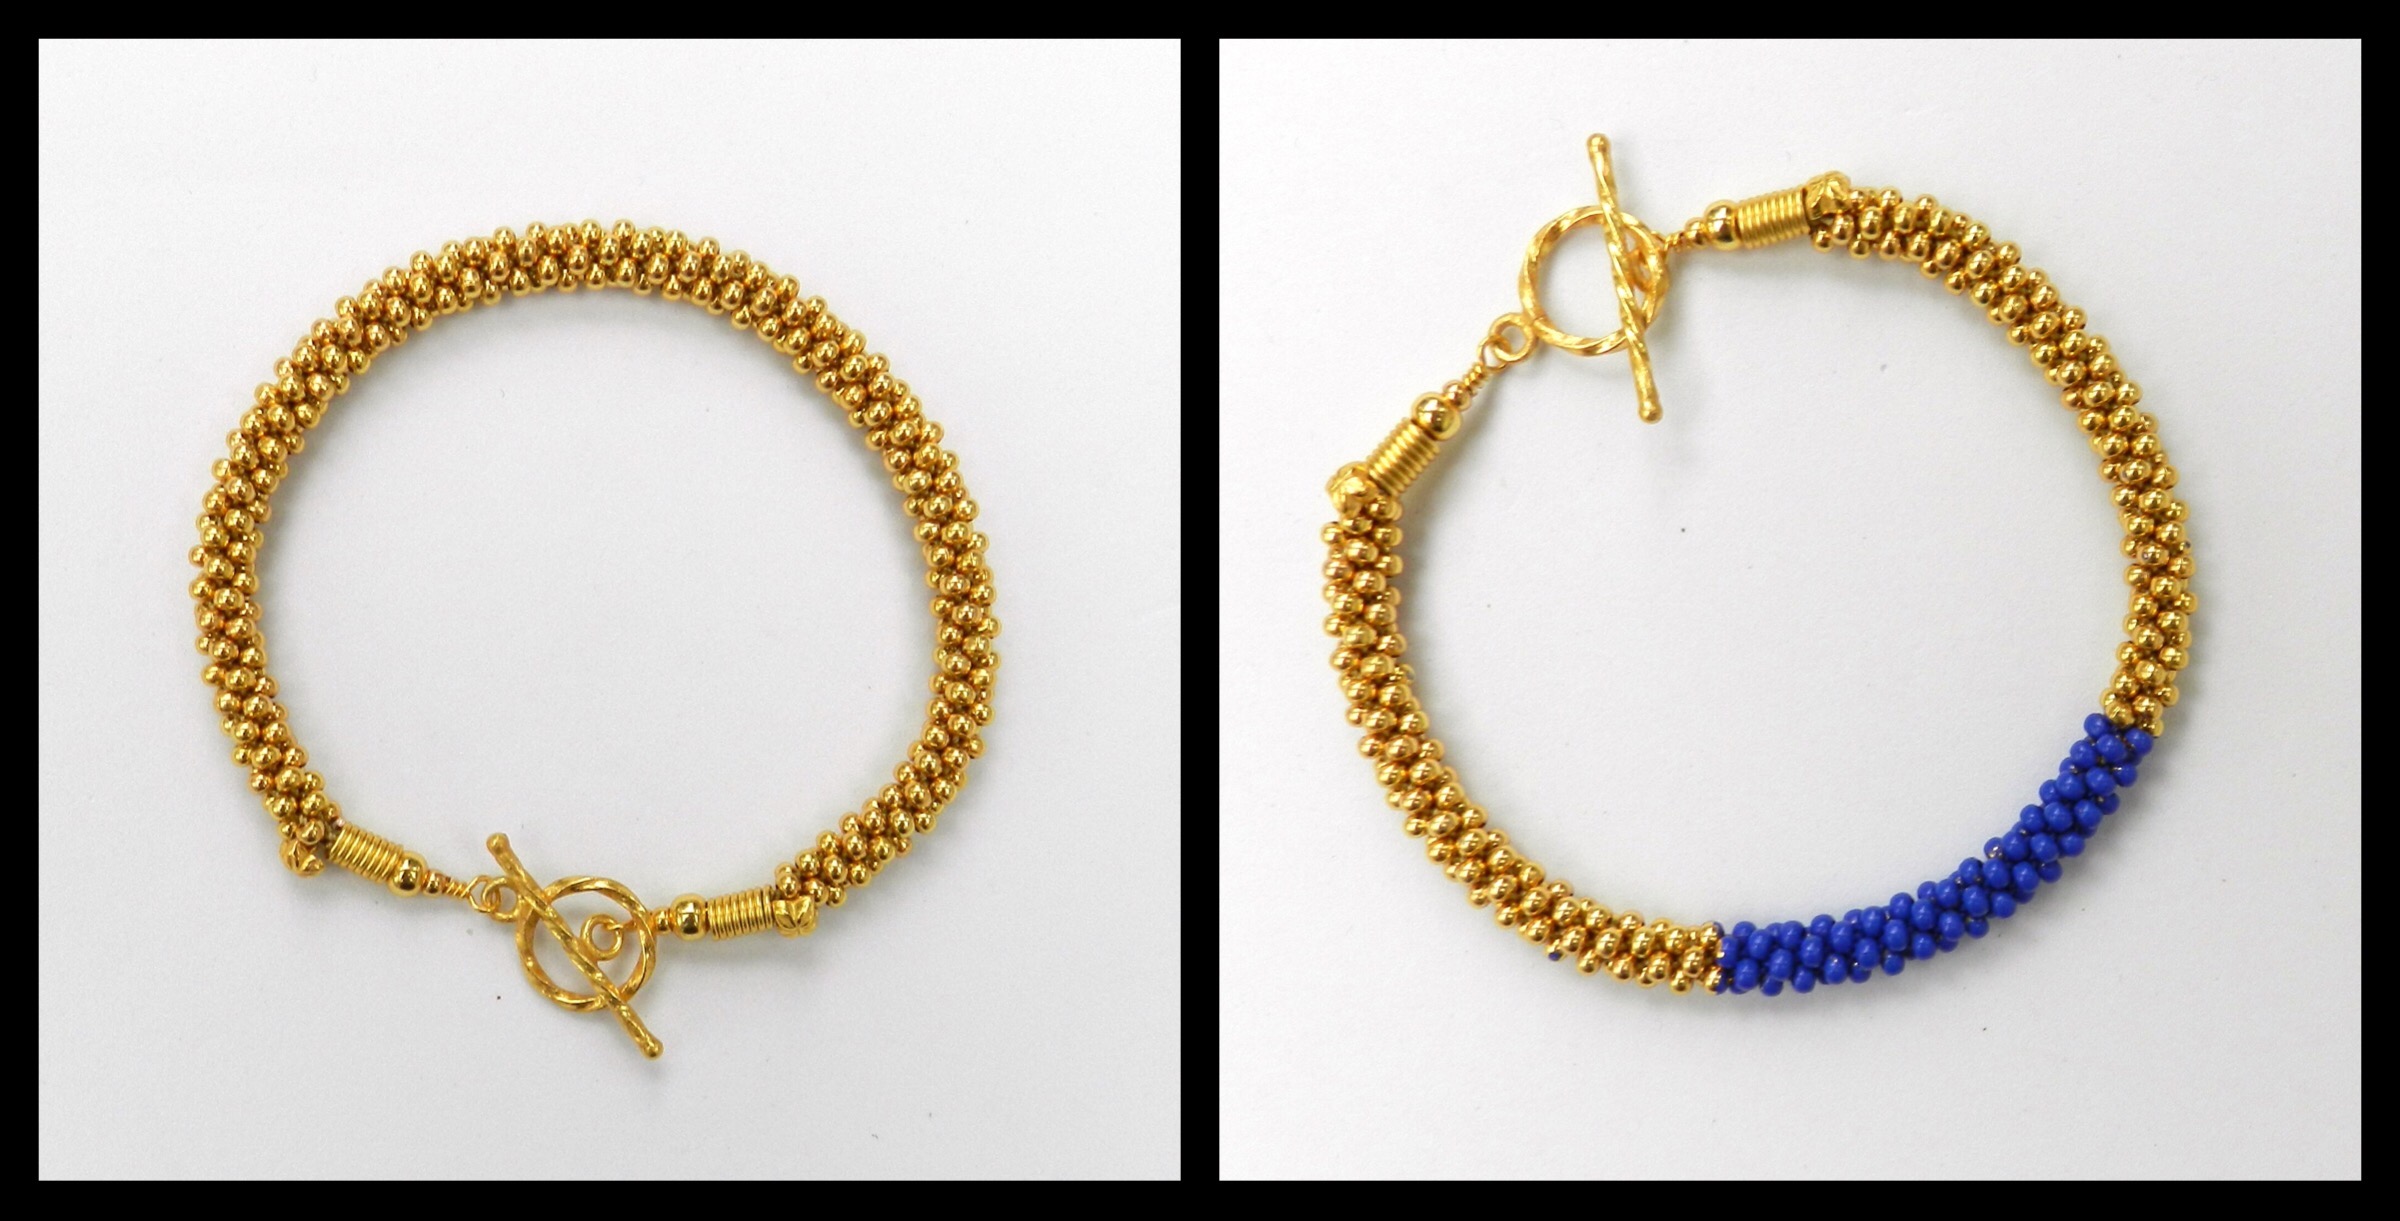
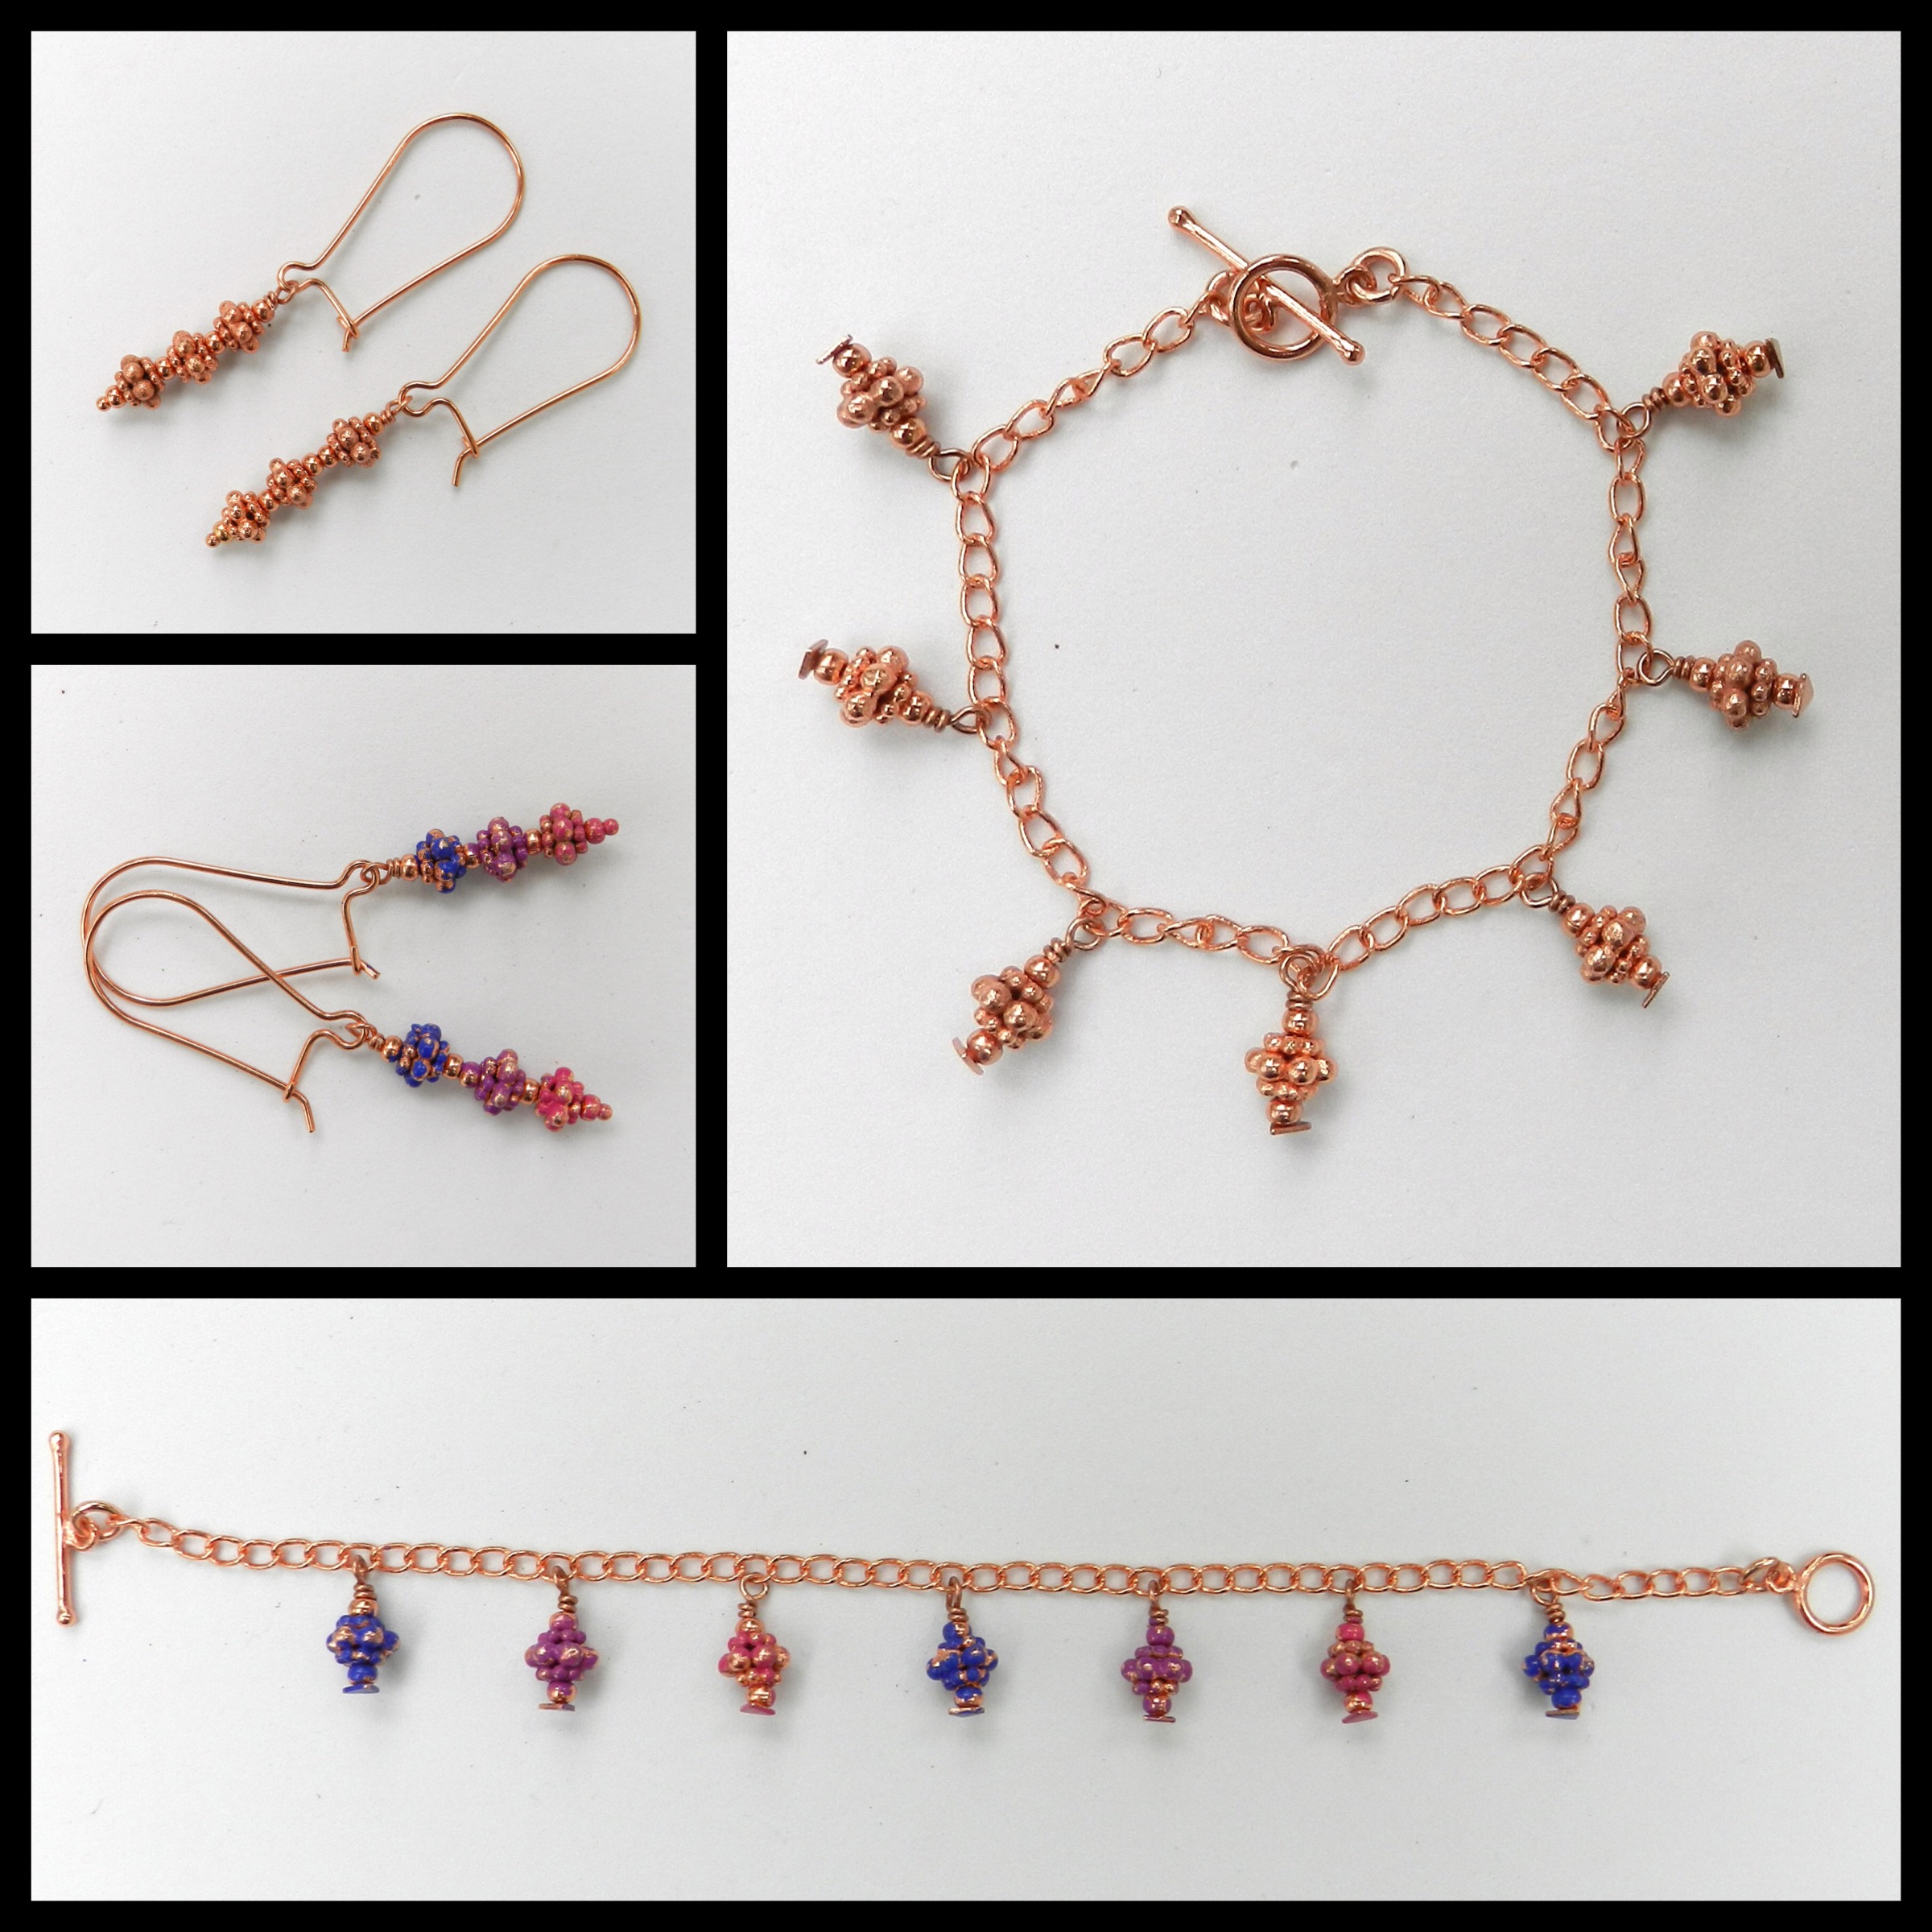
The following photos show some before and after shots to give some inspiration.
For this design I mixed a purple using ruby and cobalt paint and used it with verdigris.
For this design I wanted to make the jewellery look like ancient treasures. I used moss and mixed a brownish grey using cobalt and opalite.

I painted cobalt paint quite thickly onto the central section of a bracelet. I worked it well in between the beads. I would expect the blue to wear over time to expose some glimpses of the gold.
To make a blended design I started with ruby and worked to the midpoint. Then I worked with cobalt from the other end, blending the colours in the middle.

It is easy to add a touch of colour to a necklace. I mixed a purple to match the S-Lon and added it to alternate sections of beading.

Don’t just save the patina paint for kumihimo! I used the three colours in the antique window pack to lift this simple charm bracelet.
I made a series of pendants to show how all the paints can be used with both yellow and rose gold. They would also be fabulous with silver.
Rose Gold
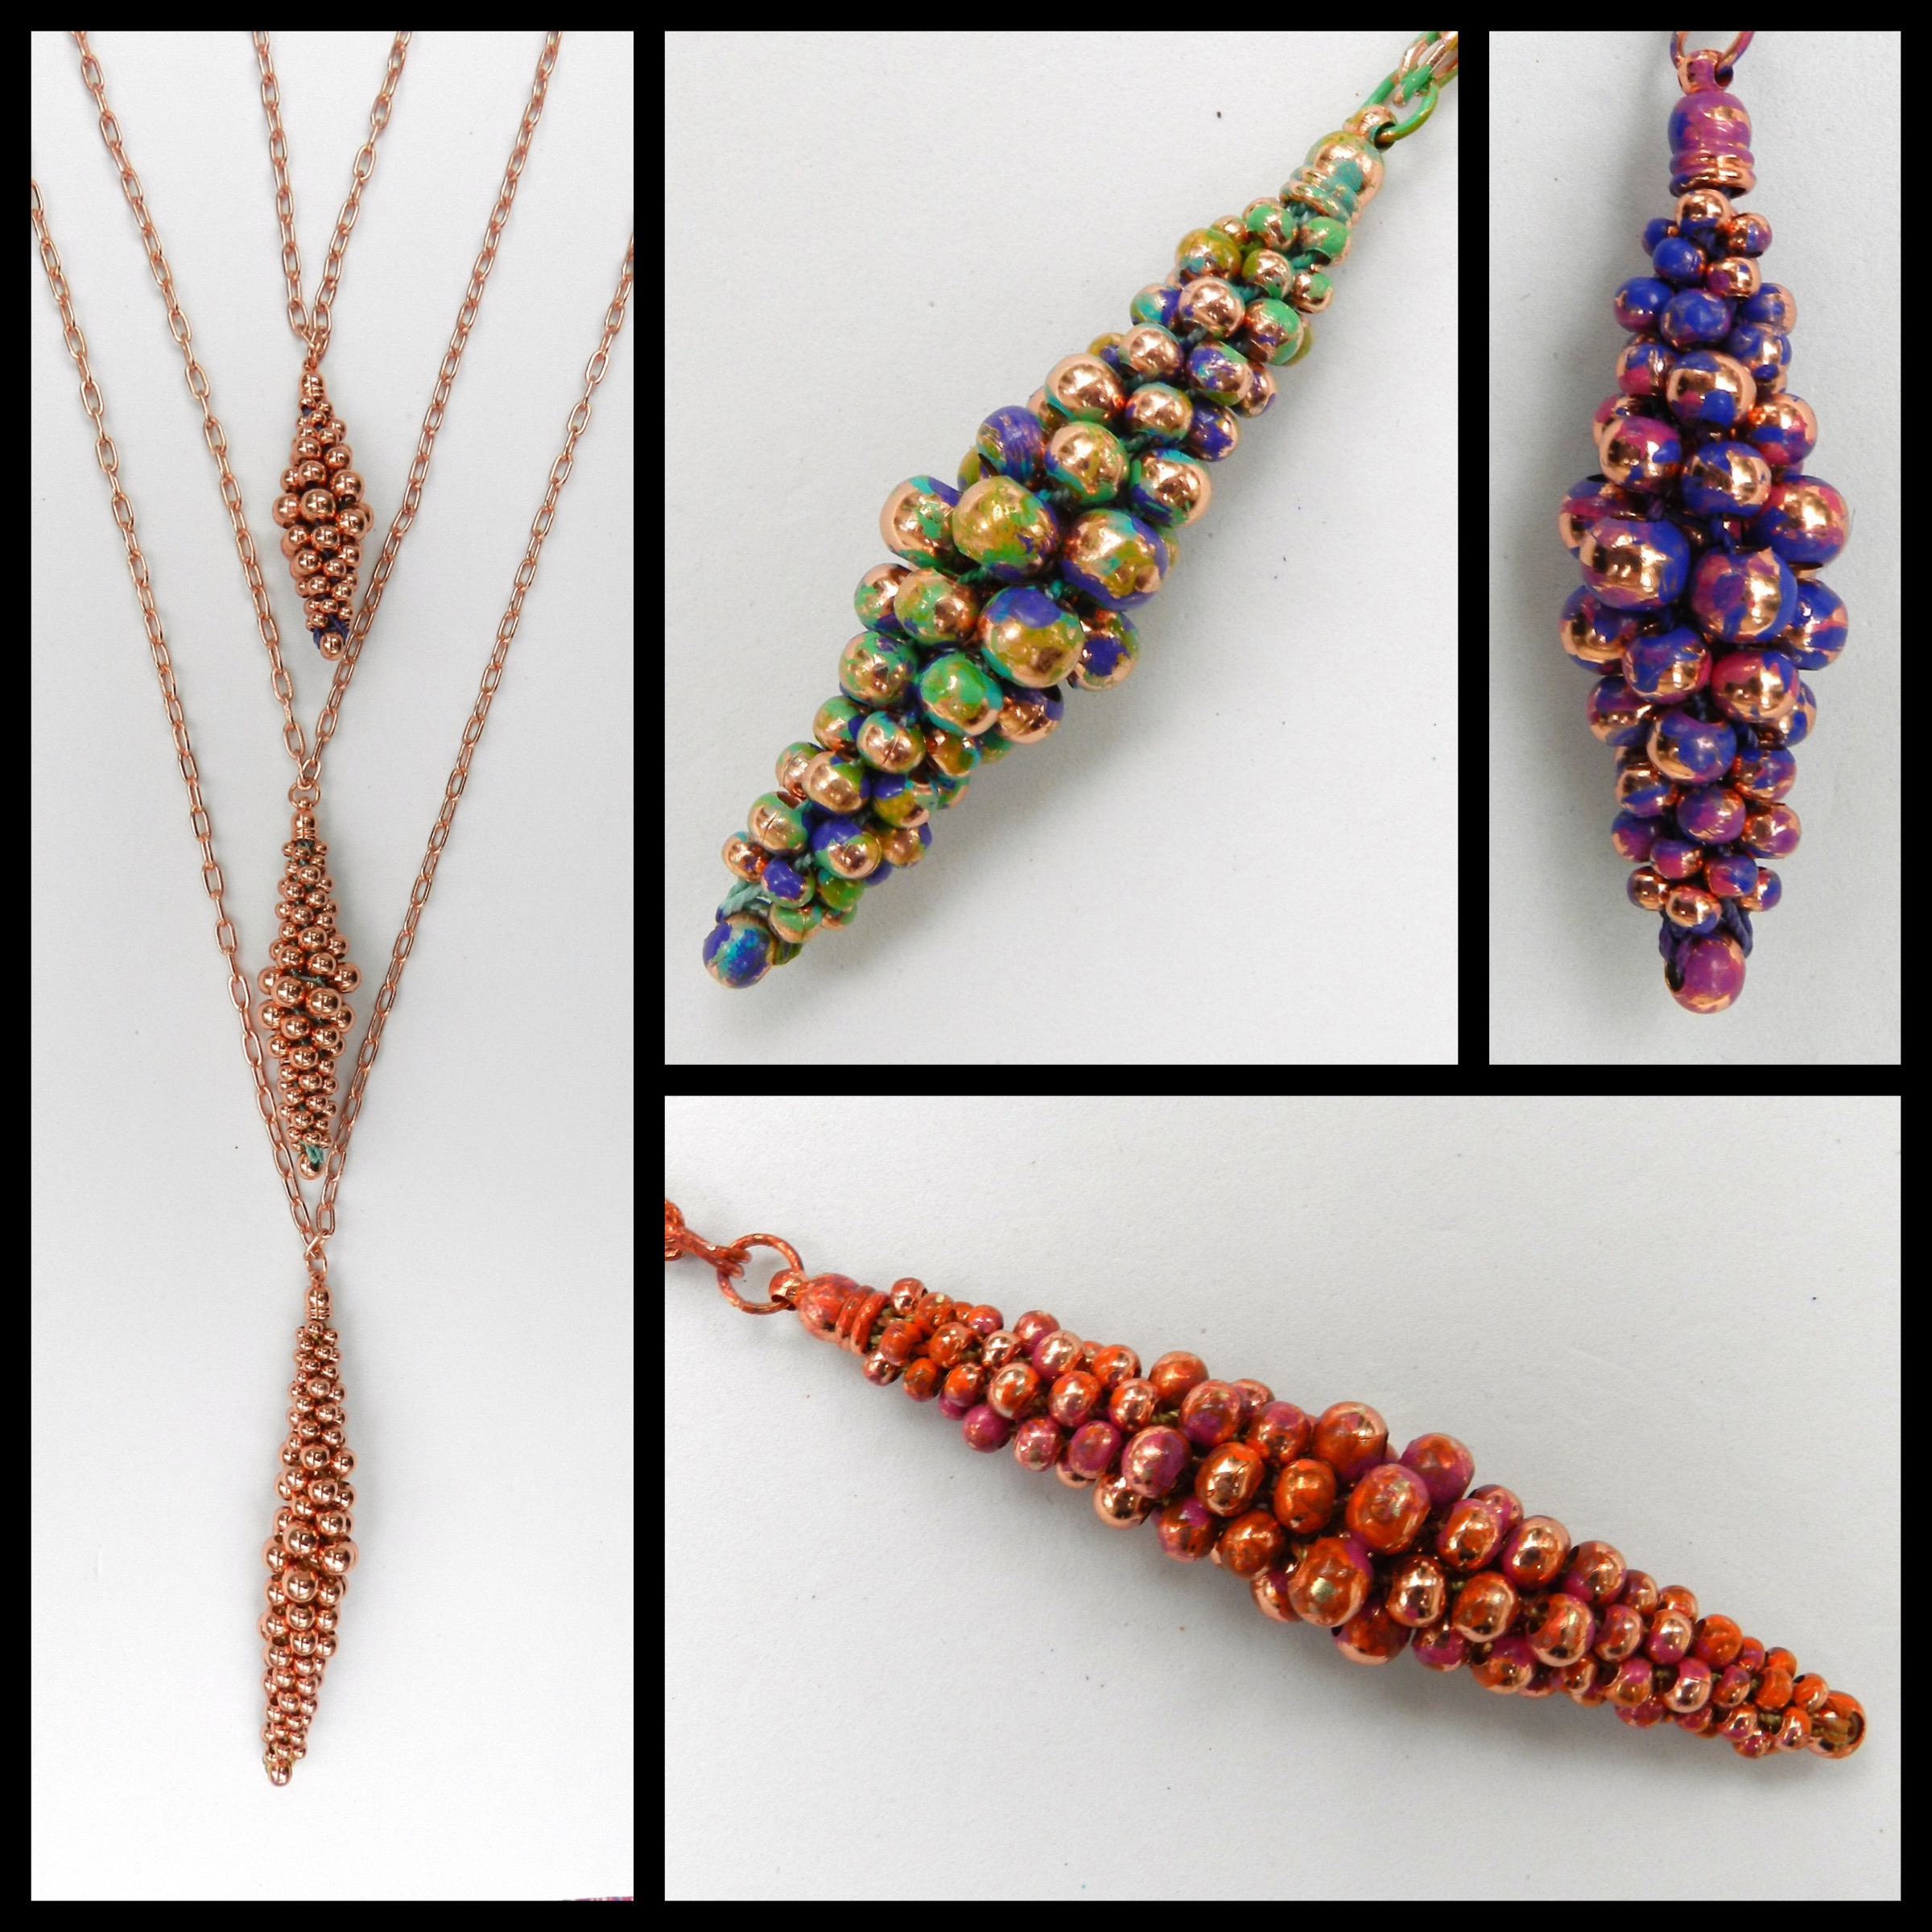
Yellow gold
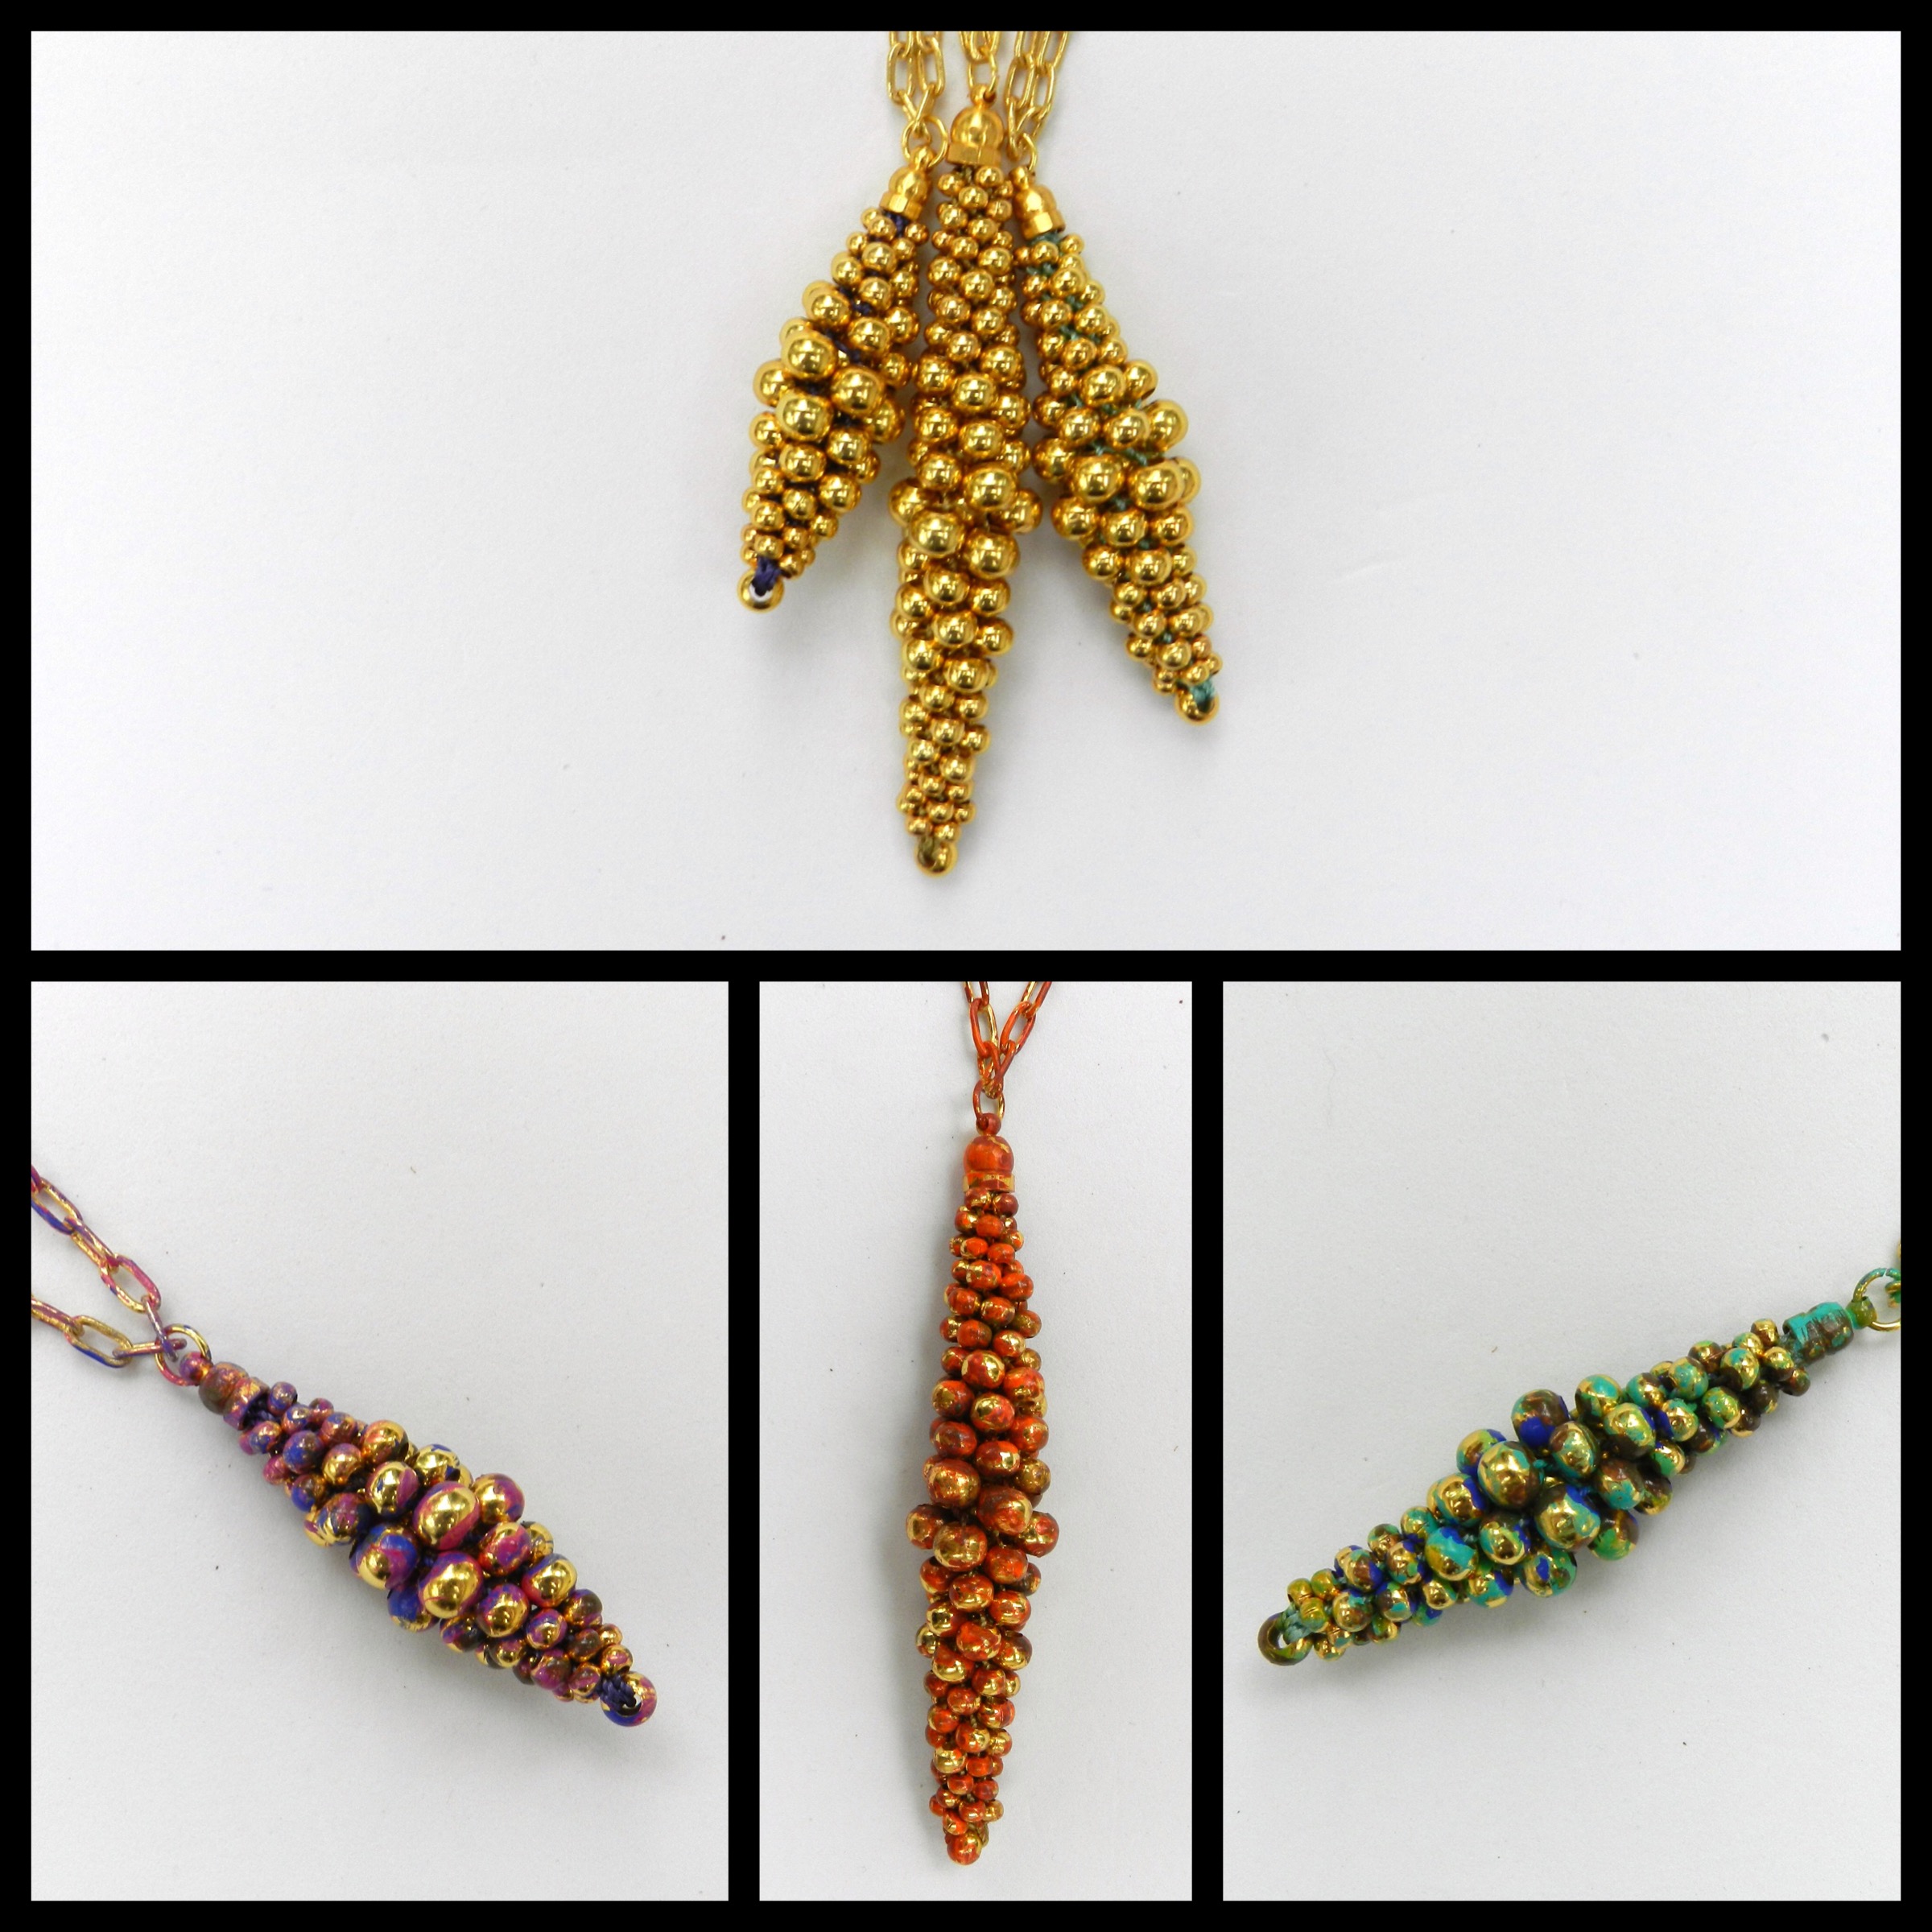
To make the pendant, start with 4 x 70cm S-Lon (0.4mm) and thread them all through a 5mm bead. Centre the bead on the cords and positon them on the disk on either side of the dots. Thread a short length of spare cord through the bead and tie it in a knot. This is used to attach the weight to and is removed at the end. Braid for 10 moves in Round Braid.
For a short pendant thread the following beads onto all 8 cords,
1 small, 1 medium, 1 large, 1 extra large, 1 large, 1 medium, 1 small
For a larger pendant thread on the beads in 2s apart from a single extra large bead
Braid in a beads with every move until they are all used up.
On the show I was a bit pressed for time, so I did not have time to show the following useful technique. When the large beads are added into the braid a fairly large gap will open up in the middle of a braid. To give the pendant structure press a single large bead into this gap, continue to braid and press this bead down into the gap. The gap will futher widen as the extra large beads are added. Press in an extra large bead and continue to braid. One more bead, a large one, will probably be needed as the rest of the beads are braided in. Once all the beads are braided in, continue to braid without beads for 1cm. Remove the braid from the disk and tie the braid in an overhand knot to prevent unravelling. The braid end needs to be glued into an end cap. It can be helpful to seal the braid with a drop of fabric or all-purpose glue. If you do this, make sure that the glue is fully dry before trimming the braid to fit the cap and using a stronger glue to stick it into the end cap.
(3mm = small, 4mm = medium, 5mm = large, 6mm = extra large)