
Kumihimo can be used to make some amazingly innovative designs using cabochons. In the show on 23.7.14 I demonstrated how to make a very pretty labradorite pendant and a few other designs were shown, but not demonstrated. These instructions are intended to accompany the show, which can be found by clicking here. If you bought the huge pack of cabochons, or if you have a few cabs in your stash you may like to try my new tutorial, Kumi-Cabs. The instructions are very detailed and include step-by-step photos. The finished design is very secure with a surprisingly delicate effect. It would be perfect for labradorite. Click here to find the tutorial.

Flower Cabochon Pendant
To make this ingenious kumihimo cabochon pendant it is best to use these instructions in conjunction with the recording of the live show. Click here to find it.
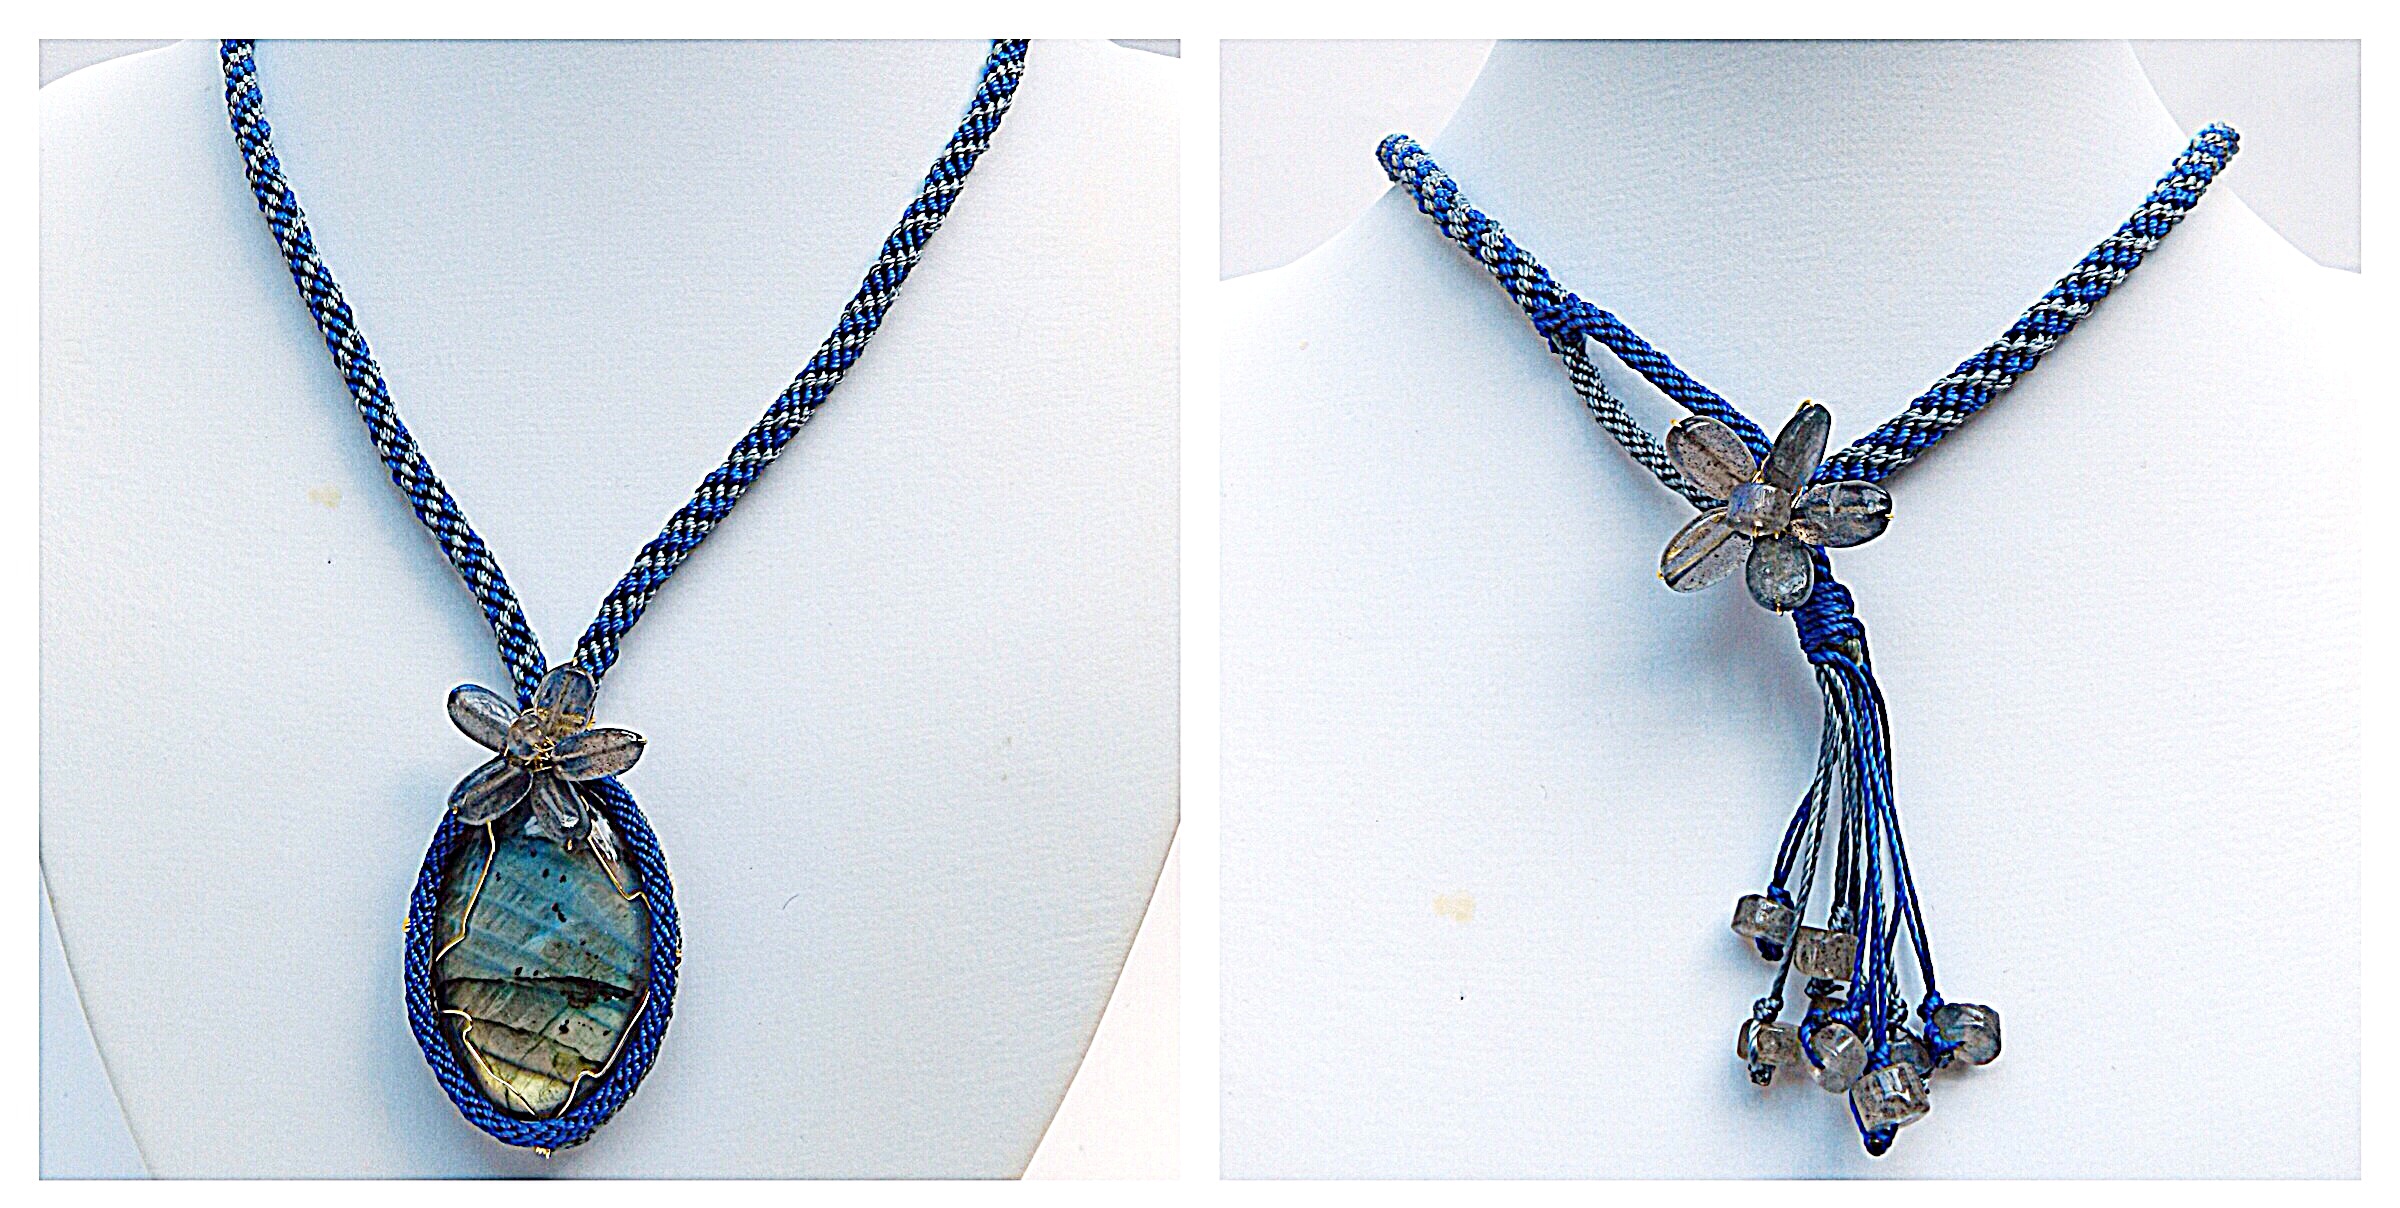
1. First make a wired flower as part of the fastening. Use 40cm of 0.4 wire, 5 oval beads and a rondelle to make the flower. Make a large wrapped loop with the excess wire and trim. This method was shown in detail on the show. A button or single large stone could be used instead.
2. Cut 4 x 3m blue cord and 4 x 3m grey cord. Thread all the cords through the loop of flower and centre it. Position the cords on the disk, 2 x blue in the slots on either side of the north and south dots, 2 x grey in the slots on either side of the east and west dots. Round braid for 22-30cm.
3. Tie two of the blue cords from two opposite slots in a knot and remove all the blue cords from the disk, move the grey cords so that single cords are on either side of the dots and braid on until the grey braid is long enough to fit around the outside of the stone.
4.Tie the grey cords from two oposite slots in a knot and remove all the grey cords from the disk. Return the blue cords to the disk and braid so that the blue braid is as long as the grey. Return the grey cords to the disk and reposition all the cords so that they are the same as the initial setup. Braid so that the second half of the necklace is the same length as the first, minus an allowance for the opening (2-3cm depending on the size of the flower).

5. Make the opening in the same way as in step 4. Braid on for 1cm. Apply clear glue to the end of the braid while still in the disk. Allow to dry until tacky, remove from disk and wrap one cord over the glue section.
6. Make the remaining cords into a tassel by tying a stone onto the ends.
7. Cut 2 x 50cm 0.4 wire. Find mid point and attach to midpoint of grey mid section using a lark’s head knot. Bring two wires to the front and two to the back. Secure the cabochon to the grey cord by looping the wire over the front and back and wrapping around the cord. Wrap the tails of the wire around all the cords at the top of the cabochon. Tighten the wires to keep the cabochon firmly in place. This was demonstrated in detail on the show.
8. Secure the blue cord to the grey cord by either sewing or gluing.
9. Make another flower to cover the wire wrap at the top of the stone.
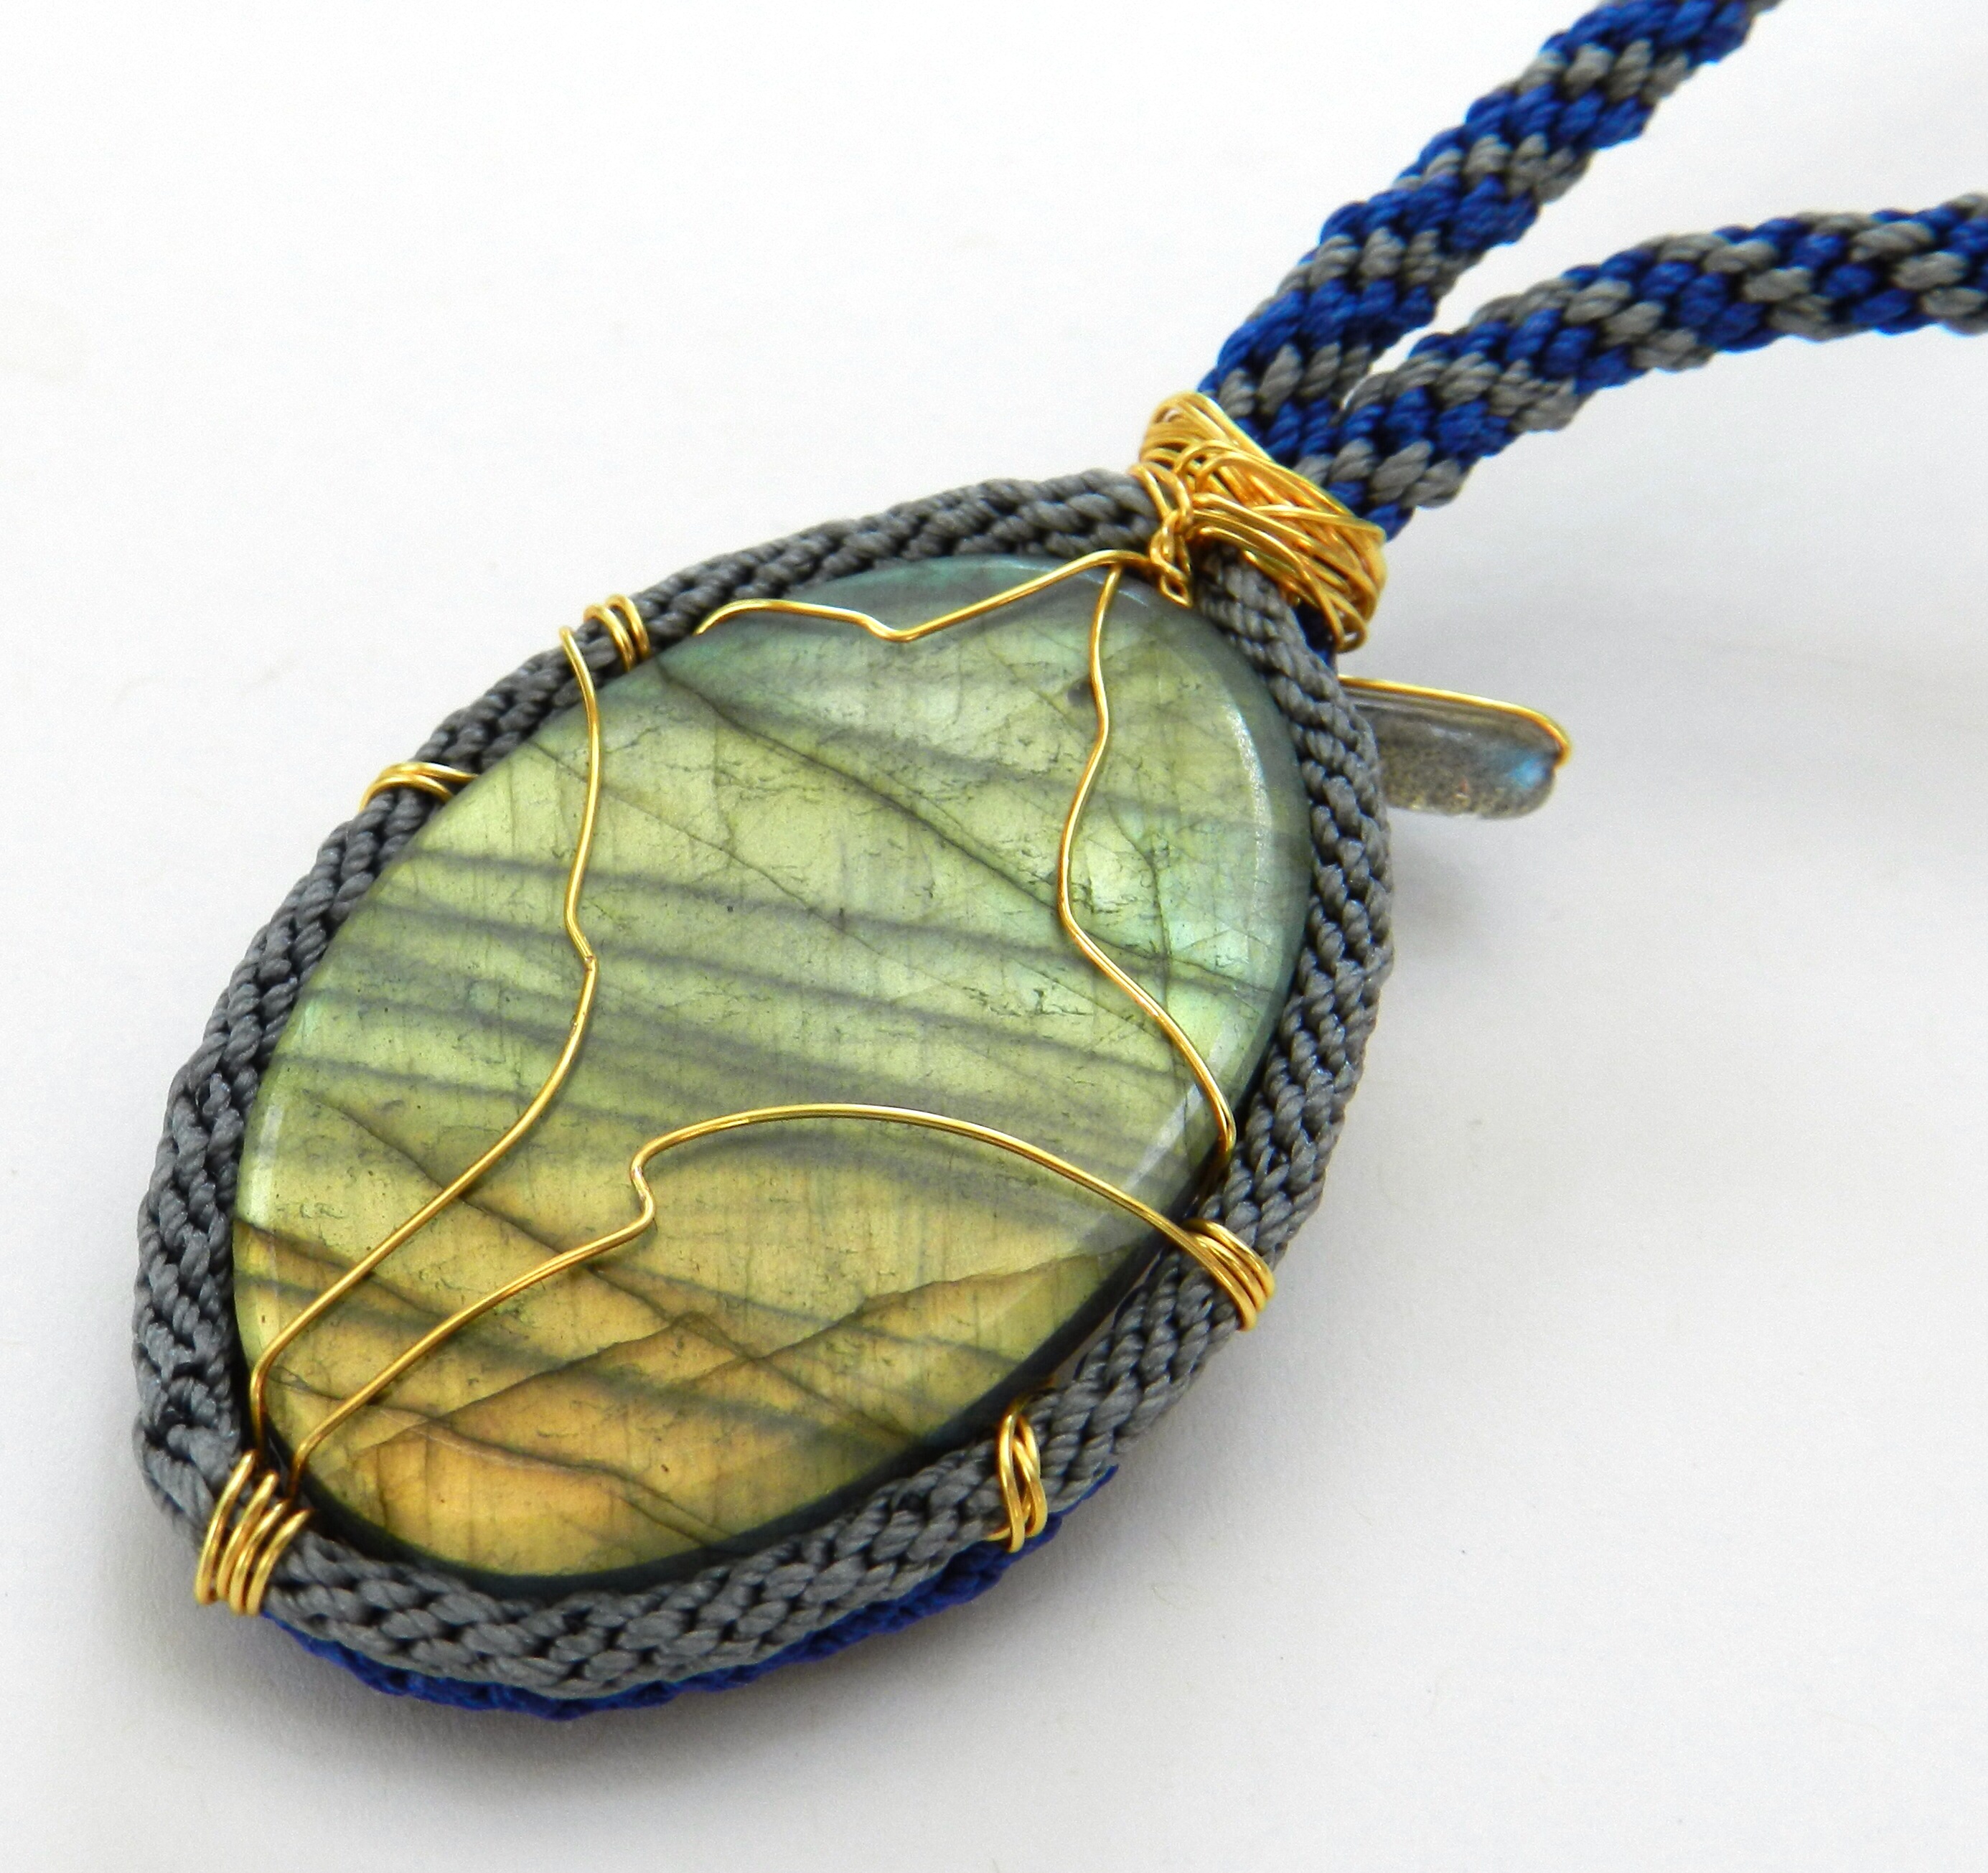
Wire Kumihimo wrapped pendant
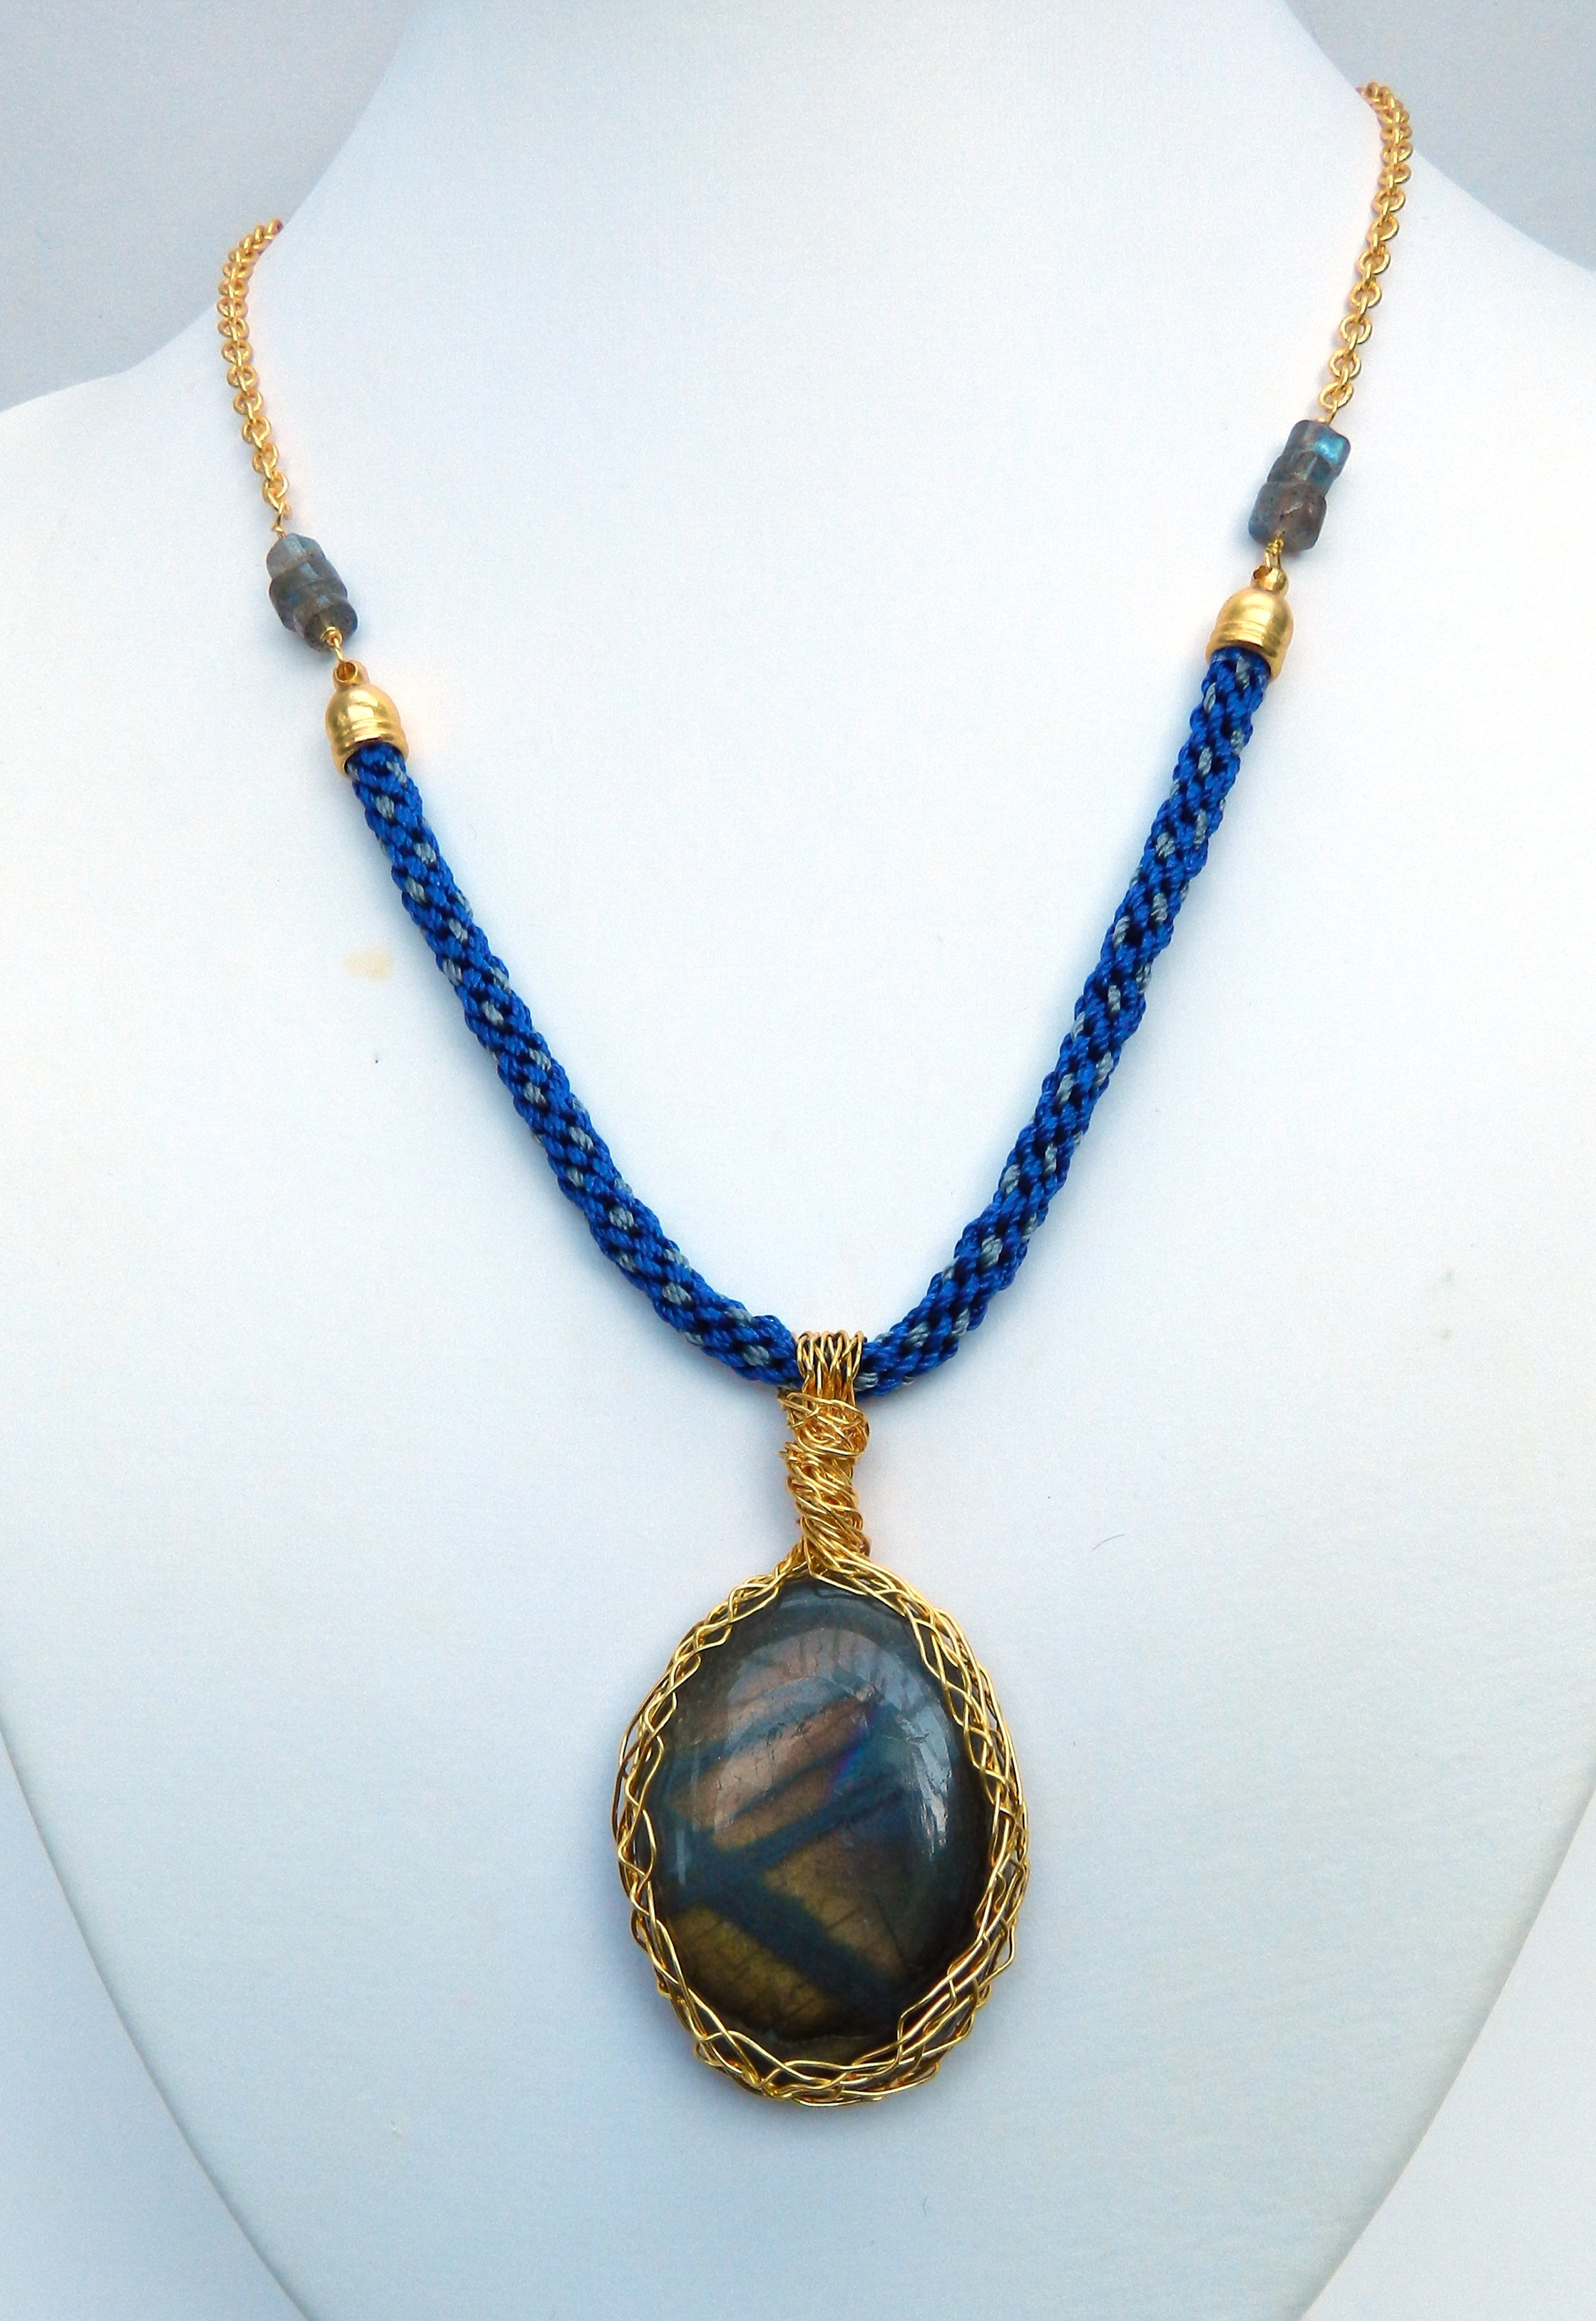
This design is made with a wire kumihimo flat braid (10 x 50cm x 0.4mm wire). Smooth the braid around the stone and finish off with a wrapped loop using the excess braid.
Bracelet

Use 0.4mm wire with beads on all 8 wires. The braid structure is Round Braid. Drop a bead in on every move. Make a wrapped loop with the excess wire at either end and cover this with a flower or cross, made in the same way as the first pendant. Use the wrapped loops to start a short braid on either side, using 2 cords in 8 slots.