
On 12.2.16 I demonstrated an amazing kit full of pretty, floral ribbons and large wooden beads in 4 sizes. This was not a typical kit for kumihimo and a few other techniques were needed to bring it all together. On the show I demonstrated the ribbon decoupage technique. As this is a kumihimo website I will only give instructions for the kumihimo designs, but the decoupage technique can be seen on the recording of the show, by clicking here.

5 Bead Jumbo Necklace
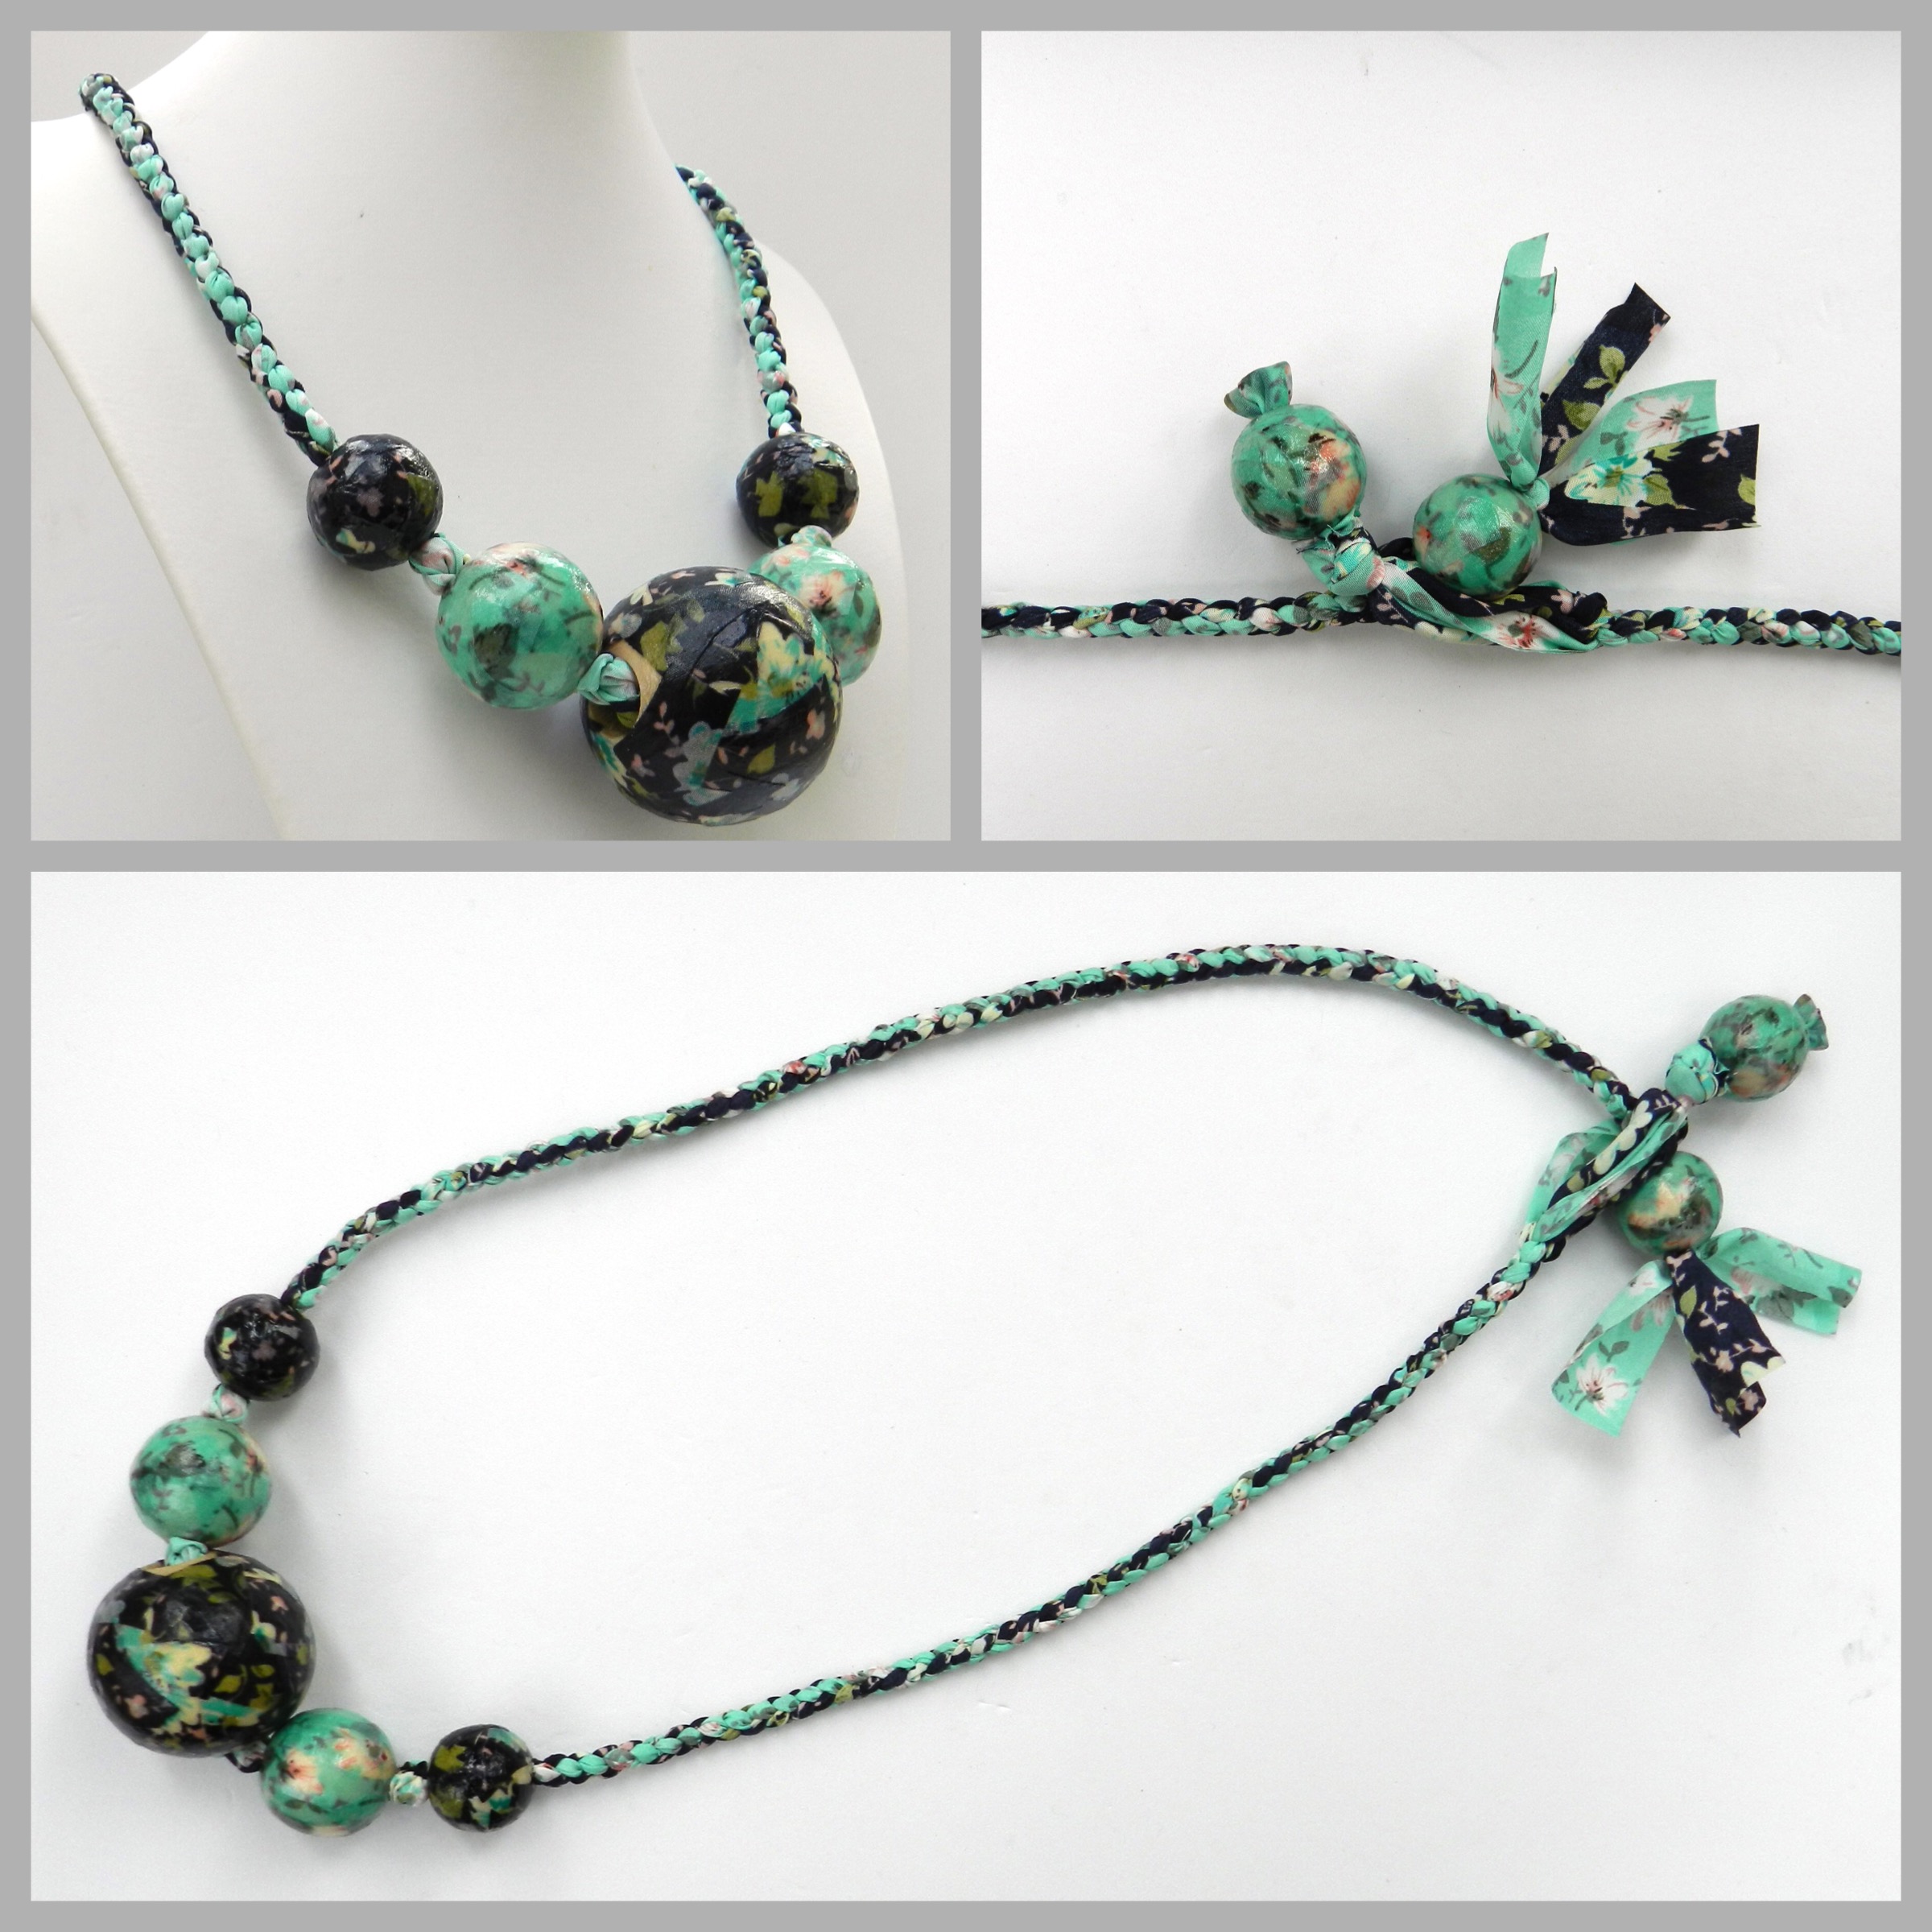
- Select 2 contrasting ribbons and use the decoupage technique to cover wooden beads. For the central section I used 1 x 4cm bead, 2 x 2.5cm beads and 2 x 2cm beads. For the fastening I used 2 x 2cm beads.
- Fold the rest of the ribbon in half, both colours. Use a length of beading thread to pull the ribbon through the 5 central beads. Centre the beads on the ribbons and snip the folded ends, which were pulled through the beads. There should now be 4 ribbons coming out of both ends of the row of beads. On one side position the cords on the kumihimo disk in the 4 slots in the north and south positions. Tie a loose temporary knot on the other side of the row of beads to keep them in place.
- Braid using the 4 cord braid. (Remember that the slot is to the left of the number, when the number is viewed the correct way up)
- 32 to 16, 17 to 32, 1 to 19, 18 to 1, return the bottom cords to the slots next to the dots. It is best to watch the Youtube recording!
- When the side of the necklace is long enough tie 2 opposite cords across the disk in a single knot. Remove from the disk and thread the 4 ribbon ends through a 2cm bead. Tie 2 oppostie cords across the bead in a double knot. Stiffen the ribbon with glue and trim when dry.
- Untie the temporary knot and adjust the central beads so that they sit attractively and position the ribbons on the disk as before. Braid to match the other side of the necklace. When the desired length has been reached tie 2 cords across the disk in a single knot. Remove from the disk and tie all the cords together in an overhand knot, leaving enough room for the bead on the other side of the fastening to go through.
- Thread on the last bead, but do not pull the ribbons right the way through. Leave a little loop. Apply some glue to the loop and allow it to harden, so that it holds the bead firmly in place. Trim the ribbon ends.
Braided Bow Bracelet
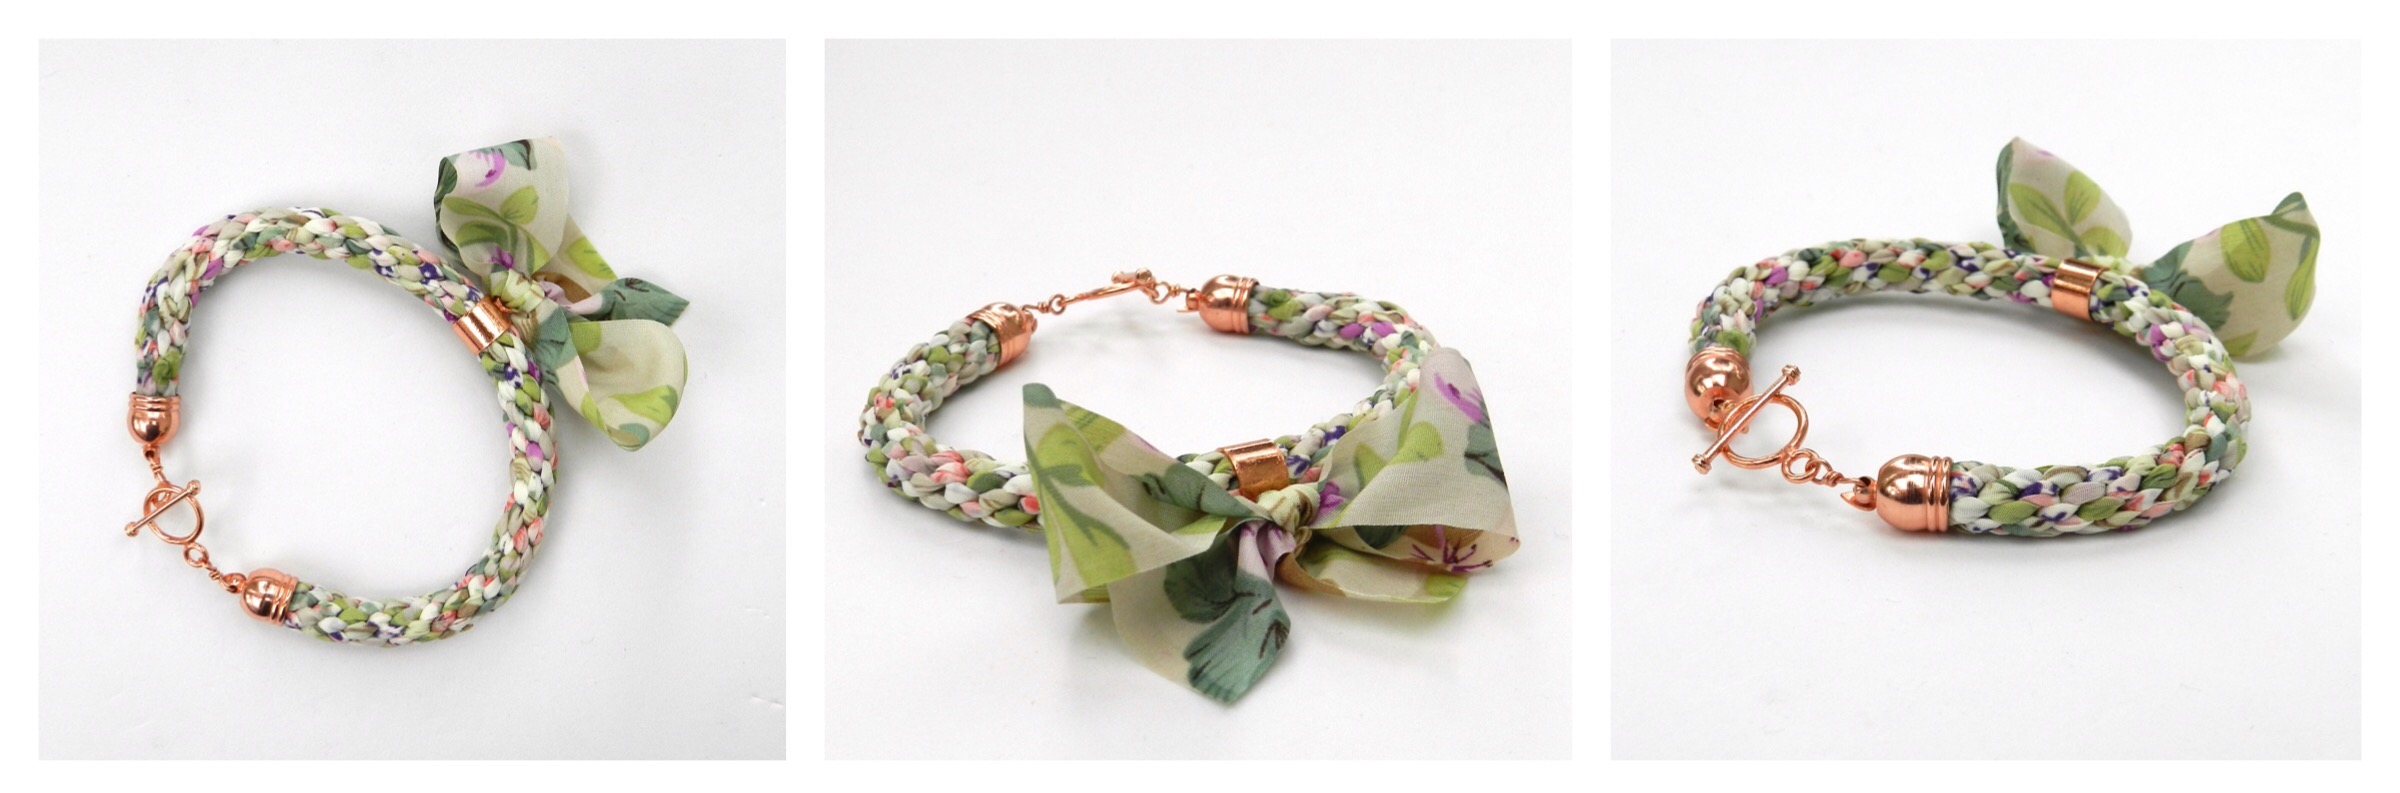
- Choose 2 toning ribbons and cut each one into 4 equal lengths. Tie them all together at one end in an overhand knot. Position the ribbons on the disk on either side of the 4 dots at north, south, east and west. Braid until the required length is reached, remembering to take account of the length of the clasp.
- Remove the braid from the disk, bind and glue the ends. Thread the bail onto the middle of the braid and attach the end caps to the braid ends with wire. Attach the clasp.
- Thread ribbon through the loop on the bail and tie a knot. Add a drop of glue to the knot in the centre of the bow to prevent it coming undone.