
This classic colour combination of black and gold is highlighted with touches of Rhodolite Garnet and glimpses of white satin cord. This show was shown on 20.8.14 and can be seen by clicking here. The demonstration of the necklace on the top left of the photo comes about 40 minutes into the show. The kit for these designs included 1mm satin cord in black, gold and white, rhodolite garnet tubes, graduated pyrite rounds (4-6mm), spinel rondelles (3-4mm), large hole gold rondelles and a findings pack. Other beads of similar shapes and sizes can be used to achieve the same effect and large hole charm beads can be used instead of the feature rondelles.

Beaded Necklace with Flower Detail

The necklace is made in sections. The pendant front is made first and includes two handy loops from which the sides of the necklace can be braided.
1. Cut 4 x 50cm flexible beading wire. Centre a crimp on all 4, close the crimp and add a crimp cover.
2. Thread a feature rondelle or wide holed bead to all 8 wire ends. Position the wires on the disk on either side of the dots and braid in Round Braid for 8 individual moves.
3. When braiding with beads and flexible beading wire it is easier to thread beads onto the wires one by one as you braid, rather than threading them all on in advance. Add a spinel to the next 4 moves, followed by 4 pyrite rounds. Repeat this pattern until there are 5 bands of black beads and 4 bands of pyrite.
4. In order to stop the braid from unravelling when it is taken off the disk, thread a wire between the north and east dots and then between the south and west dots. Crimp the two ends of the wire together as close as possible to the braid. This is a temporary measure and will be removed later. Refer to the YouTube clip if this is unclear.
5. Remove the braid from the disk. Crimp all 8 wires as close as possible to the point of braiding. Remove the temporary wire. Thread on a large gold rondelle. Slide a crimp onto 4 wires, close to the rondelle and thread the ends of the wires back through the crimp to make a loop. Trim off the excess wire. Flatten the crimp and repeat for the other 4 wires.
6. Cut 2 x 1m black satin cord, 2 x 1m gold satin cord and 1.5m flexible beading wire. Thread all the cords and wire through one of the loops on the pendant. Perform 8 individual moves of Round Braid to secure the braid.
7. Continue to braid and each time the wires are moved thread on a pyrite round and braid it in. The neatest effect is achieved by moving the satin cord first and then the beading wire. Repeat so that 12 beads are braided in on each wire.
8. Once all the beads have been braided in, continue to braid until half the desired length for the necklace has been reached. Bind, trim and glue the end of the braid and attach a glue on end and a clasp. Repeat for the other side of the necklace.
9. Thread 5 tube beads onto 5 headpins, twist together and attach to the front of the necklace by twisting half the wires around either side.
Cabochon Snake Necklace
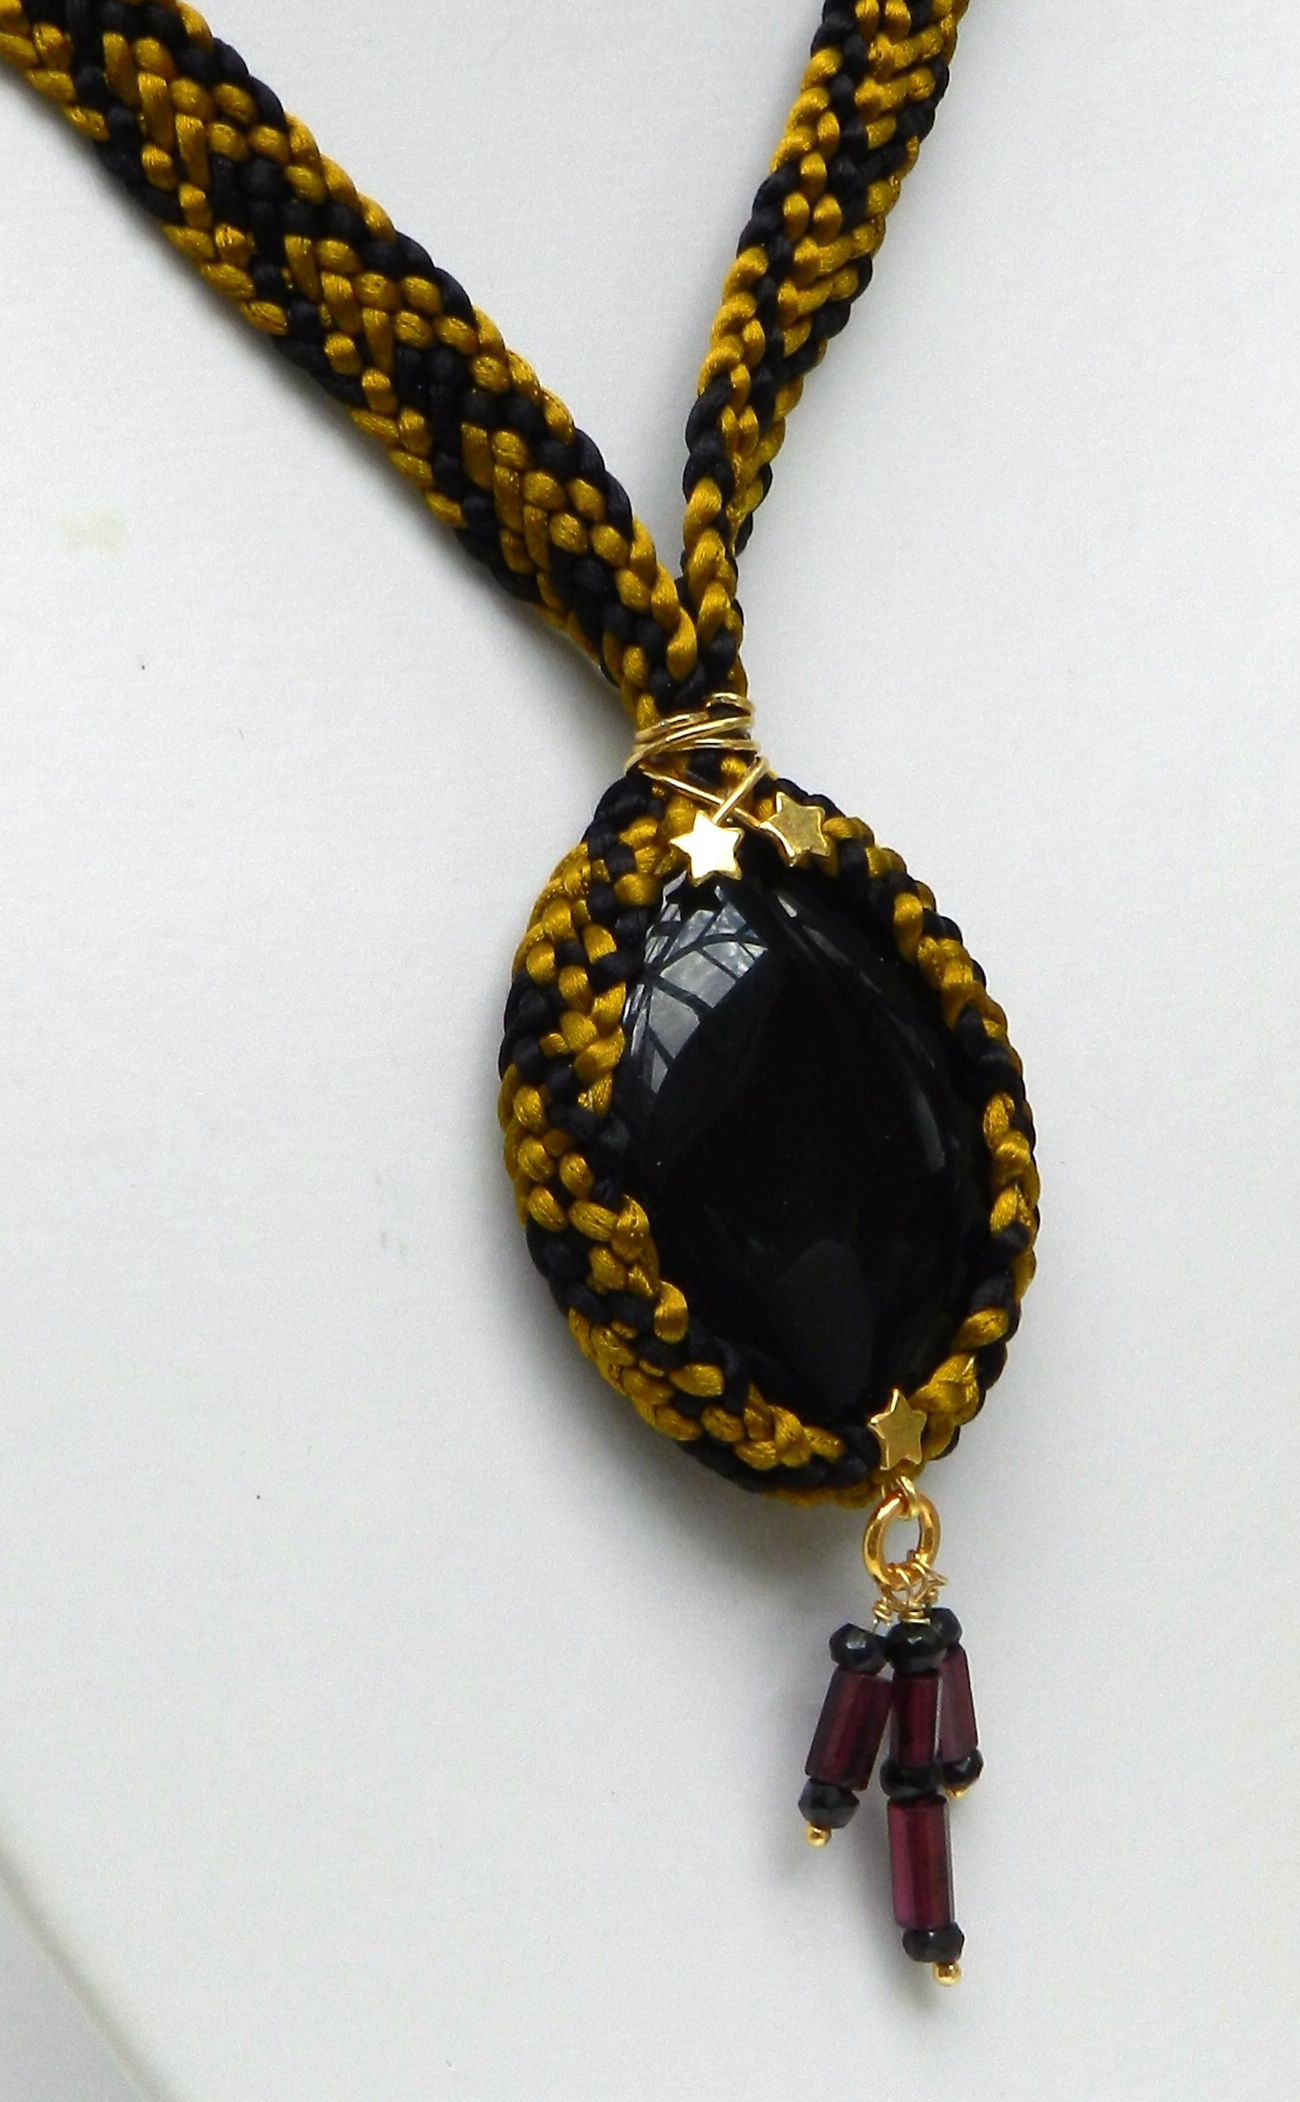
On the show the presenter pointed out a striking resemblance to a snake, complete with forked tongue! This necklace is made using the square kumihimo plate.
1. Cut 6 x 1m gold satin cord and 4 x 1m black satin cord. Position the black in slots 5, 6, 15 and 16. Position the gold in slots 3, 4, 7, 8, 14 and 17. Braid in 10 cord Flat Braid.
2. A row of running stitches in monofilament needs to be positioned close to the edge of either side of the braid around the cabochon. Wrap the braid around the cabochon to check the length and positioning of the stitching required. Use a separate thread for each row. Use the ends of the monofilament to pull the braid into the correct shape to hug the stone. When the stone feels secure tie the ends of the monofilament together and seal the knots with glue.
3. Wrap two decorative headpins around the neck of the design in opposite directions. This will gather the braid together neatly and cover the knotted monofilament.
4 Use a decorative headpin to attach a triple dangle of beads to the bottom of the cabochon.
5. Attach end cones and a clasp to the braid.
Hearts and Dangles Bracelet
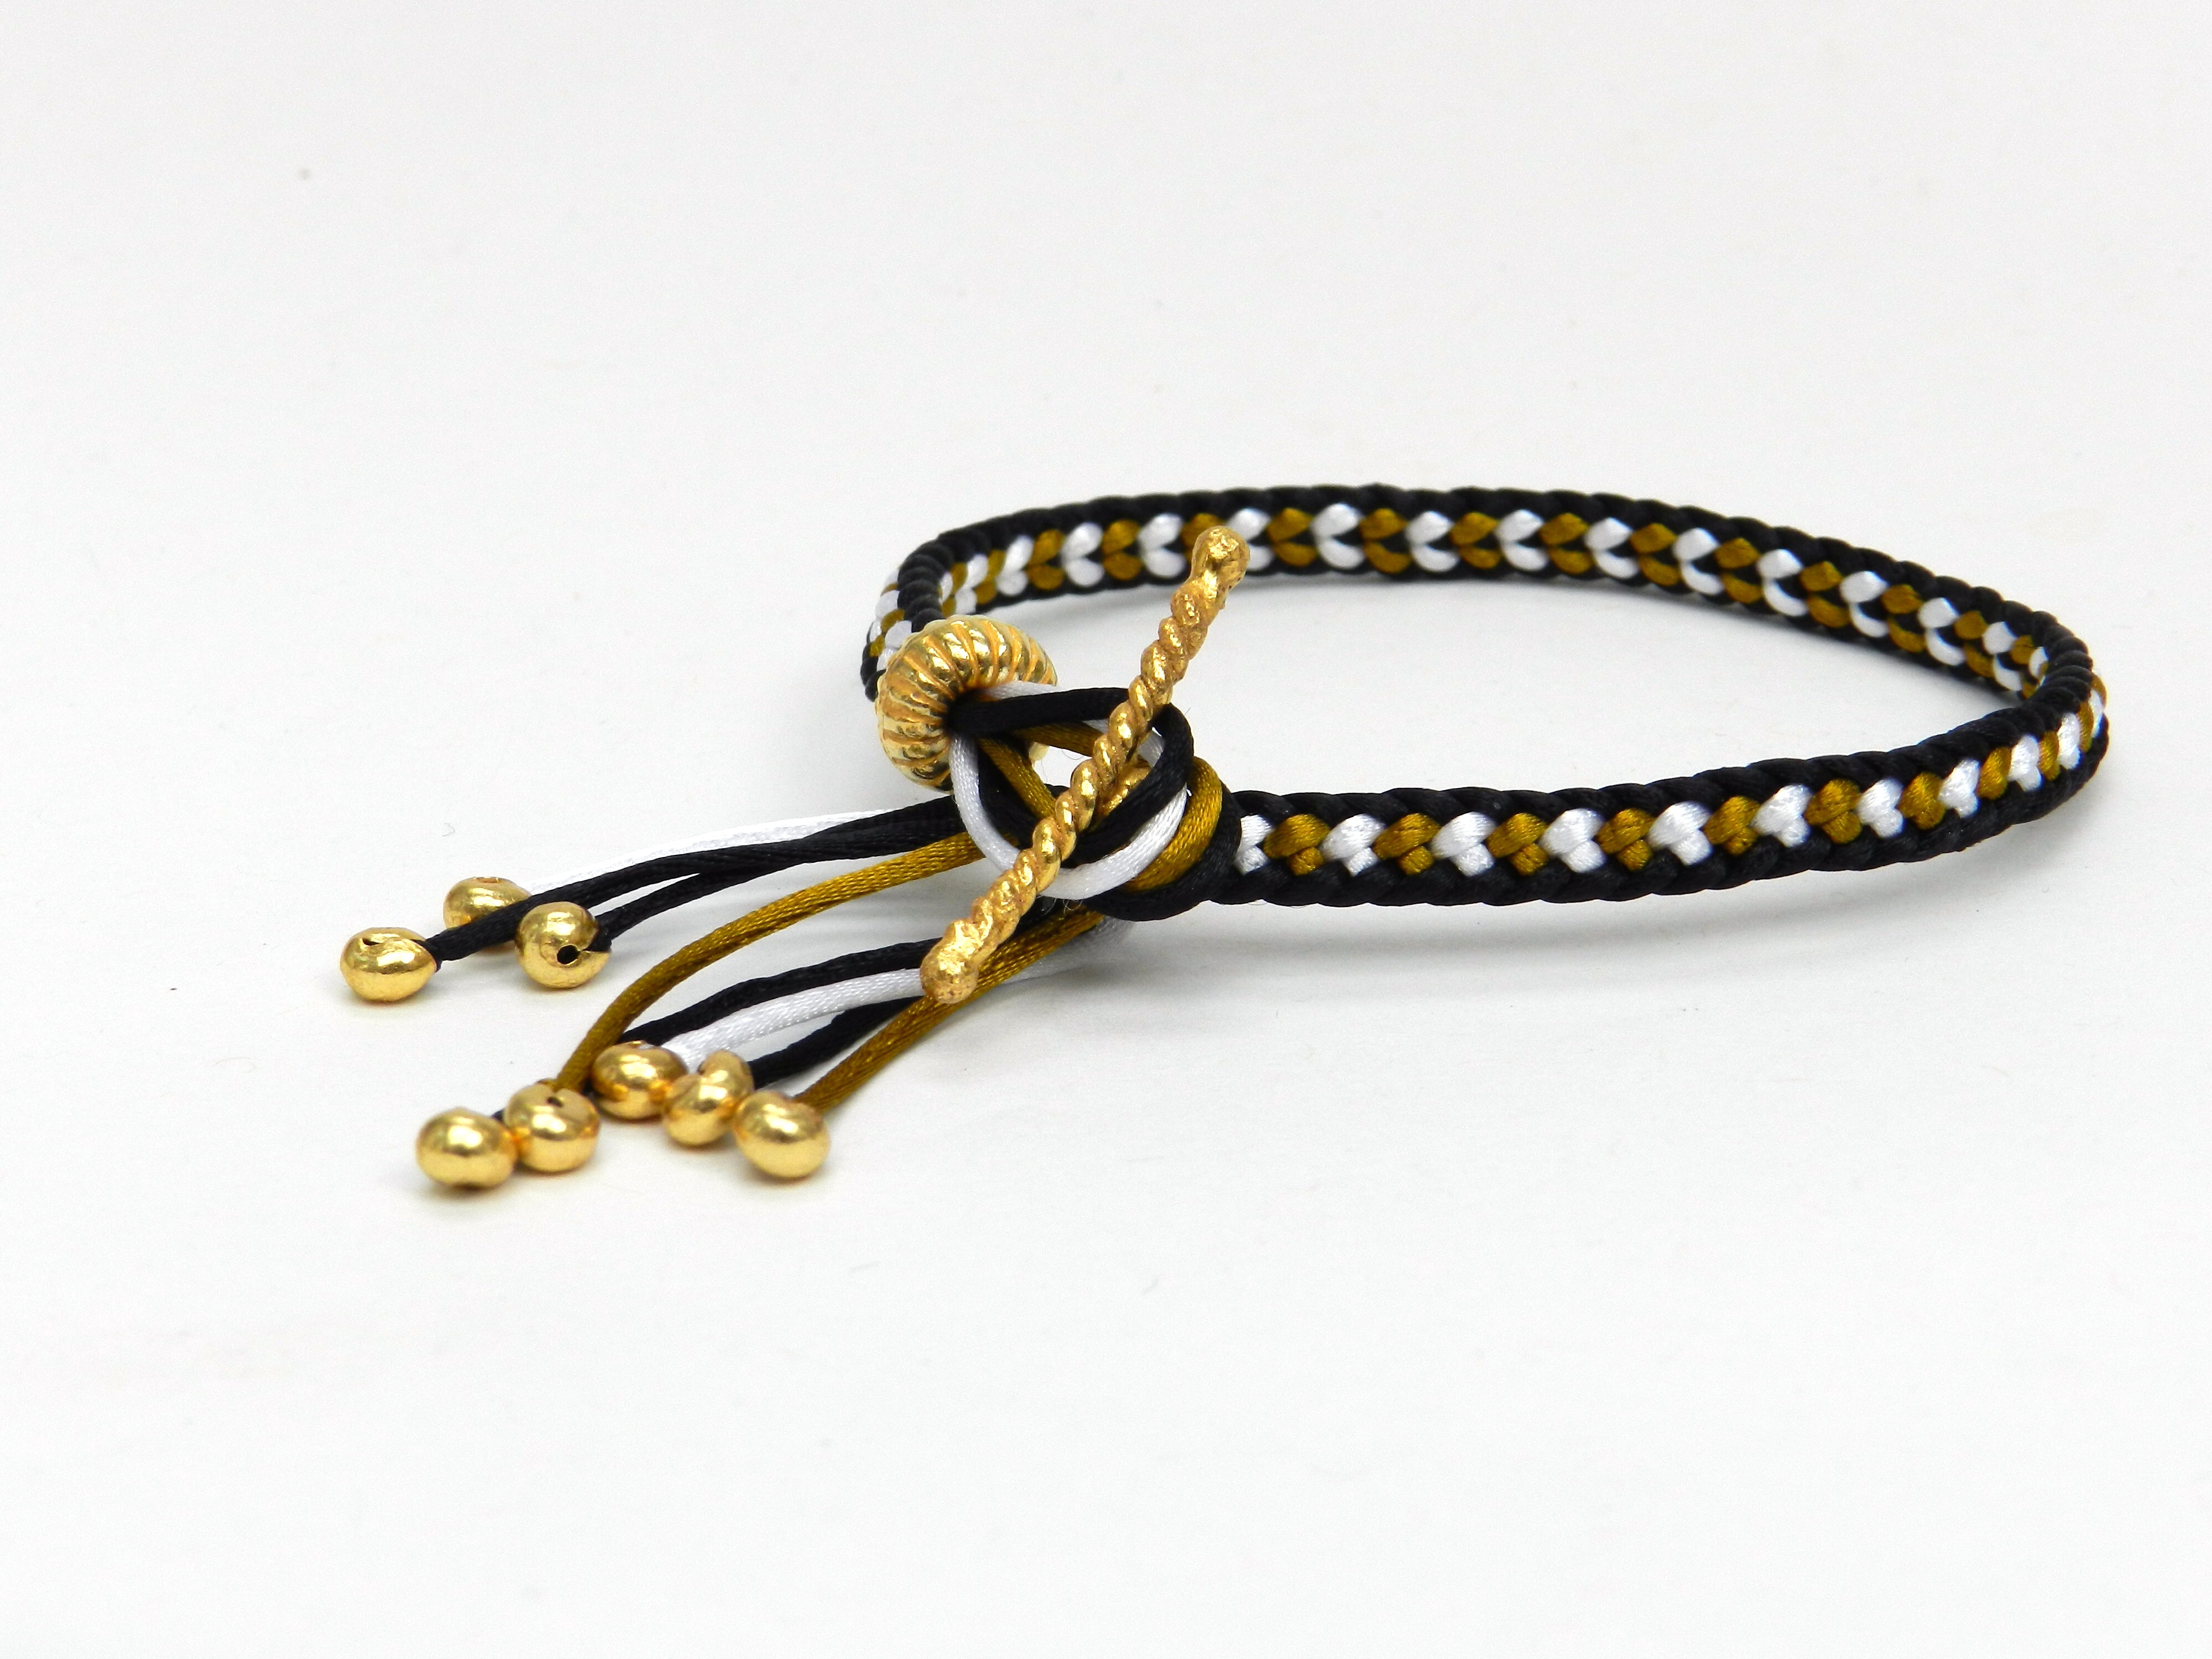
1. Cut 2 x 1m black satin cord, 1 x 1m gold and 1 x 1m white. Fold in half and pull through a wide hole bead. Only pull through enough to form a loop for the clasp.
2. Braid in Half Round Braid for the required length of the bracelet. Place the black in slots 32,1, 9 and 24. Place gold in slots 8 and 25. Place white in slots 16 and 17. In the next complete set of moves attach the toggle by threading it onto the cords in slots 16 and 17 and then finishing off the sequence. Perform two further complete sets of moves. Apply clear fabric or all purpose glue onto the last 0.5cm of braid on both sides and leave to dry.
3. Remove the braid from the disk. Tie an overhand knot in one cord 2-4cm from the point of braiding. Trim the excess close to the knot and either melt the end into a blob with a naked flame or apply some glue. Cover the knot with a crimp cover. Repeat for the other cords.
Earrings

These earrings are made in a similar way to the pendant on the Beaded Necklace with Flower Detail. The length can be varied by adding more or fewer bands of beads. When the required length has been reached use a crimp on all 8 wires to secure the braid. Attach a crimp cover. Trim away 6 wires close to the crimp cover. Thread on a crimp and pass the two wires back through the crimp to form a small loop close to the first crimp and cover. Close the crimp and add a crimp cover. Attach an earring finding to the loop and repeat for the other earring.