This braid-along took place in May 2021, but it is still possible to work through the instructions independently. There are 16 days and for each day a new set of instructions is issued, with a link to a YouTube video. It is important to both read the daily written instructions and to watch the videos carefully. Over 70 people joined in and showed their work, so everything you need to know to complete this task is to be found here, as long as you take note of all the instructions in the correct order.
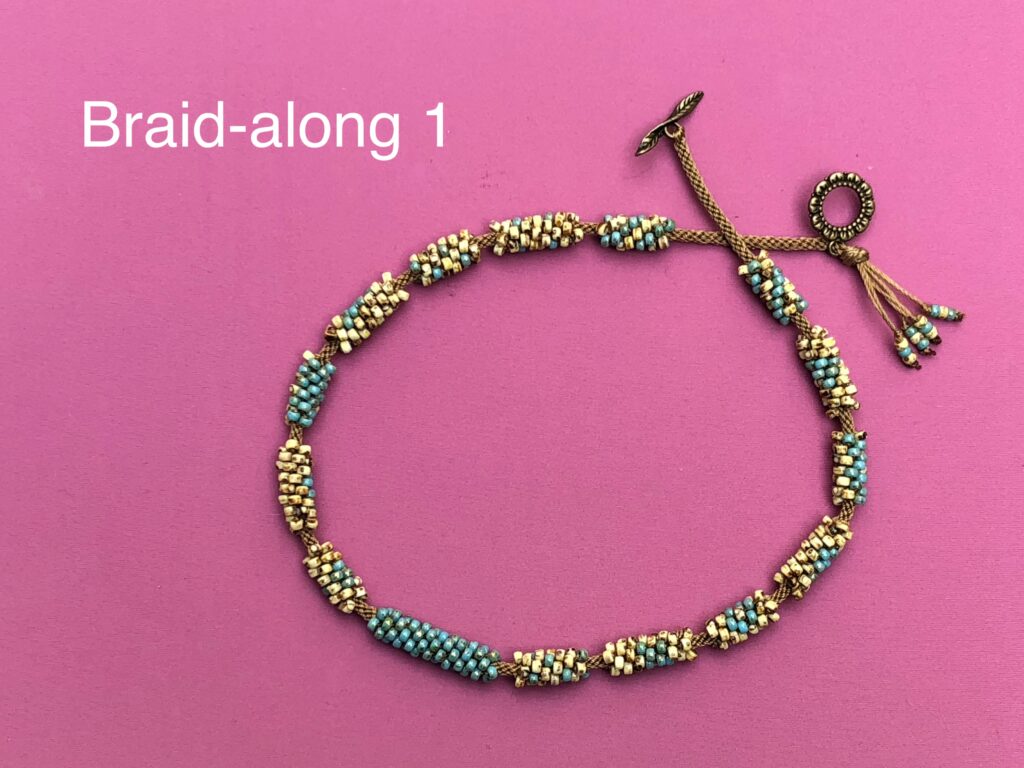
The aim of the braid-along was to teach new skills, while making a pretty necklace. The necklace was designed to be a sampler, with a different bead load for each beaded section. Any one of these sections can be extended to make a full braid for a bracelet or necklace.
I wanted people to experiment with their own colours and beads, so I have deliberately not issued a precise list of materials. All you need to get started is a round kumihimo disk in good condition, beading cord, size 8 seed beads and a toggle clasp.
These instructions will make a necklace measuring approximately 45cm/18inches. The cord allowance is fairly generous, so you can make it a couple of inches longer. If you want it much longer add more cord.
Cut 4 x 250cm/100inches of beading cord, 0.5mm/Tex210
Watch the first half of this video for instructions on setting up your disk and attaching the toggle end of your clasp.
(Or search YouTube for Prumihimo toggle clasp ending)
Braid for approximately 4cm/1.5 inches
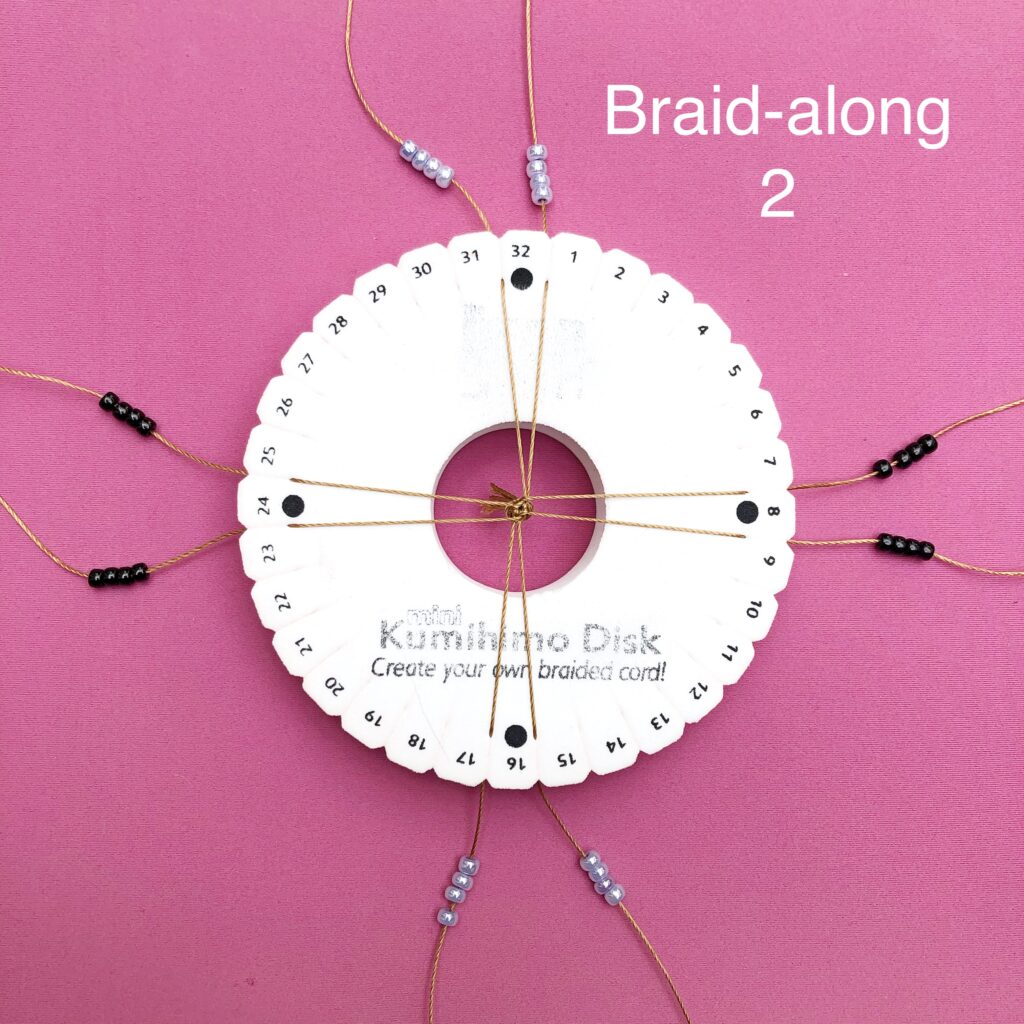
For the next part the cords need to be on either side of the dots in the north, south, east and west positions and the next cords to be moved must be the top right and bottom left cords. If you are not sure how to do this you can watch this video. (You can move the cords into the correct positions without braiding if necessary)
(Or search YouTube for Prumihimo how to know which cord to move next)
Day 2
In this sampler project the braid is made up of beaded sections, using size 8 seed beads. Each section features a different set up to create a different pattern. The beaded sections vary in size, but the plain braid in between is the same length each time. We will start with a simple 2-colour spiral, which will be familiar to most people.
We use the dots on the disk to get the spacing even, so it is important that you start this step with your cords on either side of the dots and the next cords to move are the top right and bottom left.
Thread 4 beads of one colour onto each of the 4 cords in the north and south positions. Thread 4 beads of the other colour onto each of the 4 cords in the east and west positions. Continue to braid, adding in a bead each time you move a cord. (If you are having trouble check out the handy tips in this video,
https://youtu.be/xj4_kY0fqMQ or search YouTube for Prumihimo 5 tension tips)
Your cords should now be back on either side of the dots. Now continue to braid without beads for 32 individual cord moves … there is no need to count because this number of moves will take your cords back to either side of the dots again.
Day 3
Now it is time to make the first counted beaded section. For all of these counted beads beaded sections I will refer you to a YouTube video. They are worked out on a 4 row repeat, but watch out because some of them, including this one, need an extra row to centre the motif. You will need to repeat row 1 on each cord, which means you will thread 5 beads onto each cord. When you have braided them in you will find you have gone past the dots. You need to move the cords, without braiding, back to the dots. Then braid from dot to dot as before. This will ensure that your braided gaps are all the same size.
Here are the instructions for this section, which features a small triangle on one side of the braid.
Day 4

Well done to everyone who has got this far. You have now made a beaded section of 4 beads on each cord, a gap and then a 5 bead section followed by a gap. Before we go on please check that your cords are back on the dots, with the top right and bottom left cords next to be moved.
The next beaded section is made up of 4 beads on each cord. It is the wide stripe set up and can be found in this video.
(Or search YouTube for Prumihimo wide stripe)
After you have added in the beads your cords should be on the dots. Carry on braiding without beads until your cords are back on the dots to make an even gap.
Trouble shooting! If your gaps are not even perhaps you did not reposition your cords after the 5 bead section.
As you braid you might like to think about ways you could use this wide stripe set up to make other braids. It is really versatile and useful.
Day 5
If you have been working with me so far you have now braided 3 beaded sections. Well done! The first was 4 beads on each cord, the second was 5 beads on each cord and the third was 4 beads on each cord. The gaps in between the beads will be of equal length, as long as you followed my instructions on repositioning. If your braid is different, either intentionally or unintentionally, it really does not matter as long as you like what you see. This is a sampler, so anything goes!
The next beaded section has 5 beads on each cord. First make sure your cords are on the dots and the next cords to move are top right and bottom left. Thread on the beads shown on the chart and repeat row 1. This centres the motif. Don’t forget to reposition your cords to the dots after you have finished adding in the beads. Then braid without beads until your cords are on the dots again. This will ensure your gaps are even.
Day 6

Those who have managed to stick with me this far have made great progress and I think you are going to like this flower motif. This is a 4 bead section, so you will start and finish adding beads on the dots in the north, south, east and west positions and then you can braid the unbeaded gap, finishing on the dots. If the flower does not work out you need to check that you started with your cords in the correct positions. Then please post your work-in-progress here.
When you watch the video you will see that I used not only a different colour, but also a different shape of bead for the centre of the flower. In the picture on this post I chose to make the centre bead, which is C on the chart, the same colour as my background. You can have fun playing with different colours and/or bead shapes.
Day 7
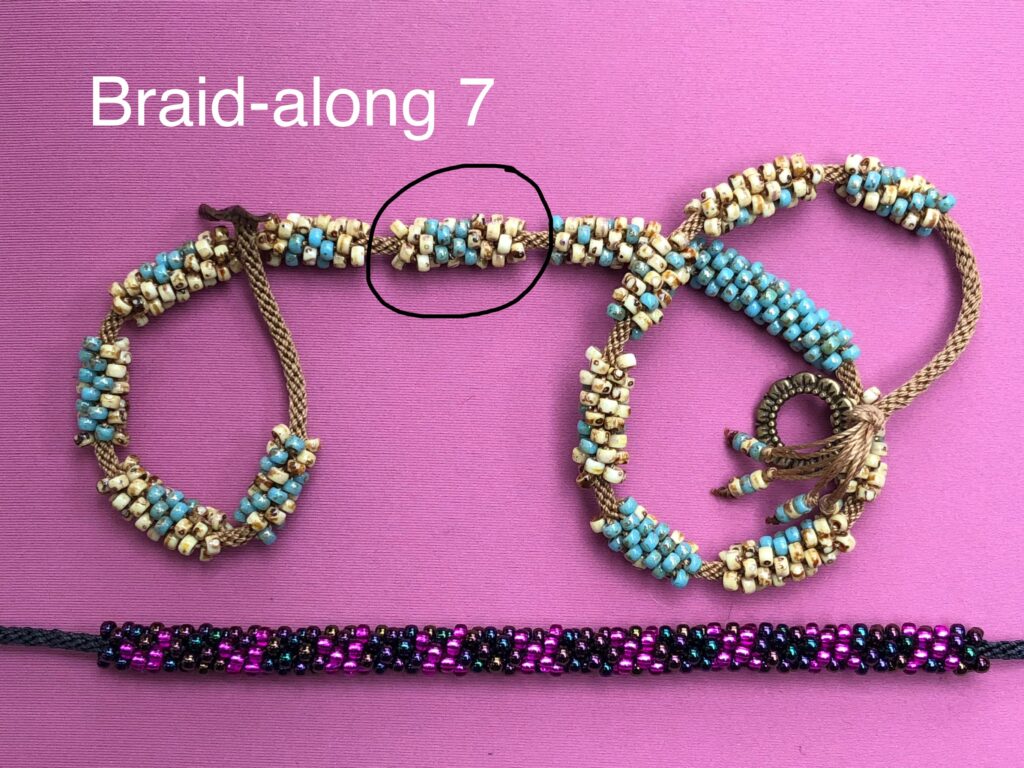
We are nearly at the middle now! The next section is made up of 5 beads, so everyone who has got this far will know what that entails. Don’t forget the extra row 1 and don’t forget to reposition!
This kiss or cross pattern works up into a very pretty bracelet, or you could try adding a kiss or two to another design as a secret message! You will find that the X is slightly wonky and that is because every pattern has to be plotted within the constraints of the spiral construction.
Some people have been worried that their motifs are not lining up. I have deliberately designed this sampler to be random for 2 reasons.
1. Round braid does not have a front or back and will move around as it is worn, so in a random braid you will see different motifs as the braid moves.
2. Every braid is slightly different, depending on your tension and the condition of your disk. This affects the spiralling of the braid, so what lines up for one person will not for another.
Day 8
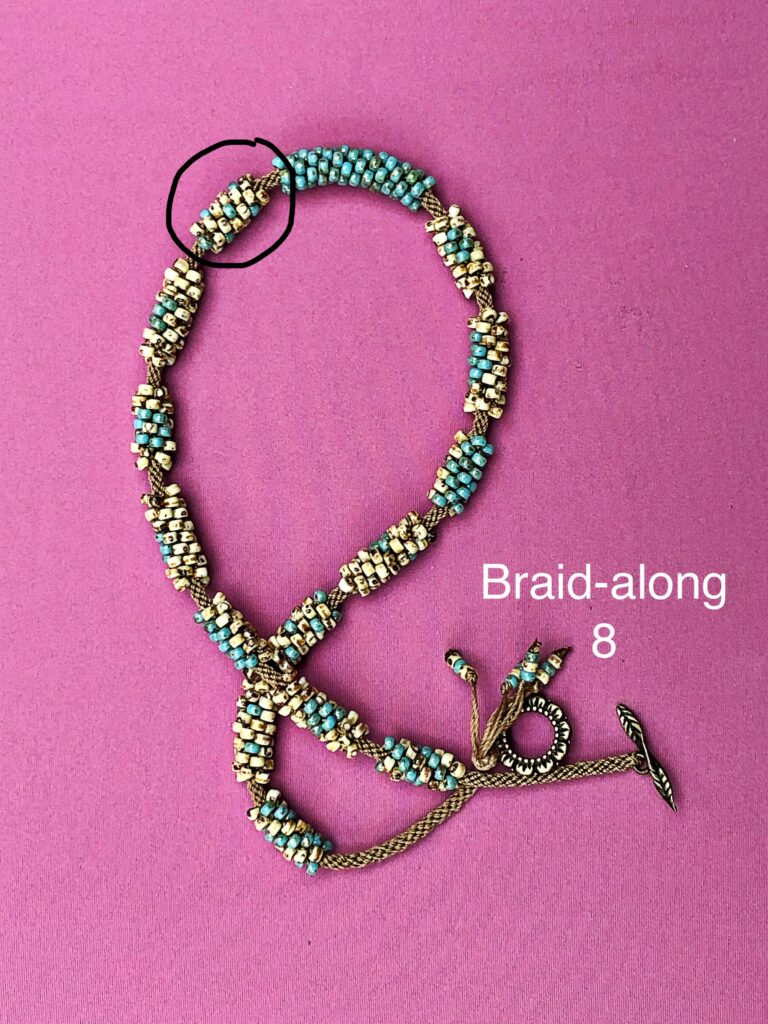
Today we have an easy one that does not require a chart. Just thread 4 beads of your contrast colour onto the top right cord and the bottom left cord. Thread 4 beads of the background colour onto all the other cords. Start on the dots, so that you finish on the dots and then complete the unbeaded gap.
Now you need to consider the length you want your necklace to be. The middle section of mine is a double one, but it could be a single one if you prefer. If you want your necklace to be longer you can repeat some of your favourite sections so far, but remember that you need enough cord to finish the second side, as well as cord for the central double section and the cord that stays on your disk at the very end. This will vary depending on the size of your disk and whether you want a double or single section in the middle. Check your remaining cord against what you started with and make a decision!
Day 9
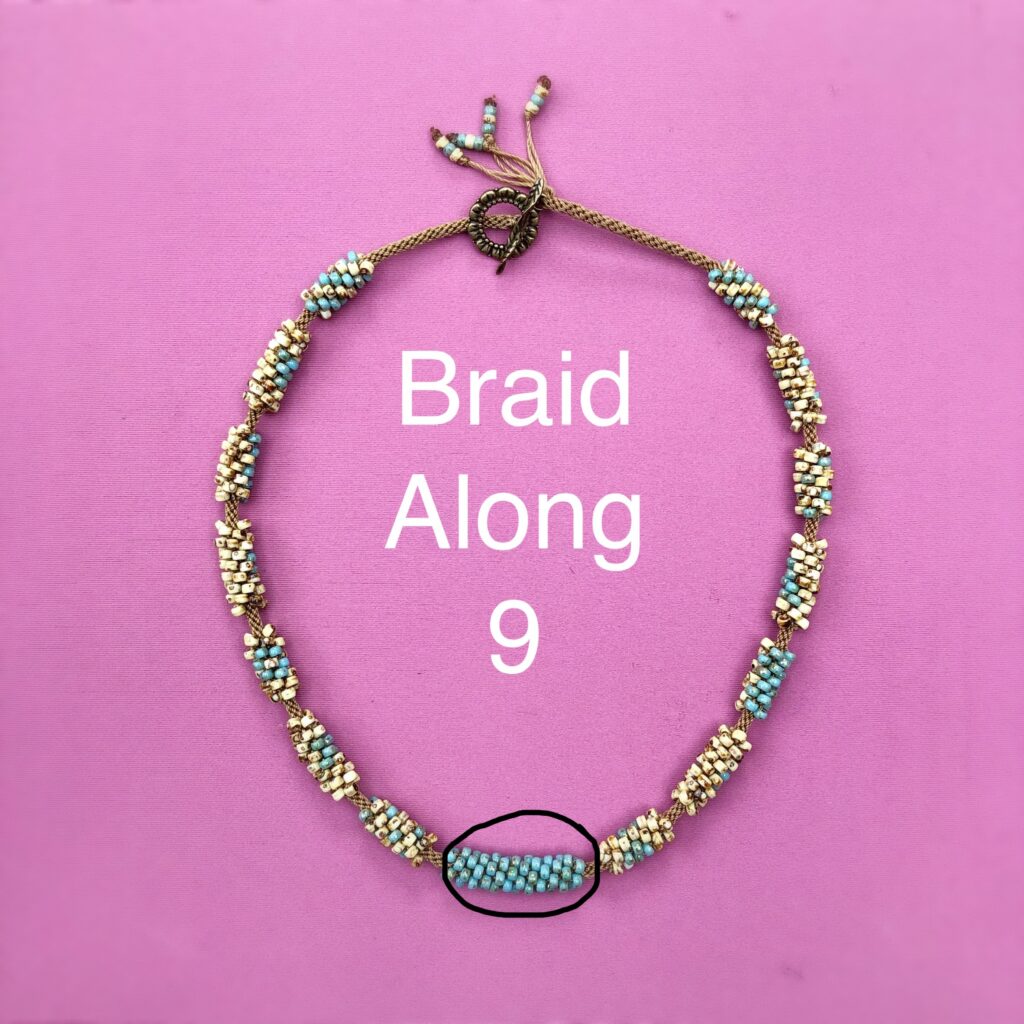
Time for some free expression!
At the centre of the braid you can use your own ideas to create a focal point. In my example I kept it very simple and made a double section of my contrast colour. I used 8 beads on each cord. If you decide to use more just remember to reposition the cords before making the gap. If you look through the posts for braid-along 8 you will see some great ideas. I look forward to seeing what you come up with. Don’t go so crazy that you run out of cord for the second half of the necklace. Once the central section has been completed you need to have approximately half the cord length you started out with.
Day 10
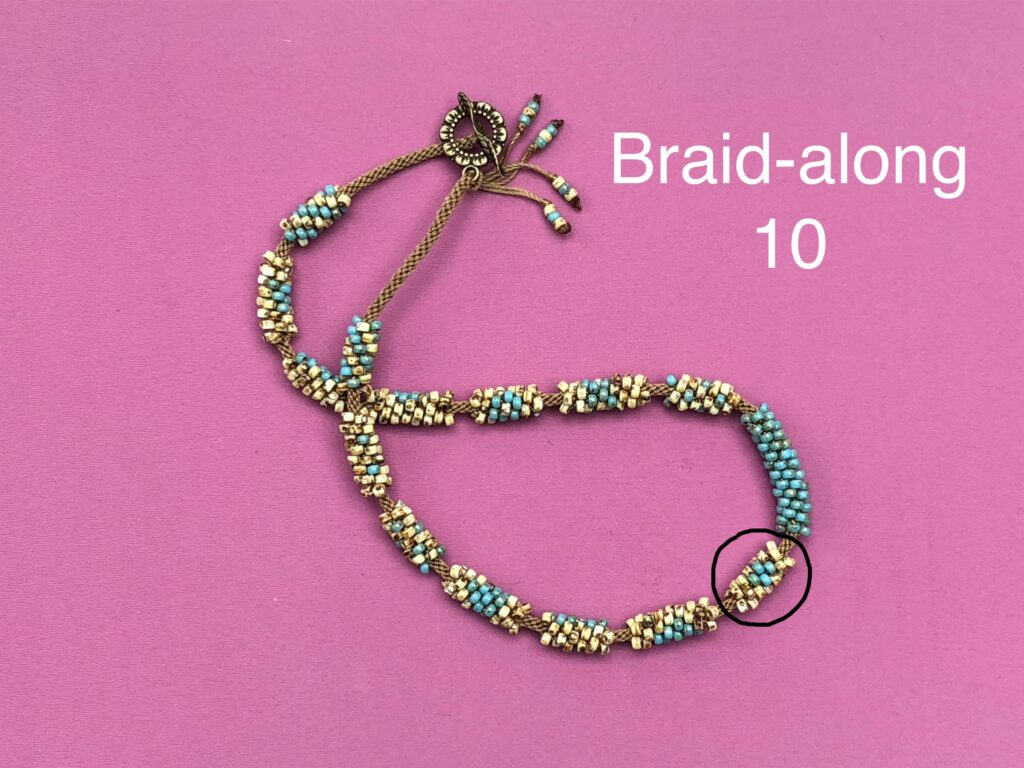
Decision time! If you are the sort of person who loves symmetry you may want to consider repeating the sections we have done so far to complete your necklace. However, this has been designed as a sampler and a learning experience, so I will continue to give you instructions for a different pattern each day. If you do decide to make your necklace symmetrical you could consider starting a new one using the new patterns and take inspiration from some of the colours and bead shapes you have seen in the work of others.
The new pattern for today features small diamonds on both sides of the braid. It is a 4 bead section, so no repositioning is necessary. I hope you will like this one.
Day 11
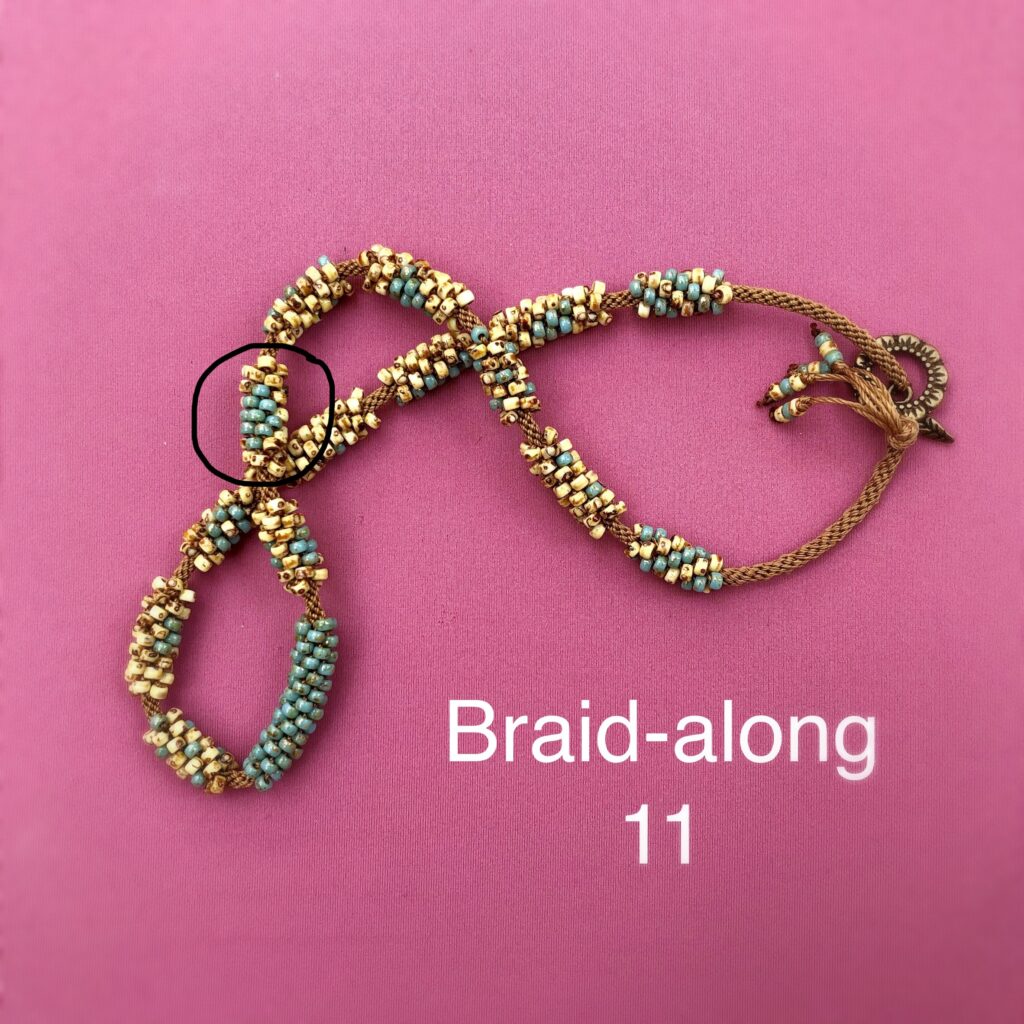
The pattern I have got for you today is a 5 bead pattern, so you will need to remember to reposition the cords after the beaded section to get an even sized gap. This pattern features a large diamond shape. It is quite similar to the clusters pattern, but it is slightly larger (9 beads instead of 6) and is a more pronounced diamond shape. When you want a strong geometric look this is the one to use, whereas the clusters are a softer, narrower shape, which makes them useful for use with larger sized contrast beads. Each pattern is useful for different effects and when your sampler is finished you will be able to use it to determine which pattern is best for what you are trying to achieve.
If you are following this braid-along you can fast forward to the chart in the video and get a screen shot. However, if you are just dipping in to these posts here and there you need to watch the whole video to make sure you understand the correct starting positions for your cords and the way the chart works.
Day 12
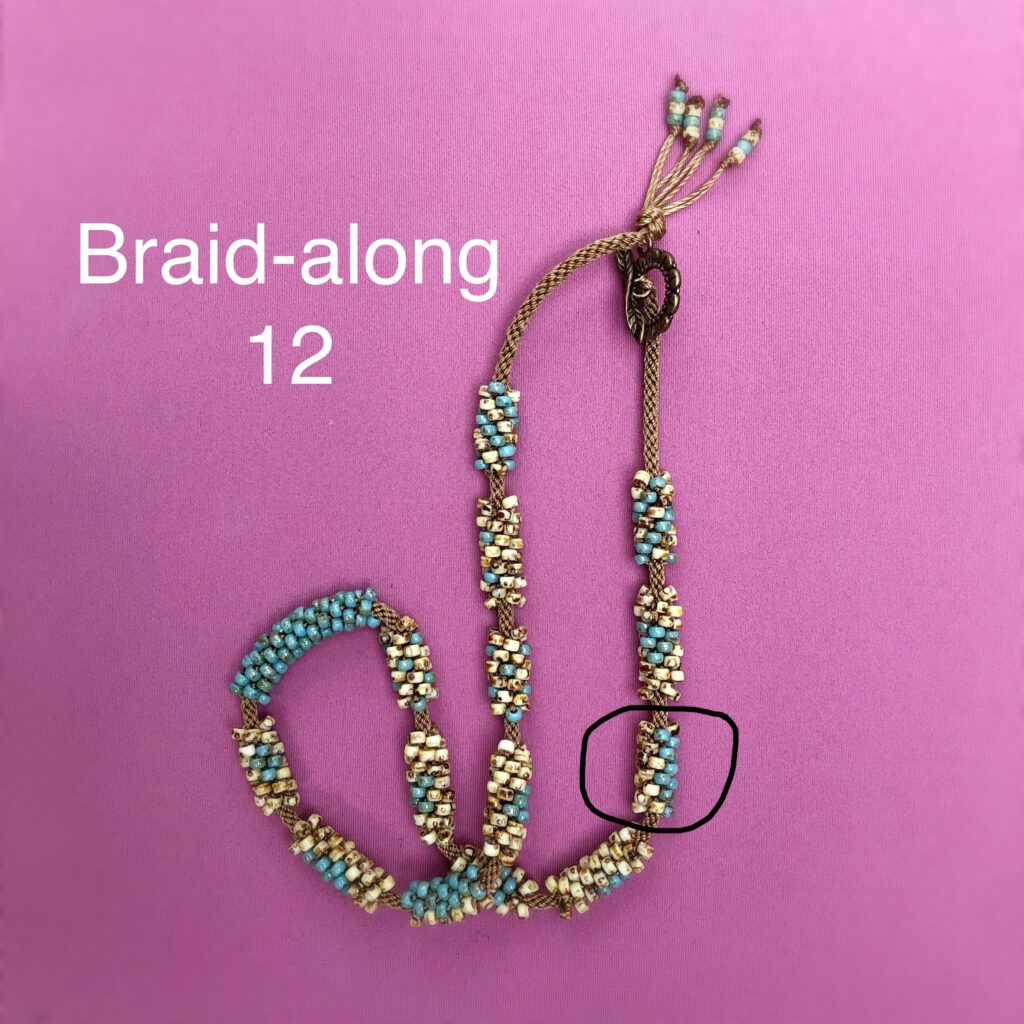
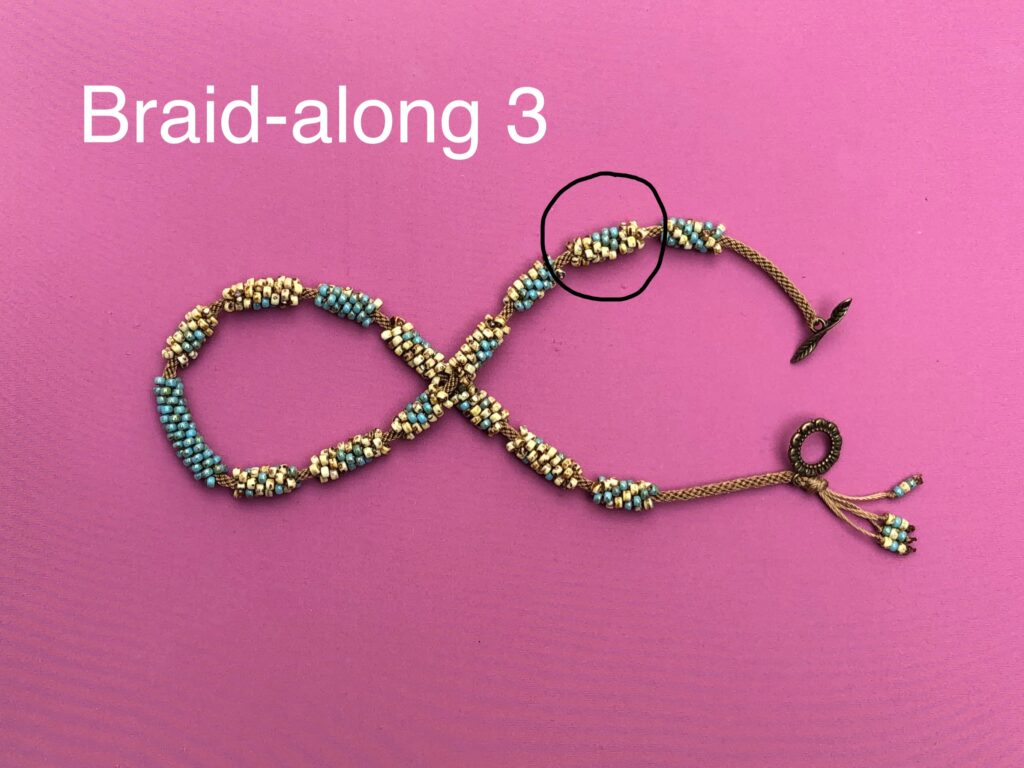
Dear braid-along friends, I think you are going to like the next beaded section. This may not be the prettiest one, but it could well be the most useful one. For instance, if you are making a bracelet it allows you to have one type of bead on the outside of a braid and a different one on the inside. I look forward to hearing what you think and how you might use it. This is a 4 bead section, so no repositioning is required.
Edit: Sorry I ringed the wrong section!
Day 13

Just 4 more to go!
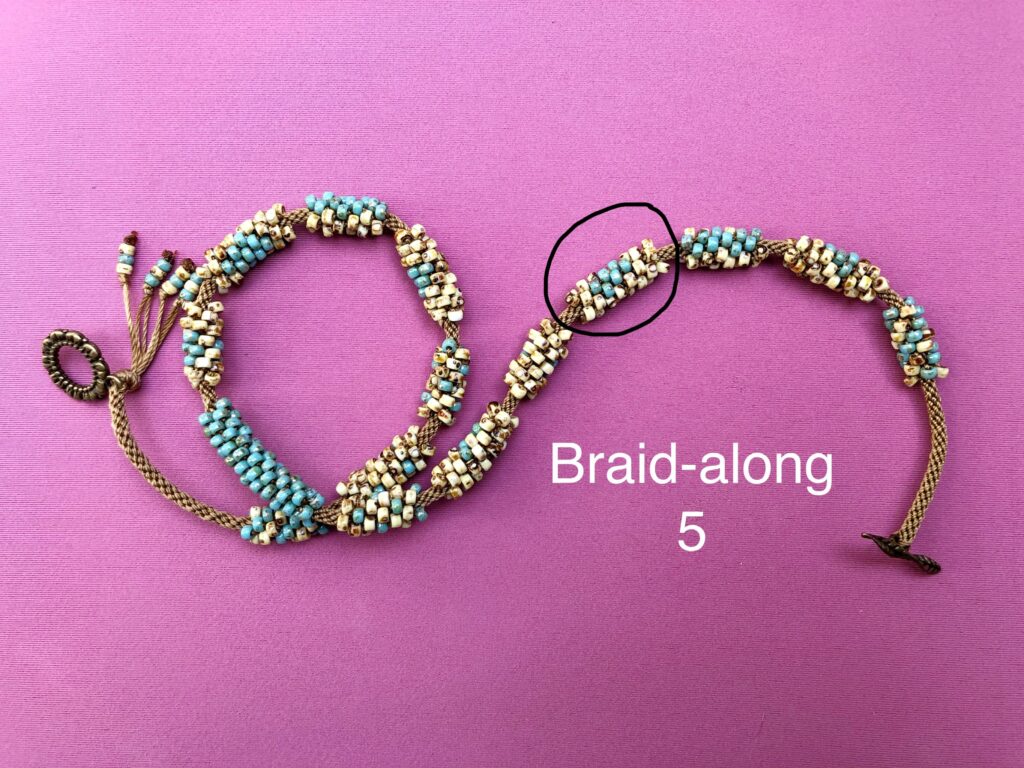
This is a very simple, but useful pattern, which is great for adding in a few larger or top-drilled beads along the edges of a braid. This is a 5 bead section, so don’t forget to reposition the cords after adding the beads.
Day 14
I have changed my mind about this one, so this section is not on my example braid. As this is a sampler I though it would be useful to have one section showing what happens when you have just one cord of a contrast colour. Thread 4 beads of one colour on any cord. Then thread 4 beads of another colour onto all the other cords. What do you get?
Day 15
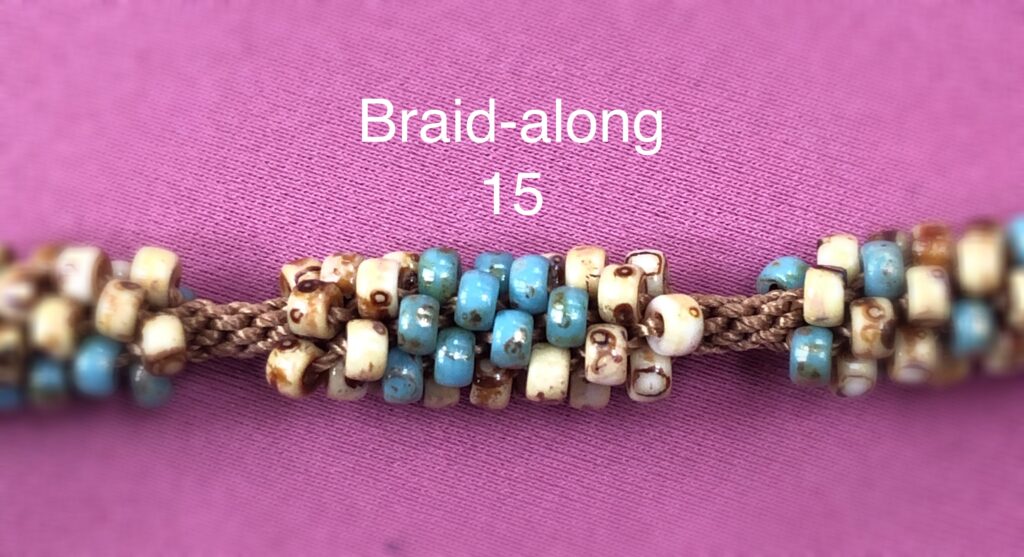
This is the penultimate beaded section, so I am giving you a choice. You can either try this large triangle pattern or you can experiment with a pattern of your own. The large triangle is, of course, very similar to the small triangle, which we made in the second section, but has different uses. If you want to add a few larger beads then the smaller triangle is best. If you want a strong geometric effect you will find that the large triangle makes a greater impact.
If you decide to experiment, you can use the Kumihimo with Beads app if you have it, or you can try a bit of trial and error based on the sections you have made so far. Have fun!
Day 16
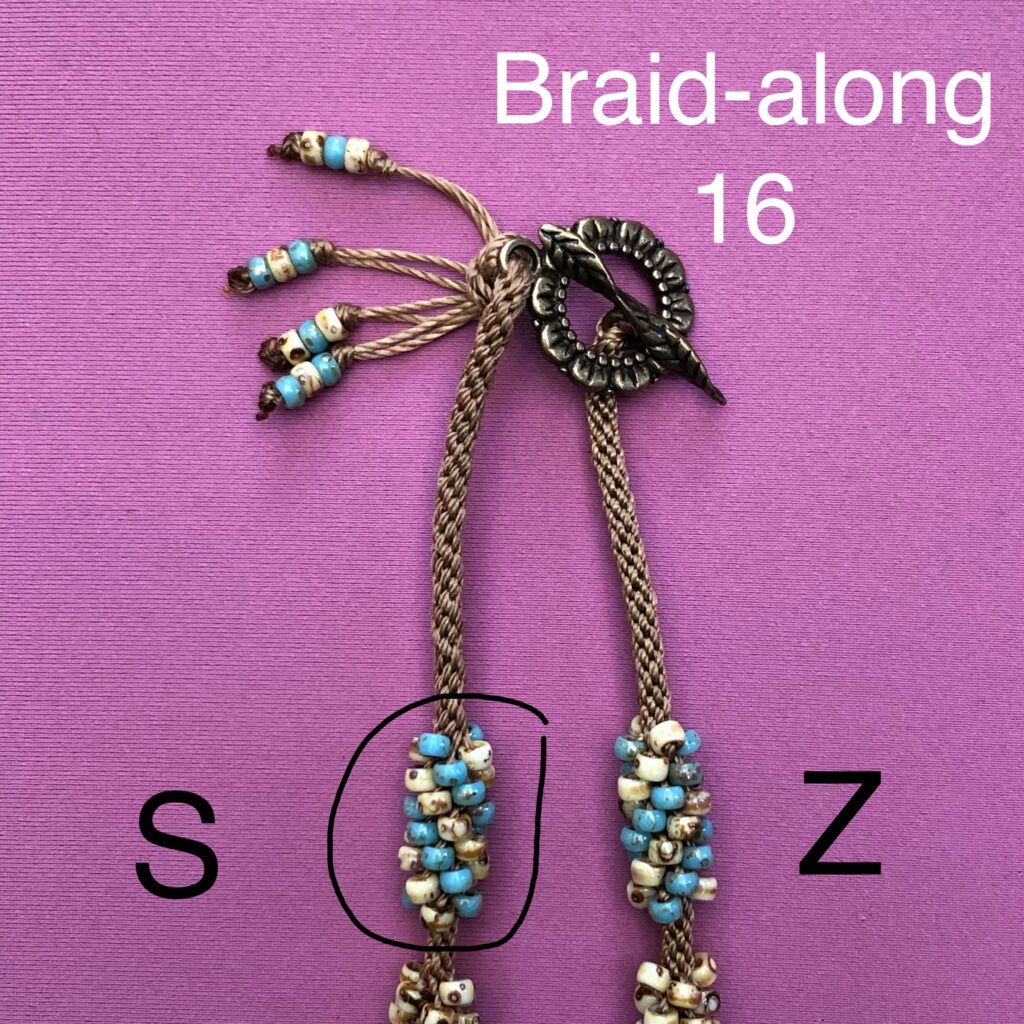
This is the last set of instructions for the sampler necklace.
For the last section we are going to repeat the first section, but reverse the spiral. If you have not done this before, please watch this video because it is full of important explanations.
The starting point is for your unbeaded gap after step 15 to have been completed. You now need to undo the last 4 individual cord moves. Then perform 4 moves using the TOP LEFT and BOTTOM RIGHT cords. This gets your cords into the correct positions for you to be able to add beads from these cords. Thread 4 beads of one colour onto the 4 cords at the top and bottom of the disk. Thread 4 beads of another colour onto the 4 cords at the sides. Continue to braid, adding in the beads and still using the top left and bottom right cords. Your braid will now spiral in the opposite direction. (If you do not understand these instructions please watch the video again!)
After the beads you can either carry on with these cords or you can revert to the cords you are used to using. Finish your necklace and attach the clasp using the instructions in this video.
CONGRATULATIONS, YOU HAVE COMPLETED YOUR SAMPLER NECKLACE.
