
This post is all about how to achieve a twist on a Prumihimo braid, which amuses me because I usually have to explain how to flatten a Prumihimo braid! One of the members of the Kumihimo by Prumihimo and Friends facebook group posted a Prumihimo braid with a pronounced twist, which she had not expected because she is an experienced braider. The post received a large number of likes and a couple of other members expressed and interest in making similar braids.
First of all the reasons for twisting of this particular braid need to be explained. I designed the Prumihimo disk to simplify a traditional straight braid, using my own system of slots, dots and numbers. If the braid is made with perfectly even tension the braid should be completely straight. Beginners rarely braid with even tension, but the more they practise the straighter the braid will be. Even experienced braiders may find that they do not produce perfectly straight braids all the time and there are several reasons for this. The good news is that steaming or pressing the braid can flatten a twisted braid permanently.
The most common reason for twisting is that the braider is pulling harder on some cords than on others and even a slight difference will affect the braid. The best way to avoid this is to work in a regular and rhythmic manner. Give yourself time to braid without interruptions and relax into the 3-step rhythm of the braid. Stopping and starting will also affect your braid. Each time you put the disk down you risk releasing the tension on the cords. The best way to set your disk down is resting on a vase or something similar, which allows the braid and cords to dangle freely and keeps the disk level. This is good advice for not just the Prumihimo disk, but also for all types of disk braiding.
Your choice of cords may affect the straightness of the braid, especially when you combine cords made of very different materials. Flat materials, such as ribbon or tape yarn will often cause a braid to twist. Using multiple cords in a slot is also likely to cause twisting.
Braiding errors will also cause twisting, especially when the 3rd move in each set of 3 is omitted.
Flattening a twisted braid is easy and is based on the traditional Japanese remedy of steaming. Please remember that steam is hot and cord, especially synthetic cords, will melt when overheated, so it is worth testing a scrap piece of cord first. Don’t forget to protect your hands and your working surface too. Give the braid a few blasts of steam from a steam iron or steamer and you should feel the braid soften and relax slightly. Untwist the braid and place it under something heavy to cool. When the braid is completely cool check it. If it needs a bit more you can then apply more steam, cover the braid with a double thickness cloth and lightly apply the iron to the braid, but be aware that too much heat and pressure will permanently damage the braid. Leave it to cool under something heavy as before.
So that covers flattening, but what about creating a twist? Deliberately choosing materials which are likely to twist is one way. For example, use a firm, round, synthetic cord, such as satin cord, in the slots at number 1 and 2, and combine it with a flat, cotton yarn or several strands of thin, organza ribbon in the slots at number 3 and 4. This is likely to produce a fairly gently twist. Experimenting with different combinations of cord will produce interesting results.
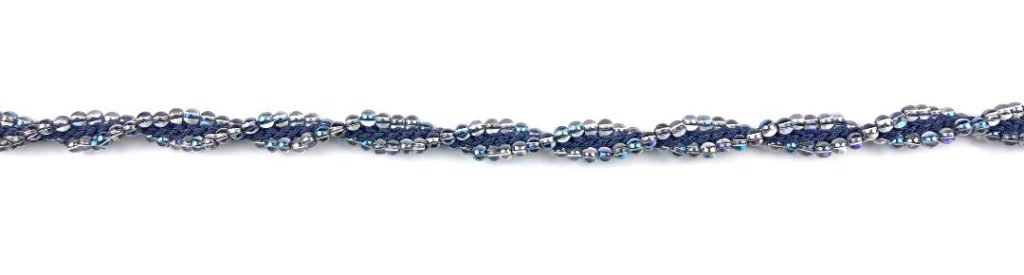
For a twisted beaded braid choose beads which are very slightly larger than the braid can accommodate and the beads will force the braid to twist to make space for the beads. For example, use 1mm satin cord in the slots at number 1 and 2 and use 4mm beads on S-Lon 0.5mm/Tex210 in the slots at number 3 and 4. When you start to braid the beads you will find that there is not quite enough space for the bead to sit in the V of satin cord and it will protrude slightly above the disk. When subsequent beads are braided the beads are forced out of line, causing a spiral. After braiding use a beading needle and beading thread to sew through all the beads several times to achieve an even spiral. You may need to experiment with different sizes of bead to get the effect you want. If the beads are not quite large enough there will be enough space for them in the braid and it will not need to twist. Using beads which are a bit too large will be difficult to braid and produce a messy effect.
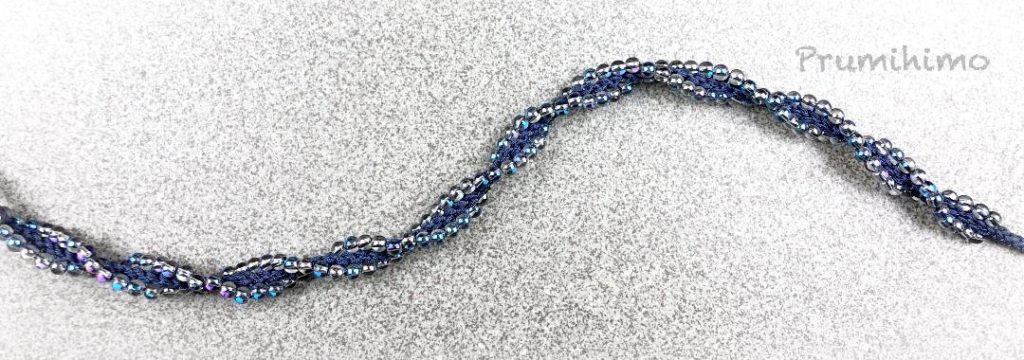
The basic round braid on the round disk is perfect for making spirals and a similar look can be achieved by using beads on only some of the cords. However, the effect is different. With round braid the beads spiral round the braid. The Prumihimo braid is also round, but when beads are added on two sides (the double beading method) the braid appears flat and the whole braid twists. The photo below explains this better than I can! The photo on the left shows a spiralling Prumihimo braid and the photo on the right shows a 16 cord round braid with beads spiralling around the braid.
