
Every January in my Facebook group I set up a poll about goals for the year. This year the top answer was to make more time for kumihimo, but there is not much I can do to help people with that!
The second most popular goal was to learn new braid structures, so I have decided to write a series of blogs about my favourite braid structures to encourage braiders to try something new. The basic round braid/kongo gumi made on the regular round disk will always be the most popular braid structure and for very good reasons. It is easy to learn, works up quickly and can be made from a wide range of materials. Plain braids can be worked in different colours to create a multitude of different surface patterns, while beaded braids add a completely new dimension, which is ever-changing as new beads come onto the market. However, experimenting with other braids is tremendously rewarding, so I would urge everyone who has not already done so to step out of their comfort zone and try something new. All the support you need is available on my YouTube channel for visual learners, or in the Braiding Patterns (Resources) section of this website for those who prefer written instructions.
Learn Spiral Braid by watching the video
Learn Spiral Braid by reading written instructions

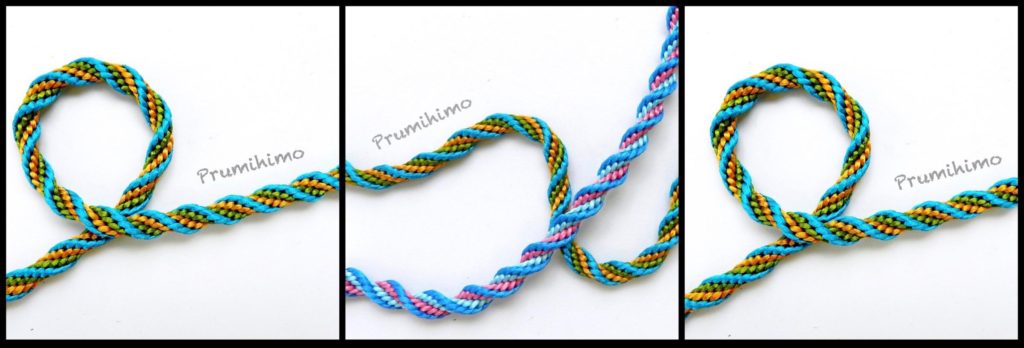
I am going to start by recommending the Spiral Braid or Ridged Spiral Braid. This is a great starting point because it is just a step away from the familiar moves of Round Braid. The braid is made with 12 cords and has a round appearance with a raised ridge spiralling around the braid. Visually it is most effective when the ridge is made in a contrast colour. It is important to heed the advice I give in both the video and the written instructions about using 2 different colours for the remaining cords because this trick makes the braid much easier to learn. Once you have learnt it you can play with different colour combinations and solid colours. You also need to cut longer cords for the ridge cords. Start with 30% longer, but keep a record of what works for you because this will vary from person to person.
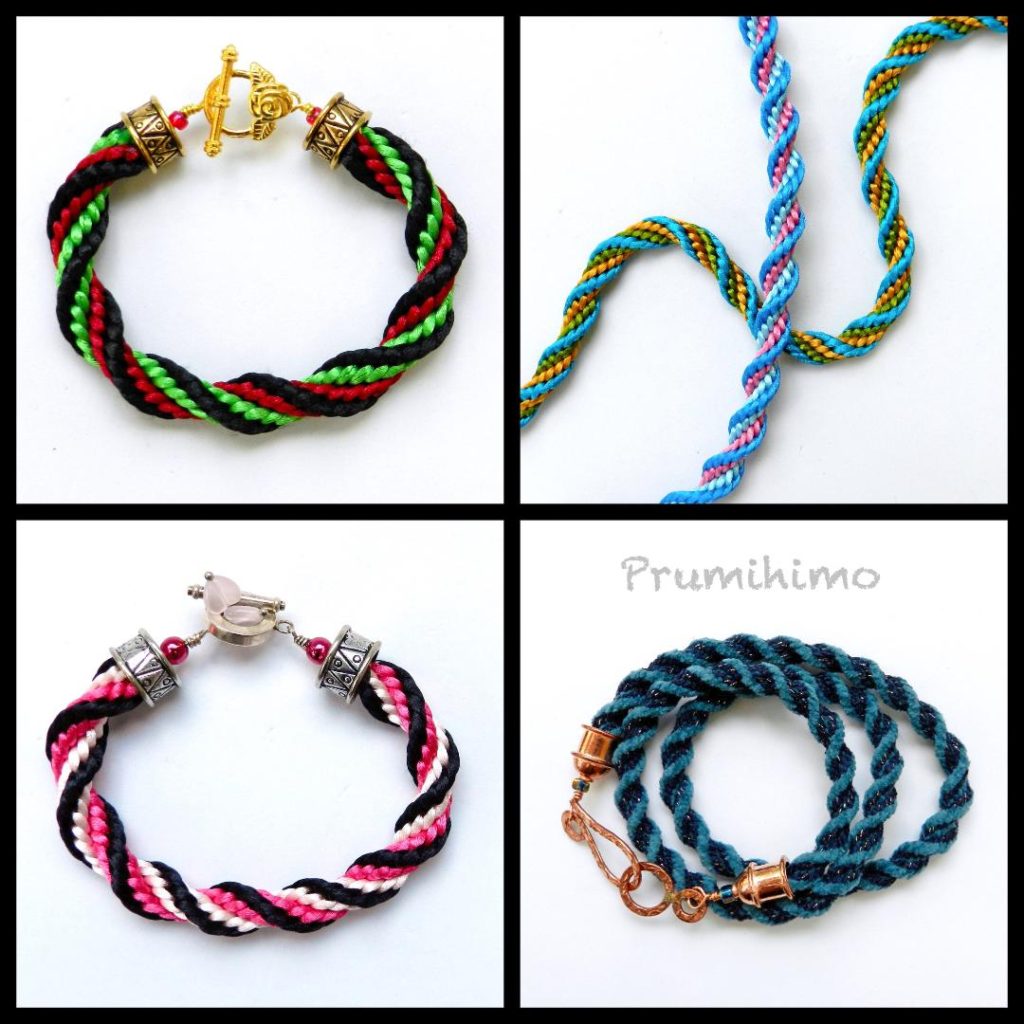
I always recommend that new braids are learnt using satin cord because the slippery surface makes it easier to control the tension and create a smooth braid. However, any braid made with 12 strands of satin cord will be fairly stiff, especially the thicker ones. This works well for bracelets, but it is usually more desirable to make necklaces which are more flexible and will drape around the neck. Once the braid has been learnt you can experiment with different cords and yarns. For the necklace below I used soft knitting yarns. For the ridge I used chenille and for the valley I used a yarn with delicate flecks of metallic thread.

The video was filmed several years after the instructions were written and I made a minor change to the order of the moves, so it is best to stick to either the video or the written instructions to avoid confusion.
As with all braids, tension has a part to play. Irregular tension in basic round braid tends to hide itself well, but in this braid it will be more obvious because the spiral will not be evenly spaced. Practise will sort this out. Sometimes the ridges will flatten out after a few inches of braiding and this is again down to tension and pulling too hard on the ridge cords. As you braid keep a close eye on the way the braid is forming and if you see any flattening or distortion you can ease off the tension of the ridge cords.
The finished braid can be used in the same way as any round braid. It makes a pretty bracelet on its own or it can be used to hang a pendant from. Lariats and lanyard straps can also be very effective made with spiral braid. Beads can be added in just the same way as with round braid, but if beads are added onto all cords the full effect of the raised spiral will be lost, so I prefer to use beads either just on the ridge or just in the valley, as shown below. This is based on my own experience and I know that other people have had more success with beads on the spiral braid. It is worth noting that when you use beads on the ridge they may move slightly to either side because they are not supported by the rest of the braid, as they are in regular round braid, so sometimes photos may not show the whole story.
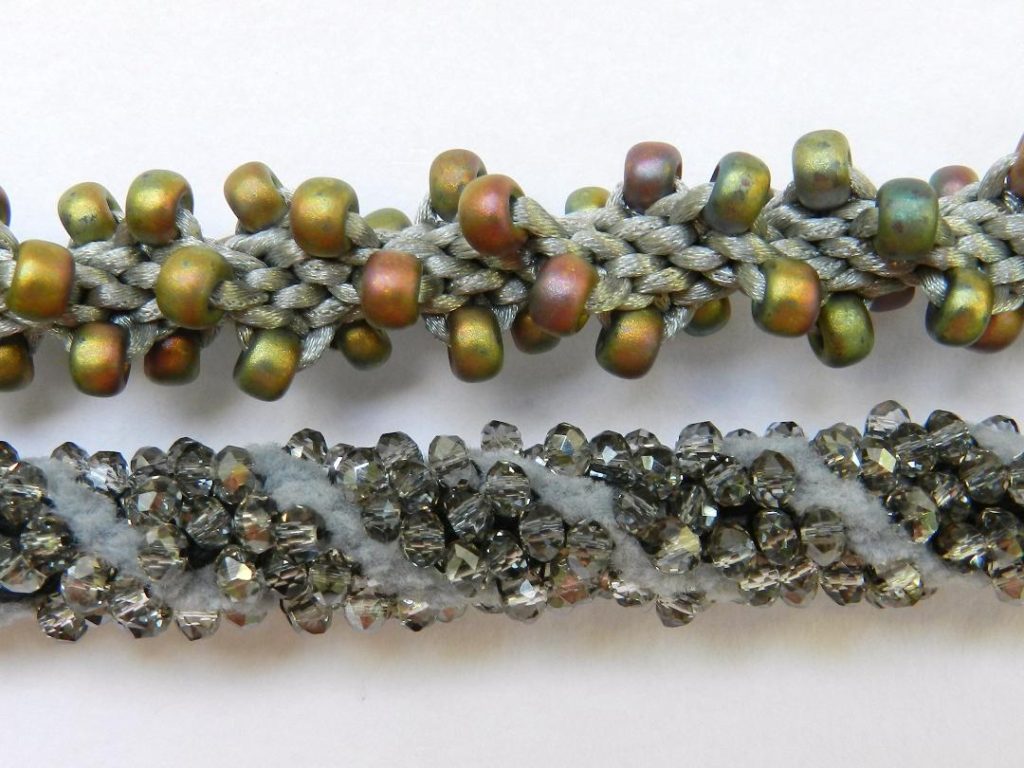
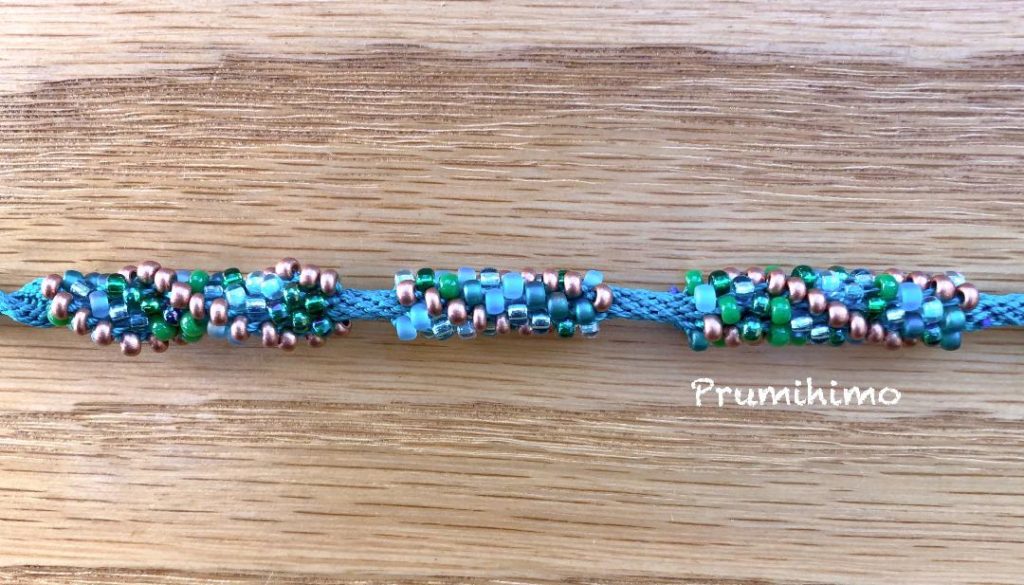
The braids in the photo above were made 6 or 7 years ago, so I thought I would revisit the technique and see if my views had changed. I used copper size 8 beads on the 4 cords which form the raised spiral and for the other cords I used a ready mixed cocktail of greens and aquas. The samples below show, from left to right,
- Beaded 12 cord spiral braid
- Beaded regular 12 cord braid
- Beaded regular 12 cord braid with a core.
I think that the slightly raised spiral effect in sample 1 is pretty, but not particularly defined. I found this quite a fiddly technique to get right because there is not much space for the beads, resulting in overcrowding. In the finished braid I felt that the copper beads in the spiral did not sit quite as neatly as I would like.
I think that the beads sit more neatly in sample 2 and regular round braid is an easier braid to work with. However, the braiding was fiddly because again there is not much space for the beads, making it more difficult for beginners.
The third sample is my favourite and was also the easiest to braid. Braiding around a core is an easy technique to learn and it provides more space for the beads, making it much easier to braid the beads. The only downside is that you do not get the raised spiral effect, but using slightly larger beads or drops/magatamas would achieve this visual effect, with the added benefit that the beads are fully supported by their neighbours.
The experiences and preferences of other braiders may well differ from mine, so experimenting for yourself is the best way to find out what suits you. An alternative to adding the beads during the braiding process is to embellish the braid with strung beads or chain, allowing them to nestle in between the ridges and securing them with a beading needle and thread.
I have been asked if Spiral braid can be worked with a core cord. The answer is that you can braid around a core using Spiral braid instuctions, but the core will force the braid into a round profile, rather than the flat profile it naturally forms and this will completly flatten the ridge on the braid.