
The following designs were made with the Kumihimo Endings kit from Riverside Beads. For each design I indicate which ending method was used, with the page reference, but a variety of different endings from the book could be used for any design. The aim of this page is to give the details of the cord lengths and bead counts needed for each design. The ending method can be found in the book. Unless otherwise indicated, all of these designs are made on the round disk. For brading instructions please refer to the information sheet supplied in the kit or check out these videos,
Braiding on the round disk – https://youtu.be/kdBerLxDcuU
Braiding with beads – https://youtu.be/15ZWqmNkrFA
Please be aware that all measurements, cord lengths and bead counts are approximate. Every braid is slightly different, due to your own particular style of braiding and the condition of the disk, so your braid may come up longer or shorter than mine. Always ensure that you check that the braid is the correct length for you before you remove it from the disk and be ready to make adjustments as necessary.
It is much easier to thread beads onto cords if the cord ends have been stiffened first. Clear nail varnish, brush-on super glue or a fray prevention product are ideal for this purpose. Be very sparing with the product because too much can cause the cords to swell. Allow it to dry and stiffen. Then trim the end at an angle and the stiffened cord will work much like a needle.
Glued Endings – page 25
Silver banded bracelet with safety chain – page 27
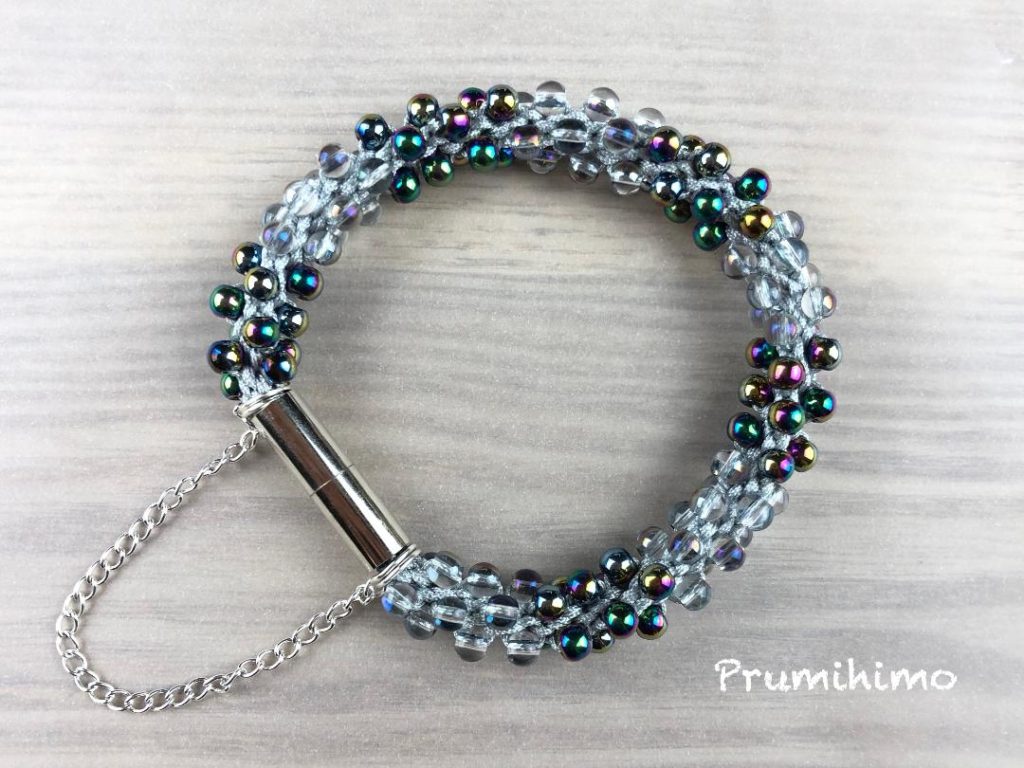
This bracelet is made using multiple strands of silver nylon cord. Cut 12 x 60cm nylon cord and 2 x 75cm nylon cord. Tie all the cords together at one end and position the longer cords in the top right and bottom left slots. Put 2 cords in the other 6 slots in the north and south positions. Braid for 2cm, working the two cords together as if they were one cord. Thread 56-64 beads onto both of the longer cords. To achieve the banded pattern thread on 6 beads of one colour followed by 6 beads of a second colour and repeat until there are 56-64 beads. Continue to braid, adding a bead into the braid every time the cords carrying beads are moved. Braid to the end of the beads. Check the length.
Use the instructions on page 27 to finish the bracelet and attach the safety chain. Use the wire in the kit to make jumprings. A knitting needle can be used as a mandrel.
Bronze beaded bracelet – page 26

This braid is made using a combination of satin cord and nylon cord. Cut 4 x 60cm satin cord and 4 x 75cm nylon cord. Tie all the cords together at one end and position the cords on the disk with the satin cords in the north and south postitions and the nylon cords in the east and west postions. Braid for 2cm. Thread 45-55 beads onto two diagonally opposite cords. Continue to braid, adding a bead each time the cords with beads are moved. Braid to the end of the beads and check the length.
Finish the bracelet using the instructions on page 26. If you do not need the extension chain remove it with pliers.
Wired Endings – page 31
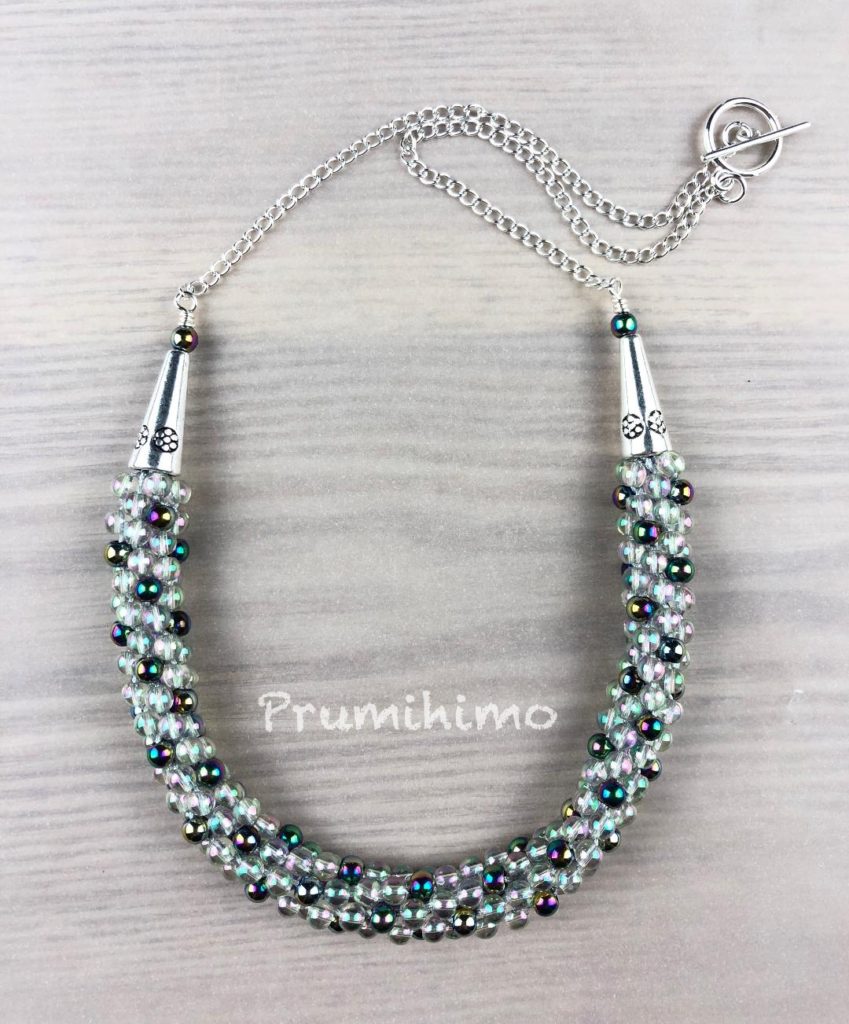
Beaded bead necklace – page 36

The beaded effect on this necklace is created by braiding clusters of beads together. Cut 8 x 200cm nylon cord. Tie all the cords together at one end and position them on the disk in the north, south, east and west positions. Braid for 7cm. Thread the following beads onto all 8 cords, 1 seed bead, 2 round beads, 1 seed bead. Continue braiding to incorporate approximately half of these beads. As you braid the round beads a gap will open up in the middle of the braid. Press one round bead into this gap and continue to braid in the rest of the beads. This technique will help to keep the shape of the beaded section. Braid without beads for 1.5cm. Thread on the same beads as before and create the beaded section in the same way. Repeat this process untill you have 9 beaded sections. Complete the braid by braiding for 7cm. Finish off using the instructions on page 36-7 and the clasp instructions on page 33.
Braid and chain necklace – page 32
The braid for this necklace is made using the braiding around a core method to ensure that the braid is firm and does not collapse in on itself. It is worth watching this video before trying this technique. Cut 8 x 70cm nylon cord and cut one length of satin cord measuring 40cm. Tie all the cords together at one end and position the nylon cords on the disk in the north, south, east and west postions. Leave the satin cord lying on top of the disk in the south position. Braid for 2cm, using the satin cord as the core and stop at a point when the cords are on either side of the dots. Thread 30 beads of the contrast colour onto the top right and bottom left cords. Thread 30 beads of the main colour onto the other cords. Continue to braid, adding in a bead with every move until the beads are finished. Braid without beads for 2cm. Finish off using the master technique for wire on page 32.
Big bead bracelet- page 39
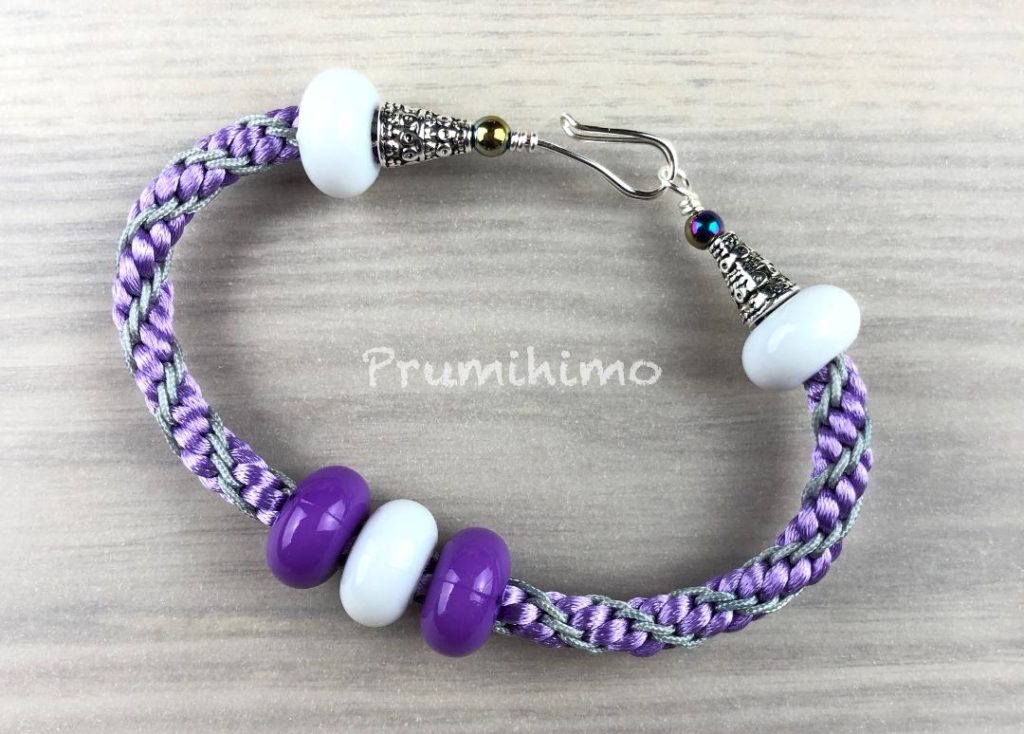
The braid for this bracelet is made by combining thick and thin cord in one braid. The take up of thin cord is much greater than the take up of thick cord and it will vary from braid to braid, depending on how firmly you pull up on the thin cord. Cut 50cm x 4 satin cord and 70cm x 4 nylon cord. Tie all the cords together at one end and position the satin cords in the north and south slots and the nylon cord in the east and west slots. Braid for approximately 14-15cm. The ending is long and will measure approximately 6cm, depending on the size of your hook. Seal the braid as on page 9 and thread on the big hole beads. Finish off using the instructions on page 39, but instead of a decorative bead use a small cone.
Button Fastenings – page 41
For button fastenings you need to start with twice the usual length for each cord and half the number of cords.
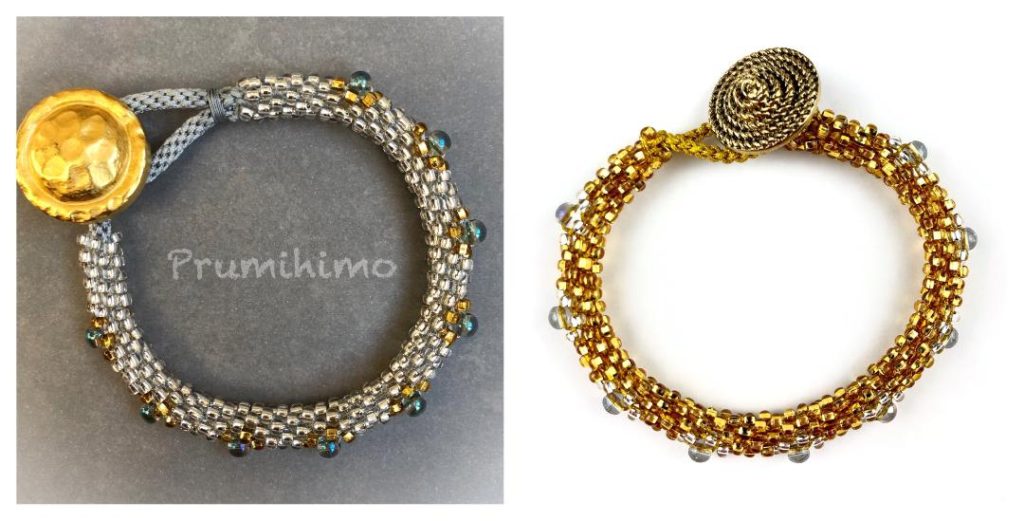
Beaded button hole bracelet – page 51

This bracelet starts with a beaded loop and finishes at the end with the button. Beads are on 2 diagonally opposite cords and these cords need to be about 20% longer than the other cords. Cut 3 x 120cm nylon cord and 1 x 160cm. Thread 30 seed beads onto the longer cord. Centre the beads on the cord and form a loop. Check that the button fits throught the loop. Tie the cords tightly in a double knot and position the cords on the disk in the top right and bottom left positions. Find the midpoint of the other 3 cords and position them evenly in the remaining slots on either side of the letters. Lift the 2 longer cords and tie a tight double knot around the other cords. Replace the longer cords in their slots and braid for 8 individual cord moves. Do not pull too firmly on the cords for these moves or the cords may slip through the knot. Thread 75 seed beads onto the 2 longer cords and braid to the end of the beads. Finish the bracelet using the method on page 52-3. For the tassel you can either use the crimp covers, as shown in the book or you can simply thread a round bead onto each cord and use the knotting and sealing technique on page 16.
Plaited button hole bracelet – page 47

This is probably the quickest and easiest way to finish off a design, as long as you know how to plait! The bracelet is made using a combination of satin cord and nylon cord. The take up of thin cord is much greater than the take up of thick cord and it will vary from braid to braid, depending on how firmly you pull up on the thin cord. Cut 2 x 120cm satin cord and 2 x 170cm nylon cord. Thread the nylon cord through the holes in the button and centre the button on the cords. Position the cords on the disk in the north and south positions, with the button facing down. Find the mid point of the satin cords and postion them on the disk in the east and west postions. Lift the top left and bottom right cords and tie a tight double knot around the satin cords. Return the nylon cords to their slots. Start to braid with the top right and bottom left cords. Do not braid too firmly for the first few moves. Once the braid begins to form you can braid more firmly. Braid to the required length. Form the button hole using the instructions on page 47. When you plait, use two nylon cords together with 2 separate nylon cords.
Dew Drops designs
These fully beaded bracelets were made using the tutorial included in the kit, using the ending methods on pages 42 and 48.
Crimp Endings – page 55
Half round braid bracelet – page 55
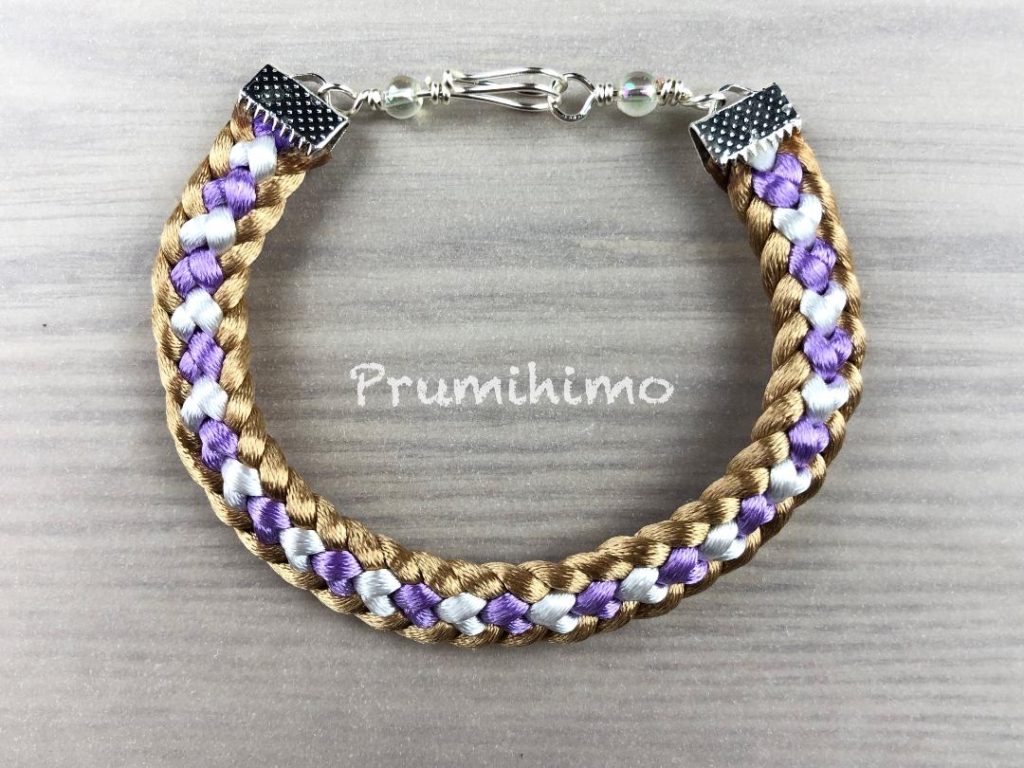
To make this bracelet you need to be able to make the Half Round Braid. You can find written instructions on this website by clicking here. You can also find a video by clicking here. Cut 4 x 50cm satin cord beige, 2 x 50cm satin cord white and 2 x 50cm satin cord lilac. Tie all the cords together at one end and position the cords on the disk. Beige goes in the top 2 slots and the 2 slots below east and west. White goes in the 2 slots above east and west. Lilac goes in the bottom 2 slots. Braid to the end of the cords and finish the bracelet using the instructions on page 55-6. You can either attach a clasp or you can make a hook and eye clasp using the instructions on page 33. In the example above the hook and eye clasps were attached to the ribbon end using wrapped loops, which can be found on page 11.
Flat braid bracelet – page 55-6

To make this bracelet you will need to use a square plate/disk. If you have not used one before I recomment watching this video first. This bracelet is made using satin cord for the body of the bracelet and nylon cord to carry the beads. Cut 8 x 50 cm satin cord and 2 x 70cm nylon cord. Tie all the cords together at one end and position the satin cords on the square disk across the top in slots 4, 5, 6 and 7. Position the satin cords on the bottom in slots 14, 15, 16 and 17. Put the nylon cord on the top in slots 3 and 8. Braid to the required length and finish off using the instructions on page 55-6. Attach a clasp with jump rings, using the instructions on page 14.
Loop Fastenings – page 61
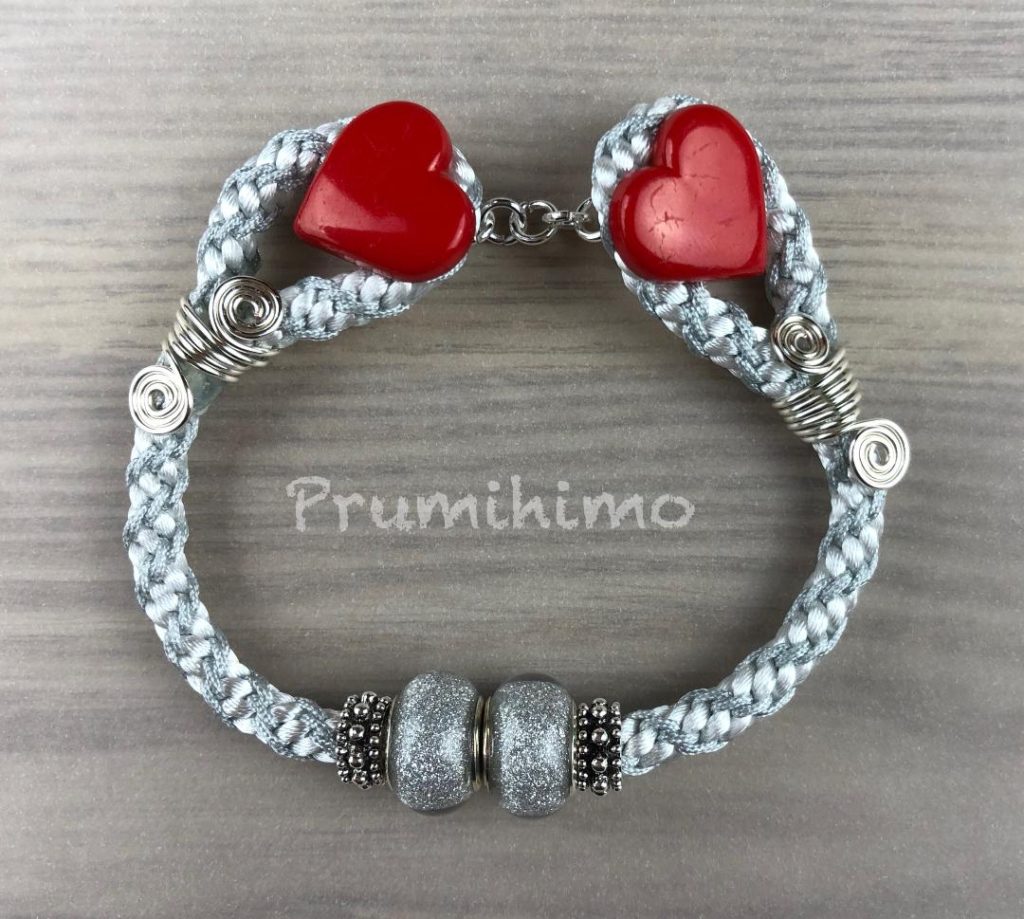
Loop and heart button bracelet – page 61
This is a unique way of finishing off kumihimo. The fastening is so attractive that you can wear the bracelet either way round for a very different effect. The braid for this bracelet is made by combining thick and thin cord in one braid. The take up of thin cord is much greater than the take up of thick cord and it will vary from braid to braid, depending on how firmly you pull up on the thin cord. You will need approximately 30cm of braid to make this bracelet. Cut 4 x 80cm satin cord and 4 x 1m nylon cord. Tie all the cords together at one end and position the cords on the disk with the satin cord in the north and south slots and the nylon cord in the east and west slots. Braid to the end of the cords. Finish off using the instructions on page 61-2. Use the heart buttons instead of toggles and use 8-9 jumprings to join the buttons. To get the sizing correct I recommend finishing one end first and then check the size around your wrist before finishing the second end.
Tassels – page 67
Book mark – page 68
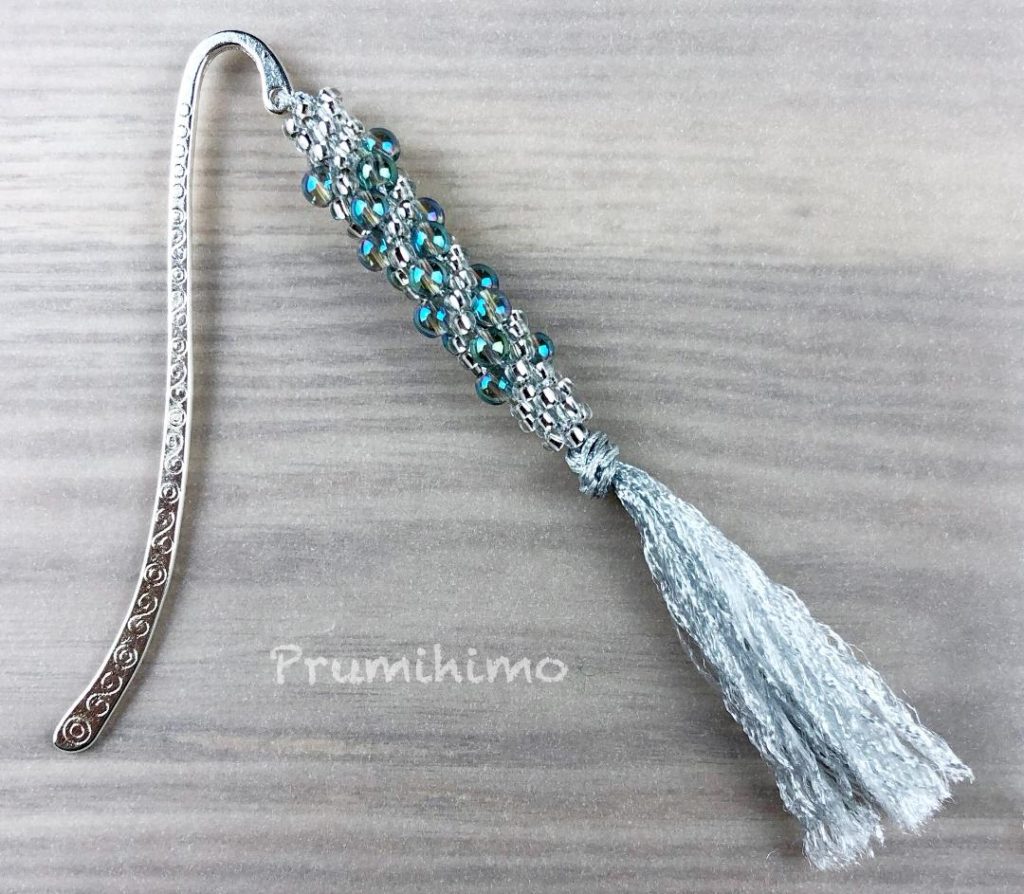
Bookmarks are such fun to make and are wonderful gifts. This braid is made with beads on all 8 cords. The round beads are twice the size of the seed beads, so each time the round beads are added into the braid, 2 seed beads are added in one move. This creates a lovely texture. Cut 60cm x 4 nylon cord. Thread 2 cords through the hole in the bookmark finding. Centre the finding on the cords and position the cords on the disk in the 4 north and south slots. Allow the finding to dangle in the hole in the disk. Find the midpoint of the other 2 cords and position them on the disk in the 4 east and west slots. Braid for 8 individual cord moves, but do not pull too hard on the cords at this stage or you will pull them though the finding. Thread the following beads onto the 4 north and south cords, 2 seed beads, 5 round beads, 2 seed beads. Thread 14 seed beads onto the 4 east and west cords. Continue to braid, adding in a bead from each cord. When you get to the round beads add in 2 seed beads from the following cords. Make sure you add in 2 seed beads after the last round beads and then there will be 2 seed beads left on each cord. Braid in these seed beads and finish off the braid using the instructions on page 68. The nylon cord is easy to unravel as long as you take your time and work carefully from the end.
Clasp and tassel necklace – page 69

This is a very easy method of finishing and requires just a clasp. This braid is made with beads on all 8 cords. The round beads are twice the size of the seed beads, so each time the round beads are added into the braid, 2 seed beads are added in one move. Cut 4 x 2m nylon cord. Thread 2 cords through the toggle and position the cords on the disk in the north and south slots, with the toggle hanging below the cords in the centre of the disk. Postion the other 2 cords in the east and west slots. Braid for 14cm and stop when the cords are in the starting positions. Thread the following beads onto the 4 cords at north and south, 2 seed beads, 3 round beads, 2 seed beads. Thread 10 seed beads onto the 4 cords at east and west. Continue to braid, adding in a bead from each cord. When you get to the round beads add in 2 seed beads from the following cords. Make sure you add in 2 seed beads after the last round beads and then there will be 2 seed beads left on each cord. Braid in these seed beads and braid without beads for approximately 3cm. Thread on the same seed beads as before and braid them in. You now have 2 beaded sections, repeat to create 3 beaded sections. Braid for 14cm and finish off using the instructions on page 69. For the tassel thread a round bead onto each cord and use the knotting and sealing technique on page 16.