

From time to time I am lucky enough to be sent some new beads to play with and to see how they might work for kumihimo. A short while ago a big box of beads arrived from Beadsmith and they have been keeping me pretty busy since then. Some of the designs I came up with were posted a few days ago and as there has been a lot of interest in the photos I thought I would write a blog about how I used these particuar beads and how I generally approach a new bead shape.
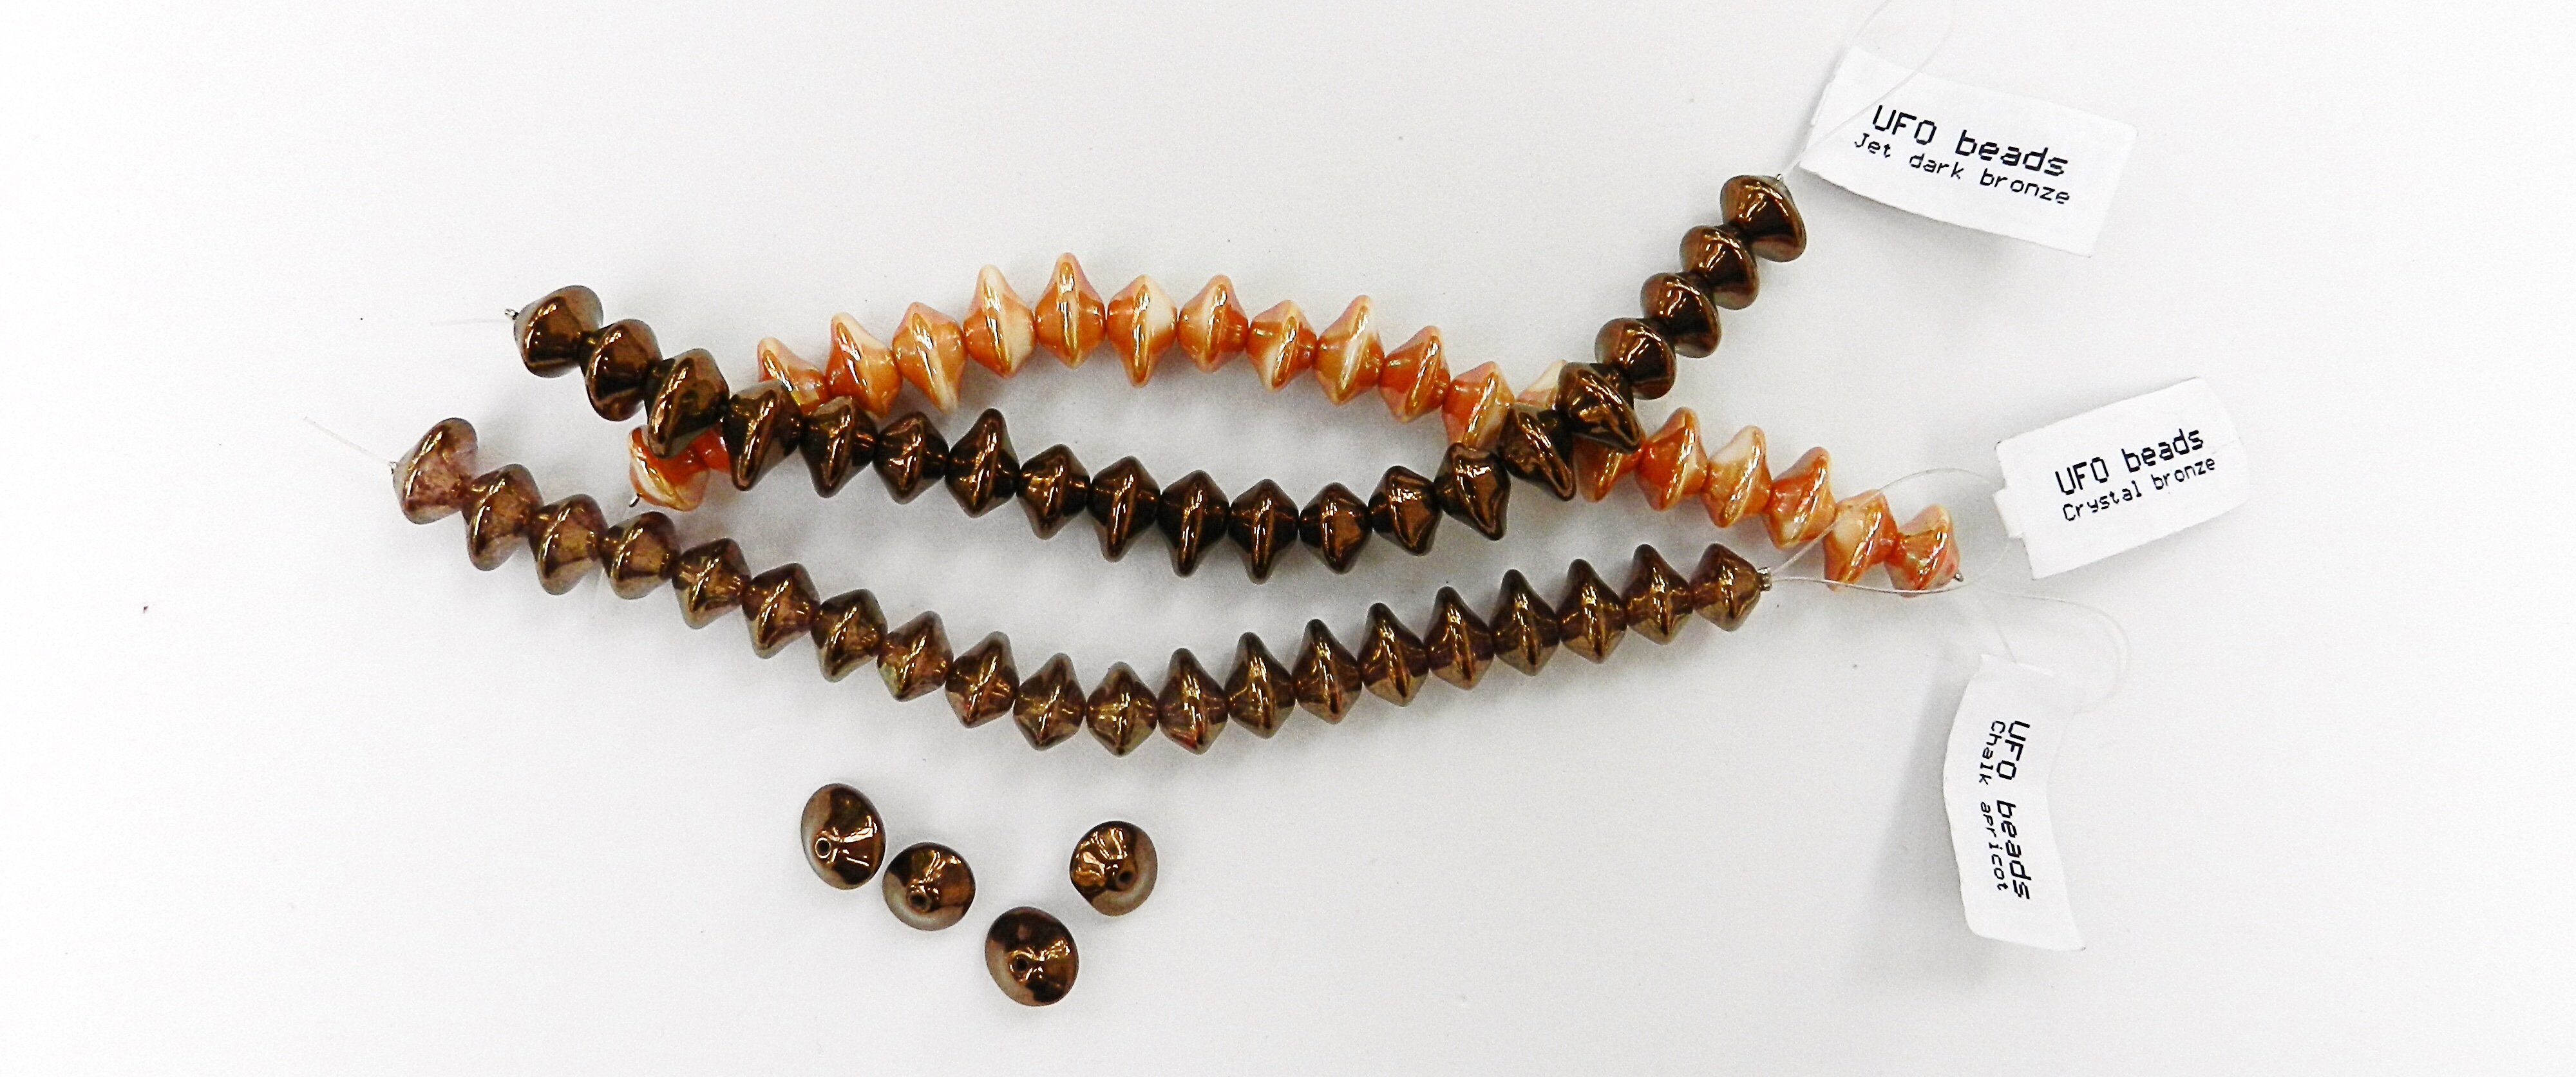
The beads I received were UFOs and Nanos. The UFOs are pictured above and they are a definite spaceship shape, with an asymmetrical silhouette and a medium-sized offset hole. They come in a lovely range of colours and finishes and I particularly liked the warm apricots and bronzes I received. The Nano beads are pictured below and they are a chunky irregular cup shape with a very large hole. They come in the same colours and finishes as the UFOs, so they can be used very effectively together.

When a new bead shape falls into my hands I sometimes find that it is very easy to know how to use them because they are similar to a bead I have used before. At other times I find the use less obvious, but with a bit of thought and experimentation the result is often something far more creative and unusual than the ‘easy’ beads.
The most important thing is to inspect the beads carefully and identify their most valuable feature from a kumihimo point of view. The first thing I look for is a hole which will accommodate my cord of choice, S-Lon Tex 210. The UFOs ticked that box, but the Nanos have such a large hole that much wider cords can be used, but the bead would need to be stabilised in some way to be used with thinner cords.
Larger beads like both of these can be difficult for kumihimo, but if they have offset holes or are top drilled the size can be a real advantage because the smaller end can be secured in the braid and the longer end will protrude as a feature.
It is important to work out how a bead will sit with its neighbours in a braid. Some beads will snuggle up to each other neatly, others sit more awkwardly with beads of the same type. Seeing how they sit together on a single strand does not tell the whole story, so a quick trial braid of 5 beads on each of 8 cords is necessary. I examine the trial braid and try to work out how adding beads of different shapes and sizes could improve or alter the look. Sometimes several trial braids are needed.
Once I have decided on the main qualitities of the bead from my point of view I start to consider braid structures and previous designs. Then I make sure that I have got a reasonable period of peace and quiet and I settle myself down with my notebook and get to work. This is what I came up with.
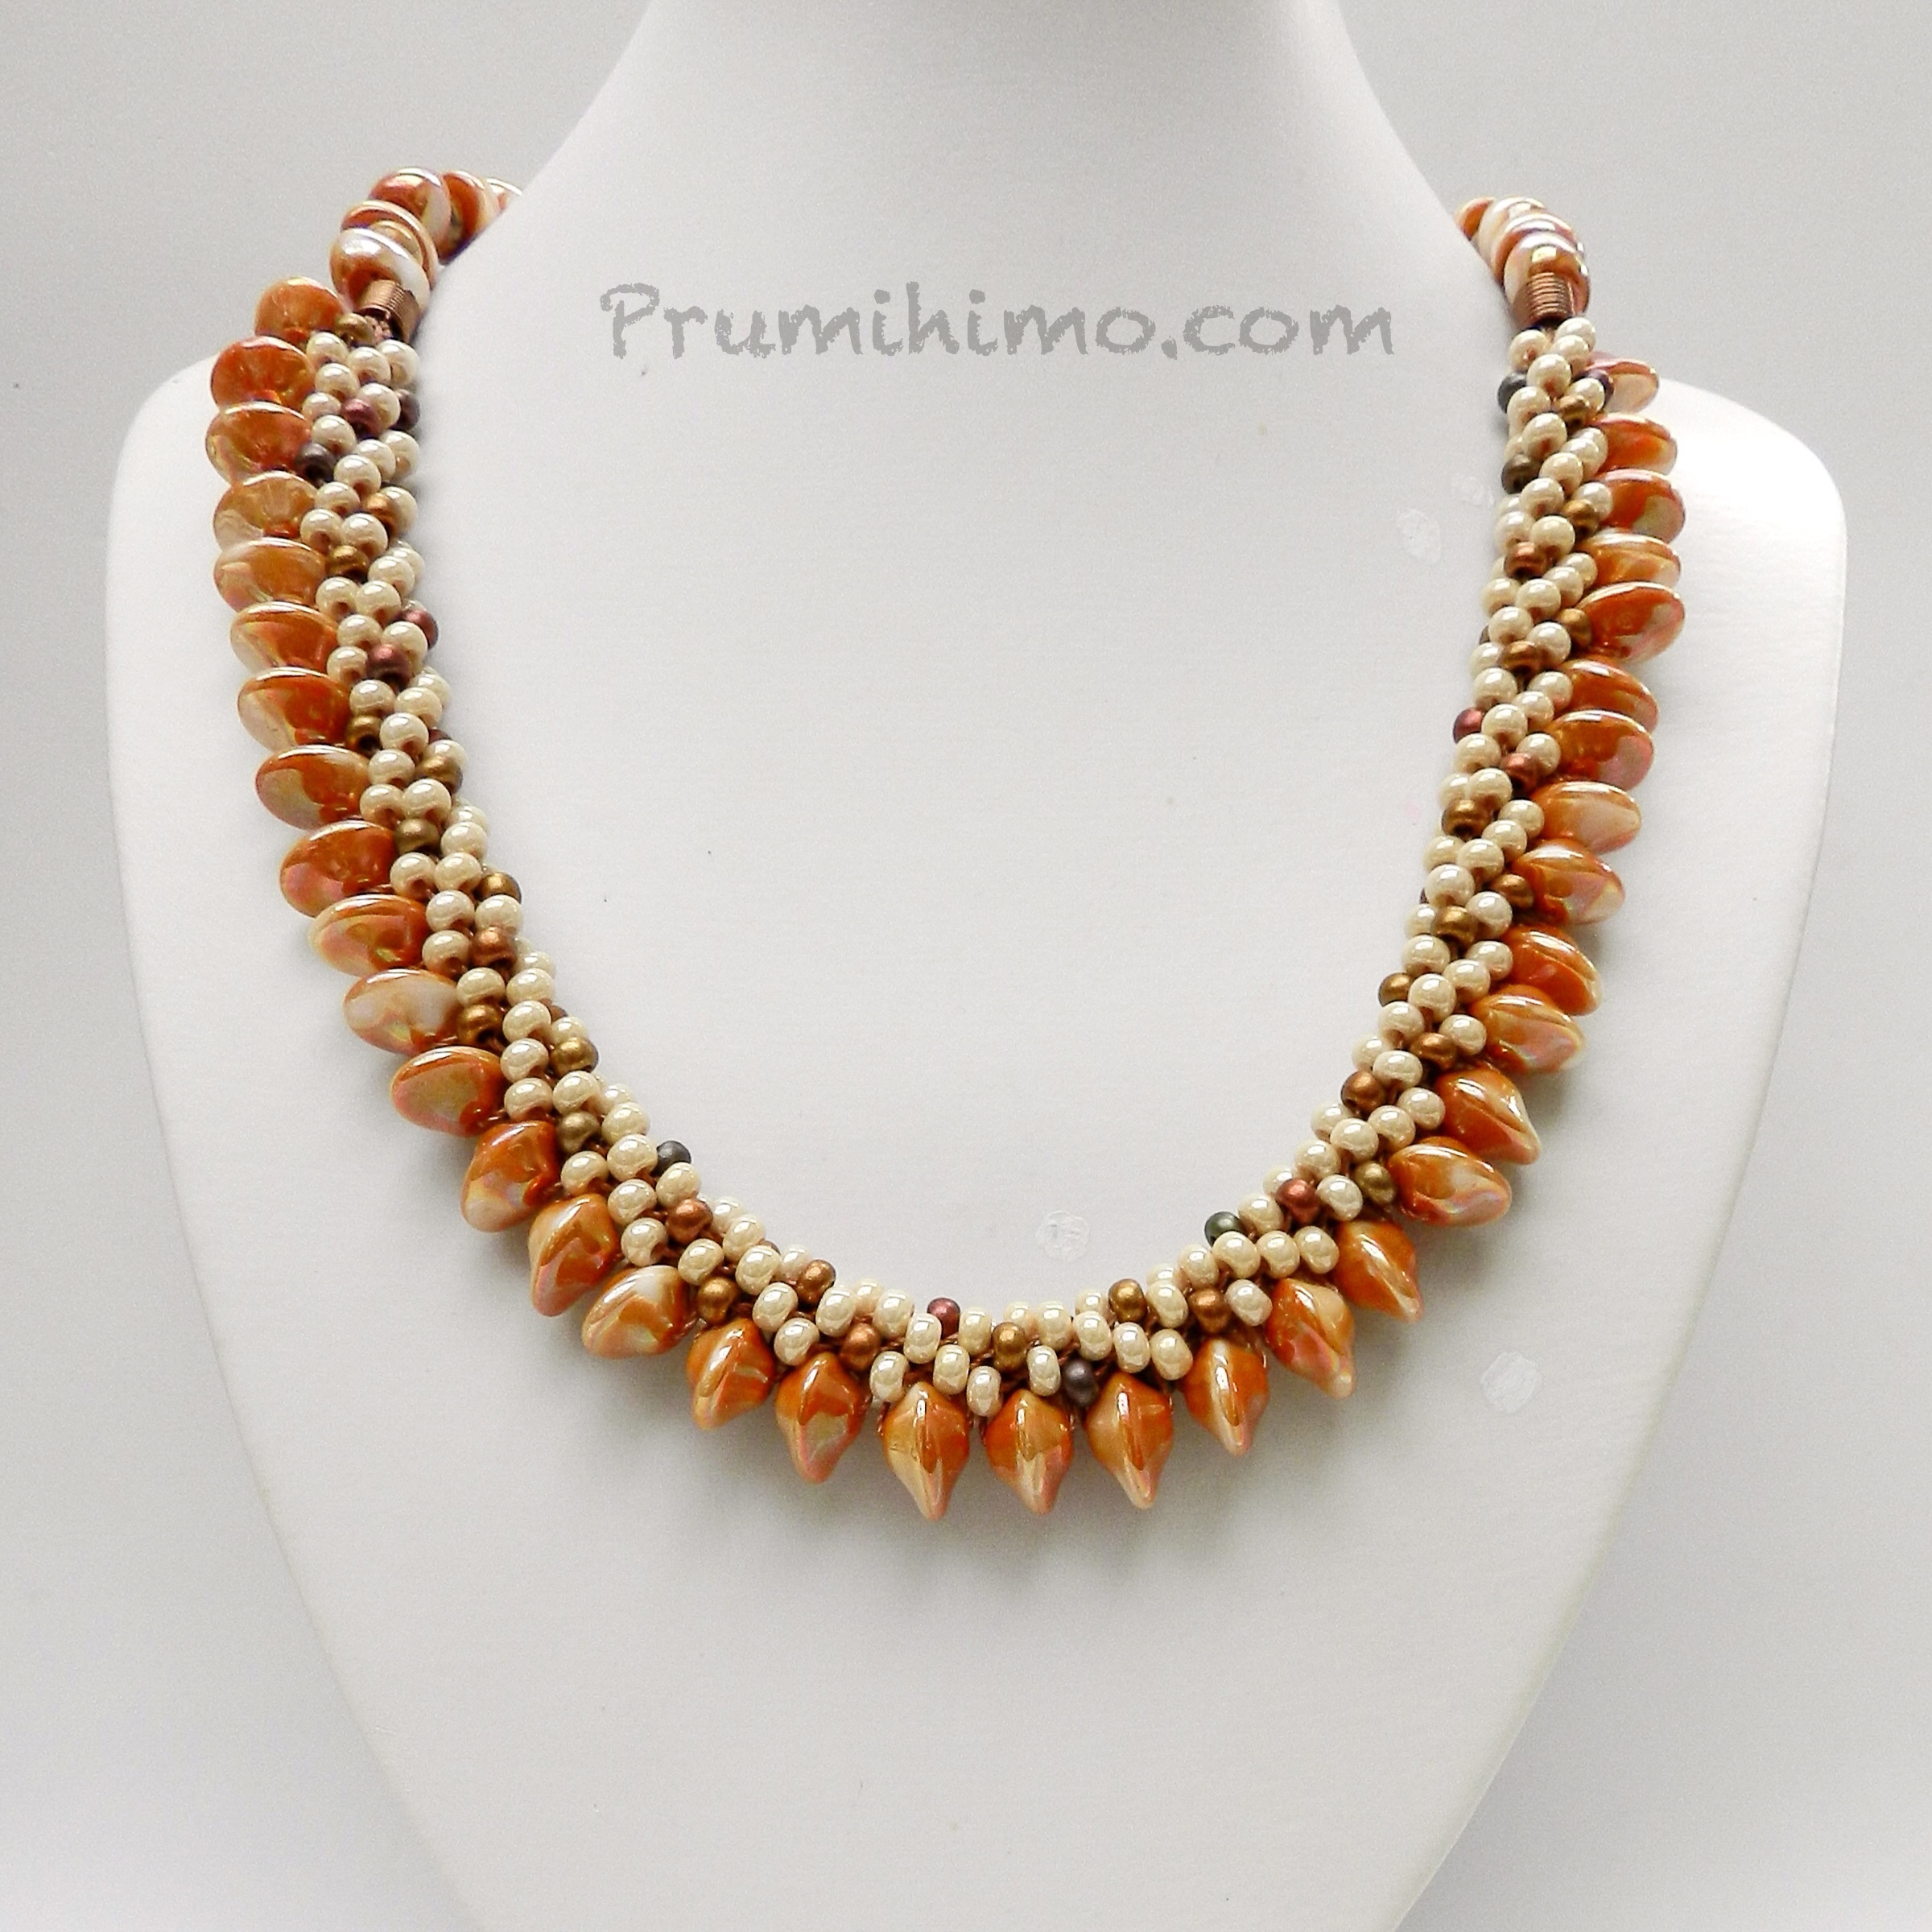
This necklace was made using a pattern originally designed for a bracelet made with Long Magatama beads. It is a design which relies on precise threading of beads onto the cords in a repeating pattern. The braid structure is Round Braid and the UFOs are used with size 6 beads. I loved the way the large UFOs opened up one side of the braid to create a lovely curved shape. This is a great example of how the choice of bead can radically change a design. Below is the Sleeping Dragon bracelet on which the necklace is based. To adapt the design I increased the number of repeats and finished off with beads threaded onto beading wire.

A very useful braid structure for beads of different shapes and sizes is the 7 cord braid, also known as Fill the Gap. The next two designs are made using this structure and instructions can be found by following this link (bottom of the page)

The sizes in this bracelet ranged from the massive UFO to tiny size 8 seed beads, with size 6s and 6mm round gemstones thrown into the mix. The size 8s were added into the braid in 2s to minimise visible thread. This approach delivers a very flexible braid with great texture. I think the UFOs are really shown off to their best effect. Before adding the clasp I threaded on a Nano at either end to act as a ‘faux’ end cap (!).

Experimentation is all about learning as you go, so as the bracelet had worked well with the UFOs I decided to use a similar approach with the Nanos. These beads needed to be given a bit of stability by braiding them together with a size 6 seed bead on both sides, so that 3 beads were braided in at the same time. This created quite a large unit, which cause an interesting distortion to the braid, which I didn’t expect, but I really loved! It gives the braid a slight zig-zag effect, which looks really pretty on the neckline.
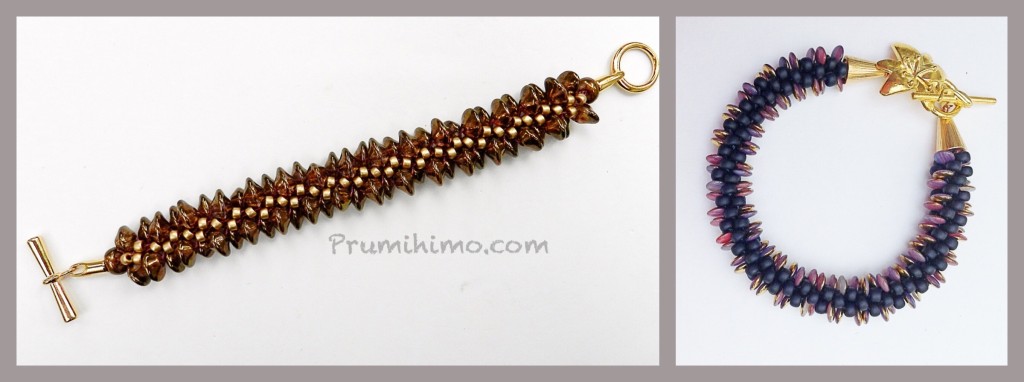
The bracelet above demonstrates again how different a design can look when beads are substituted. I used my Luscious Lentils tutorial. The bracelet on the left is made with UFOs and size 6 Matubo beads, instead of the lentils and size 6 seed beads used in the bracelt on the right. The size of the UFOs pushes the seed beads apart to give the impression of a totally different construction.
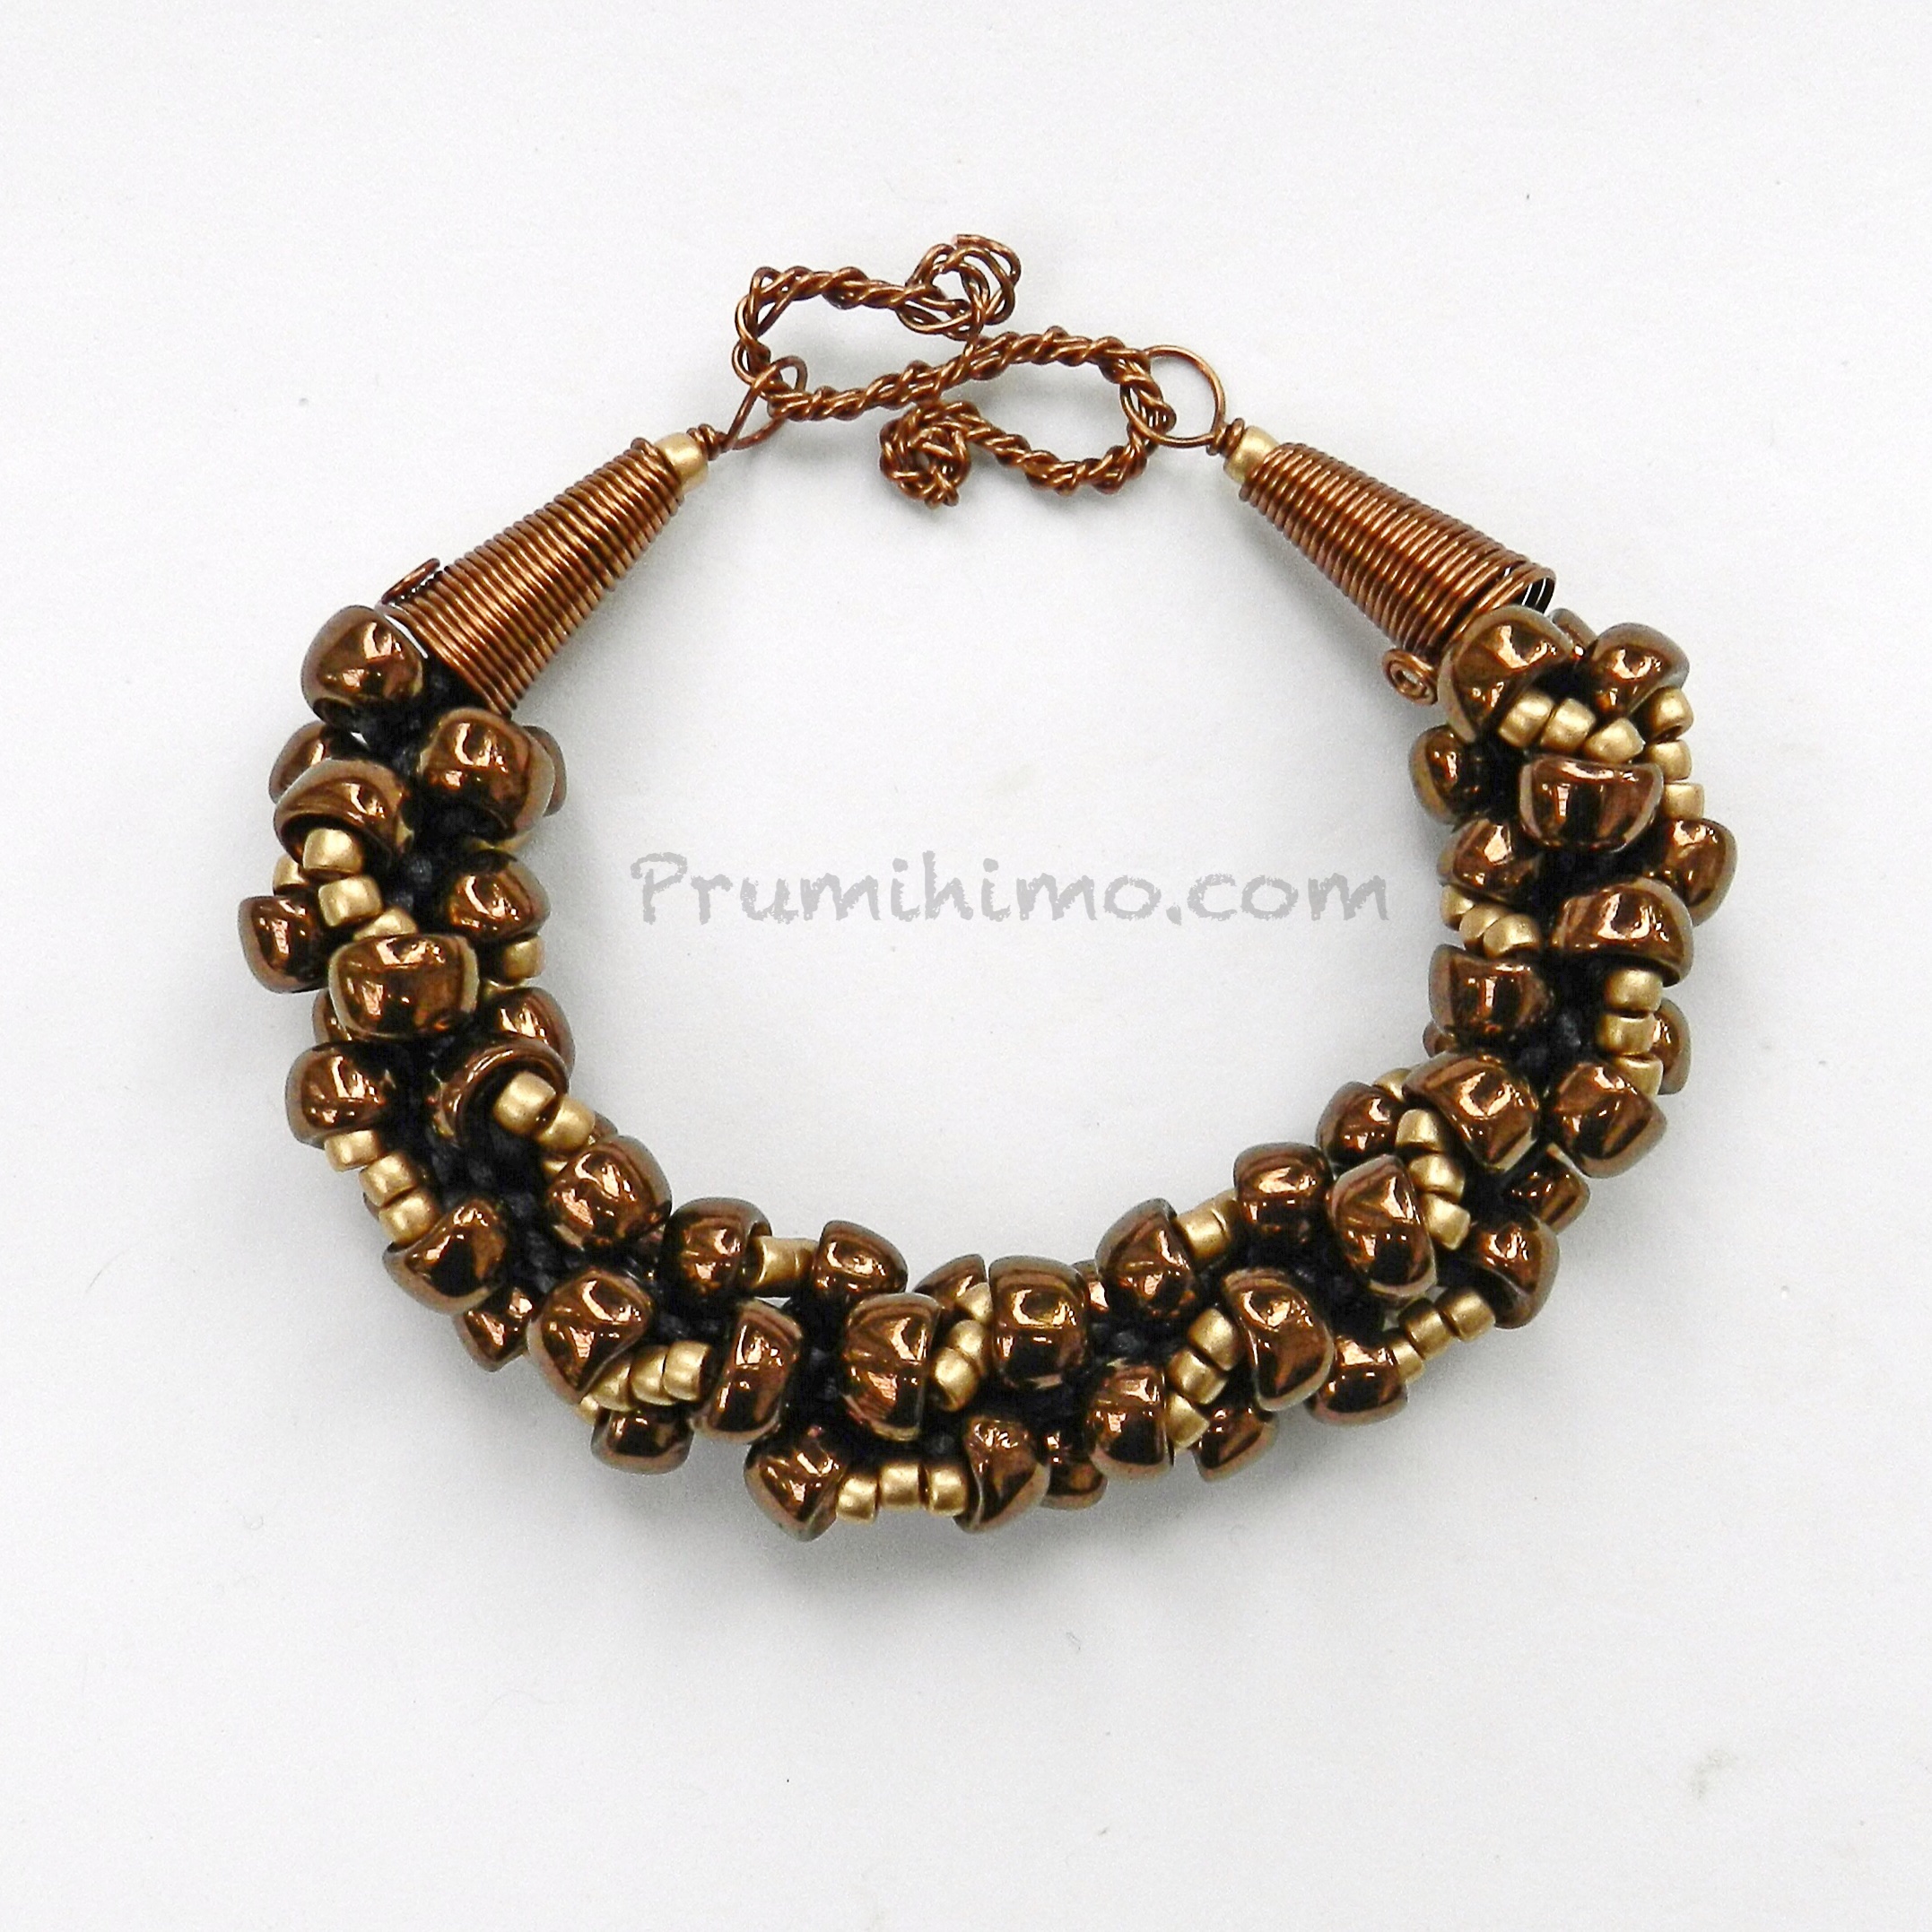
I also wanted to try the Nano beads threaded onto larger cords. This bracelet is seriously chunky because it was made with 2mm satin cord. The Nanos slipped onto the cord very easily. The advantage of thick cord is that the braid works up very quickly. The beads are cup shaped and I alternated the direction of the cups. After braiding I embellished the braid by sewing 3 size 6 gold Matubo beads in between the cups. Substantial findings are needed to balance a heavy braid, so I made my own using 0.8mm wire, twisting it for strength in the S-clasp.
For a bit of variety I tried the Nanos on a Half Round Braid. I braided them along one side of the braid, alternating the direction of the cups, and then embellished the design by sewing faceted gemstones and gold Matubo beads in between the cups. This was another quick design to make up because very few beads needed to be threaded onto the cords and the 2mm cord works up very swiftly.

The whole experience of working with these beads has been both enjoyable and educational for me. If you want to develop your kumihimo skills I recommend trying these beads and seeing what you can come up with. They can also be used in beadweaving and stringing and there is a lot of potential in combining different techniques to develop some strikingly individual jewellery.