
This is not a Japanese braid, but it can be made very easily and effectively on the kumihimo disk. It is made using a series of traditional knots. Knots tend to go by lots of different names due to different origins and end uses. The general name Box Knot Braid has been used here for simplicity. The knots are perfomed in the same direction to create a spiral braid.
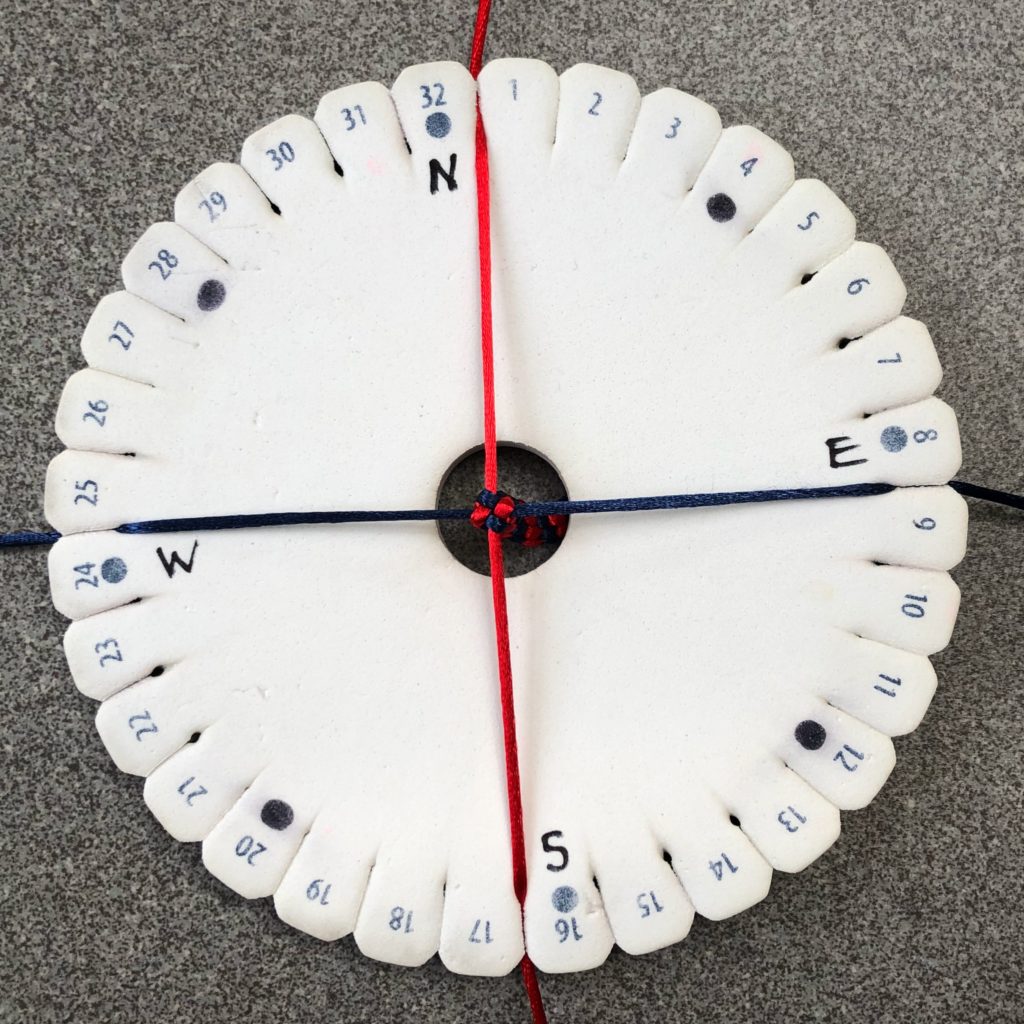
I recommend preparing the disk by marking the disk with N, S, E and west to mark the points of the compass. This will enable you to find your place and be consistent as you braid. This braid is made with 4 cords, which need to be longer than you may be used to. I suggest calculating the cord requirement as 4 times the finished length for each cord, and adding on 25cm/10inches to each cord. This will be more than you need, but it is more comfortable to work this braid with plenty of cord. Position the cords on the disk in the north, south, east and west positions. Attach a weight to the knot in the middle. I recommend 50g for 1mm cords and 75-100g for 2mm cords.
Braiding without beads
- Take the cord in the north slot without removing it from its slot and wrap it around your finger. Put the cord in the slot to the right of the north slot. Stretch the cord across the disk and put it in the slot to the right of the south slot.2.
- Turn the disk so that the east slot is at the top and repeat the action of wrapping the cord around your finger and putting it the slots across the disk.
- Turn the disk so that the south slot is at the top and repeat the action of wrapping the cord around your finger and putting it in the slots across the disk.
 4. Turn the disk so that the west slot is at the top. Wrap the cord around your finger and put the cord in the top slot as before. This cord needs to be laid over the first two cords and passed under the third cord. (An easy way to do this is to hold the cord as a loop, press on the disk with the thumb of the other hand, which will create a gap between the cord and the disk, and pull the loop through the gap)
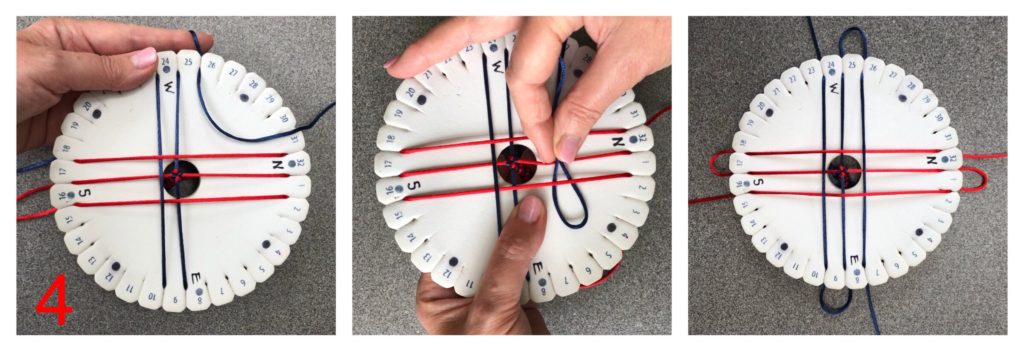
- 5. Turn the disk so that the north slot is back at the top. Lift the top loop out of the slots and pull on the cord in the bottom right slot until the loop is drawn close to the point of braiding.6. Turn the disk so that the east slot is at the top. Lift the top loop out of the slots and pull on the cord in the bottom right slot until the loop is drawn close to the point of braiding.7. Turn the disk so that the south slot is at the top. Lift the top loop out of the slots and pull on the cord in the bottom right slot until the loop is drawn close to the point of braiding.8. Turn the disk so that the west slot is at the top. Lift the top loop out of the slots and pull on the cord in the bottom slot until the loop is drawn close to the point of braiding.
 9. The knot in the middle needs to be tight and even, so pull on the cords in opposite pairs to achieve this. Consistency in creating this central knot will ensure that the braid is regular and even. Practise makes perfect!
 10. To ensure consistency, return the cords to their original slots, by moving them one slot to the right. The cords will be slightly twisted, so take this opportunity to untwist them by running each one between your thumb and finger before putting them in the slot. This is an important step because if the twist is allowed to build up it will adversely affect the tension of the braid.11. Repeat all the moves from the beginning to create a beautiful box knot braid. Your first effort may be a little lumpy, but they will get better.
- 5. Turn the disk so that the north slot is back at the top. Lift the top loop out of the slots and pull on the cord in the bottom right slot until the loop is drawn close to the point of braiding.6. Turn the disk so that the east slot is at the top. Lift the top loop out of the slots and pull on the cord in the bottom right slot until the loop is drawn close to the point of braiding.7. Turn the disk so that the south slot is at the top. Lift the top loop out of the slots and pull on the cord in the bottom right slot until the loop is drawn close to the point of braiding.8. Turn the disk so that the west slot is at the top. Lift the top loop out of the slots and pull on the cord in the bottom slot until the loop is drawn close to the point of braiding.