
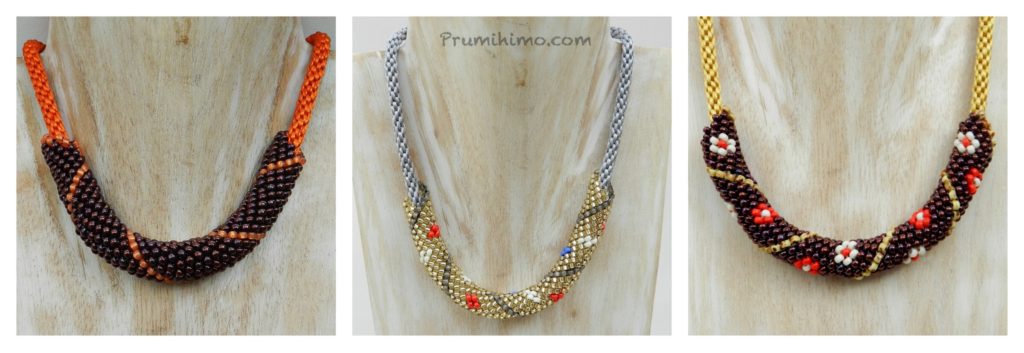
Although kumihimo is my great passion, I am always interested in how other techniques can be used with kumihimo to add a new angle to this ancient art. When I came across a new development in the beadweaving world I immediately wanted to give it a go to see how I could incorporate it into a kumihimo design. The new beadweaving stitch is Peyote with a Twist, also known as Peytwist and PWAT and it is a variation on the traditional peyote stitch, where a tube of beading is created with the beads on the diagonal. This gives the tube the flexibility to curve into a necklace or bracelet, without the buckling sometimes found in tubular peyote. The diagonal rows also give a new look to this popular stitch. The creator is a designer called Gerlinde Lenz and her work is causing quite a storm in the beadweaving world!
I had a go at the stitch, using Jill Wiseman’s excellent video to take me through the steps. Like so many beadweaving designs, it looks very complex and hard to learn, but as long as it is taught in a clear and logical way it is very easy to pick up. Right from the start I enjoyed the process and loved the effect. However, beadwork is time consuming and can really eat up the beads, so I practised by making short sections of tube. It was quickly clear that not only would these pieces look great on a kumihimo braid, but that they could be slipped on and off the braid. As long as the end caps are only a tiny bit larger than the braid and a slim clasp, such as a toggle clasp is used, you can make a selection of interchangeable focal sections for one braided necklace. Then you could have a Peytwist necklace for every day of the week.These are relatively quick to make and do not require many beads. They would be a good project to finish off beads that you already have in your stash.
My video upload for this week shows how Peyote with a Twist can be used with kumihimo. I do not demonstrate the actual stitch because Jill Wiseman’s video does that so well. These are the designs I show in the video and the braids were made on both the round disk and the Prumihimo Disk. For the beadwork I have kept to very simple designs, which did not require a pattern, but it is possible to make some really intricate designs with this technique. It is also possible to work with much smaller beads and team them with a thinner braid, such as one made with beading cord or embroidery thread and that is where I would now like to experiment, so watch this space!
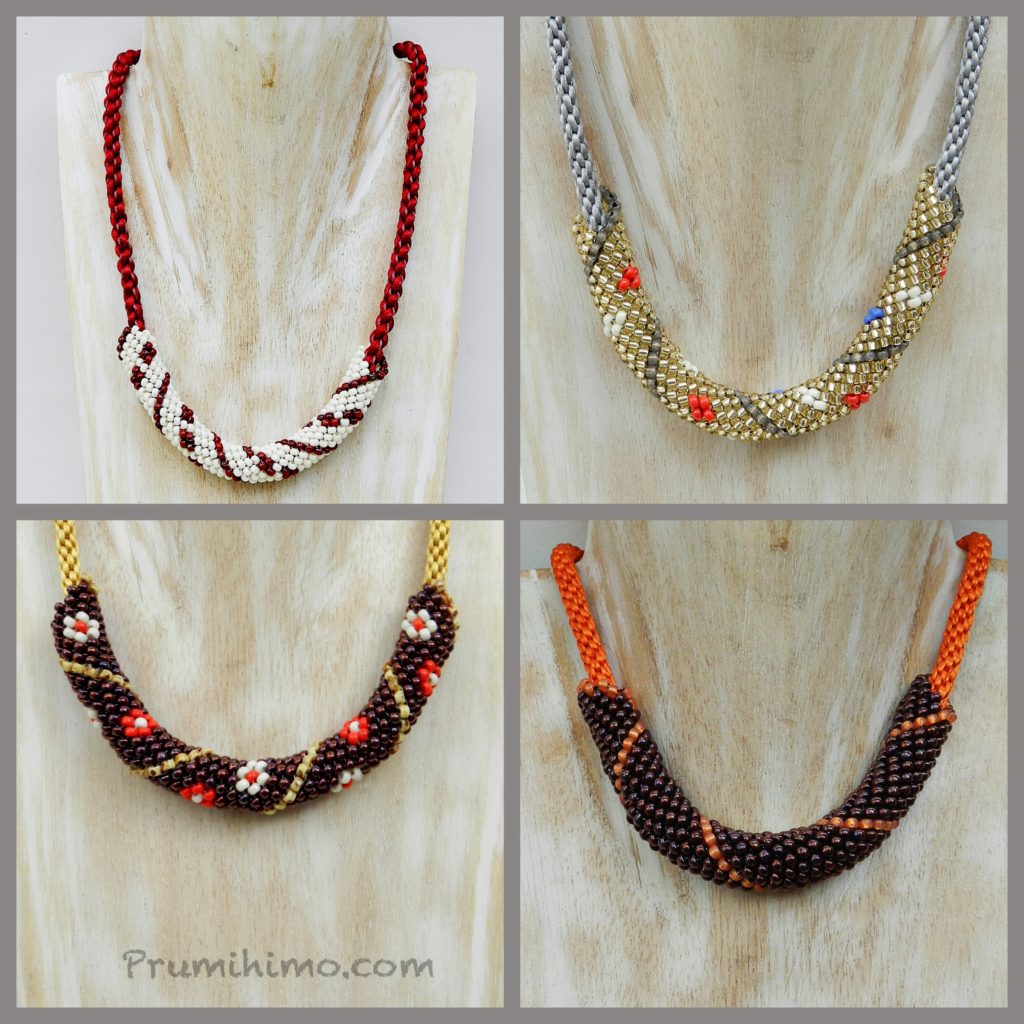
I believe that this combination of techniques has a lot of potential and when I first posted my version it turned out that quite a few other people were working along the same lines. There are lots of avenues I would like to explore, if only I can find the time! I decided to leave the ends on the peyote tube diagonal, because I felt that was a feature of the stitch and I liked the effect. However, some might feel that looks too unfinished and it is possible to add beads to straighten out the ends, so I would like to see how that would look. A further development would be to slide on a large hole bead at either end, so that they sit next to the beadwork. As long as the beads are reasonably heavy they would not need to be stuck into position, because their weight would keep them in place. This would mean that you could have lots of fun mixing and matching beadwork and beads, using just one kumihimo necklace. I am really looking forward to seeing what other people come up with and I hope to write an update on this technique, showing how other people combine these two fabulous techniques.
To watch the video, Peyote with a Twist on Kumihimo, click here
For more information about the video, click here